Extron Electronics HSA 822 User Guide User Manual
Page 17
4.
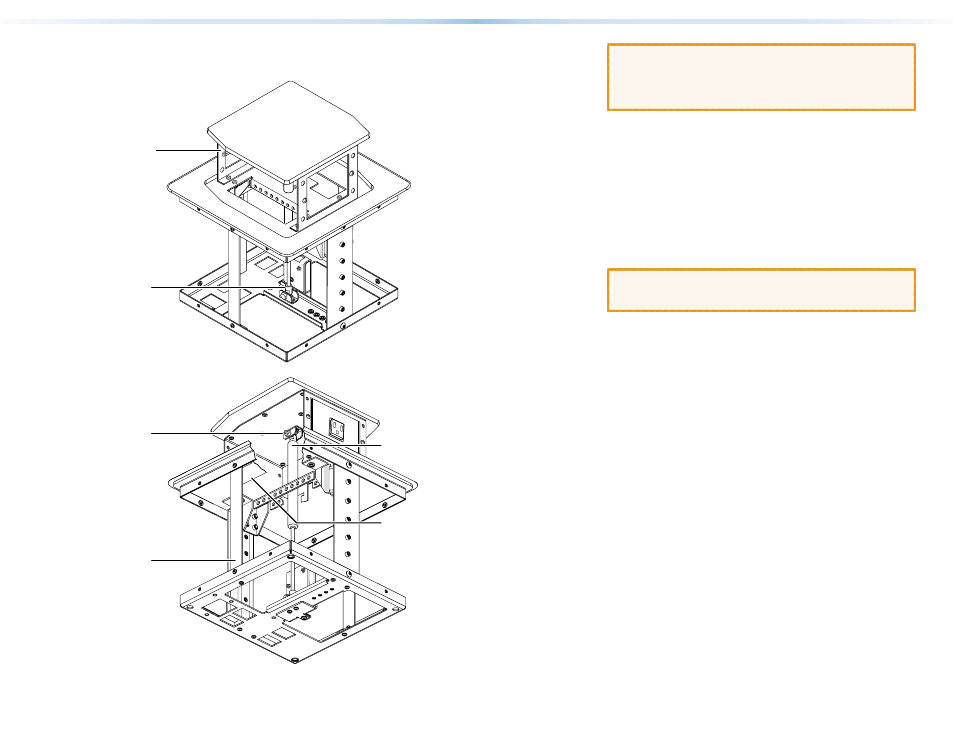
Open and close the top panel as necessary to access the
center lifting platform (see figure 17). Remove the four
screws that secure the top panel bracket to the lifting platform.
Frame
Clevis Nut
Top Panel
Clevis
Enclosure
Frame
Top Panel
Bracket
Lifting
Platform
Gas Lift
Figure 17.
Changing the Gas Lift
CAUTION:
With the top panel bracket detached from the
lifting platform, the bracket will be loose atop
the gas lift. Ensure that the bracket does not
contact the top flange. Marring of the soft
surface of the flange may result.
5.
Turn the enclosure frame rightside-up.
6.
Remove and retain the 9/32-inch nut and bolt that secure the gas
lift to the top panel clevis. Lift the top panel and clevis off of the
gas lift and set it aside on the bracket flanges.
7.
Turn the gas lift counterclockwise until the lift comes free of the
frame clevis nut at the bottom of the enclosure frame. Carefully
draw the gas lift out through the top of the enclosure frame.
8.
Insert the shaft end of the replacement gas lift through the hole
in the lifting platform. Thread the shaft of the gas lift into the
frame clevis nut and tighten it several turns.
CAUTION:
Ensure that the top panel bracket does not
contact the top flange. Marring of the soft
surface of the flange may result.
9.
Hold the top panel in position above the gas lift. Secure the
gas lift to the top panel clevis with the nut and bolt that were
removed in step 6.
10.
Reconnect the interior AC power cables.
11.
If necessary, release (extend) the top panel. Turn the enclosure
frame upside-down and place it on the soft cloth surface.
12.
Secure the top panel bracket to the lifting platform with the four
screws removed in step 4.
13.
Reinstall the surface mount enclosure. See “
”, steps 11 through 18.
24
HSA 822 Hideaway Enclosure • Maintenance and Modifications
25
HSA 822 Hideaway Enclosure • Maintenance and Modifications