Extron Electronics HSA 822 User Guide User Manual
Page 22
Package an HSA for shipment as follows:
1.
Contact the Extron S3 Sales and Technical Support Hotline to
obtain a return kit. Extron will send the repair kit to the location
you specify.
WARNING:
The flanged edges of the top of the surface
enclosure are sharp when the HSA is removed
from the table. Exercise caution when handling
to prevent personal injury.
CAUTION:
The flanged edges of the top of the surface
enclosure are bevelled to an ultra-fine thickness
of less than 0.04 (4/100) inch (approximately
1 mm). These edges are soft and can be easily
nicked or bent. Exercise caution when handling
and mounting the enclosure. Mishandling can
damage the appearance of the enclosure.
2.
Disconnect all cables, remove any AAPs, and remove the
HSA 822 from the table or desk (see “
”, steps 1 through 8, in the “Maintenance and
Modifications” section). Place the enclosure upside-down on a
horizontal surface. To protect the finish, place the enclosure on a
soft cloth or rubber mat.
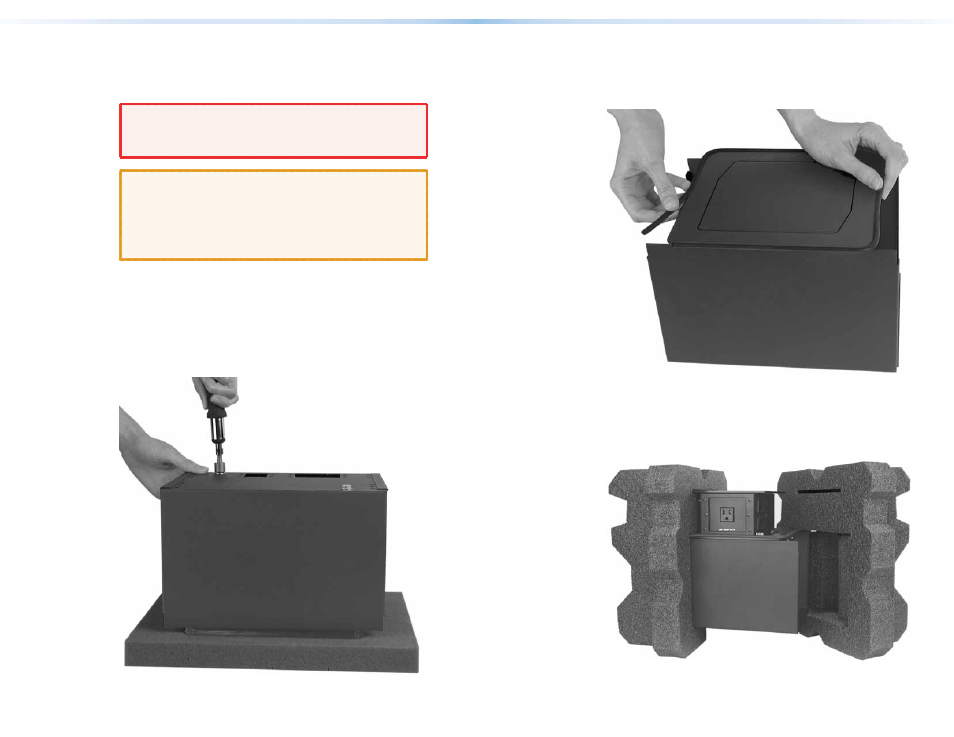
3.
Bolt the clamshell to the enclosure with two bolts and flat washers
included in the return kit (see figure 25).
Figure 25.
Attaching the Clamshell
4.
Place the enclosure and clamshell rightside-up on a horizontal
surface. To protect the finish, place the enclosure on a soft cloth
or rubber mat.
5.
Install the rubber strips that protect the flanged edges of the top
of the surface enclosure (see figure 26).
Figure 26.
Installing Protective Strips
6.
Release (extend) the top panel.
7.
Insert the HSA 822 and the clamshell into one of the foam shells
(see figure 27). Either open end of the clamshell and the open top
panel will fit into the recesses in the foam.
Figure 27.
Installing the Foam Shell
34
HSA 822 Hideaway Enclosure • Packaging for Shipment
35
HSA 822 Hideaway Enclosure • Packaging for Shipment