Uploading (adding) an image, Deleting a stored image, Selecting a stored image – Extron Electronics GSS 100 User Guide User Manual
Page 50
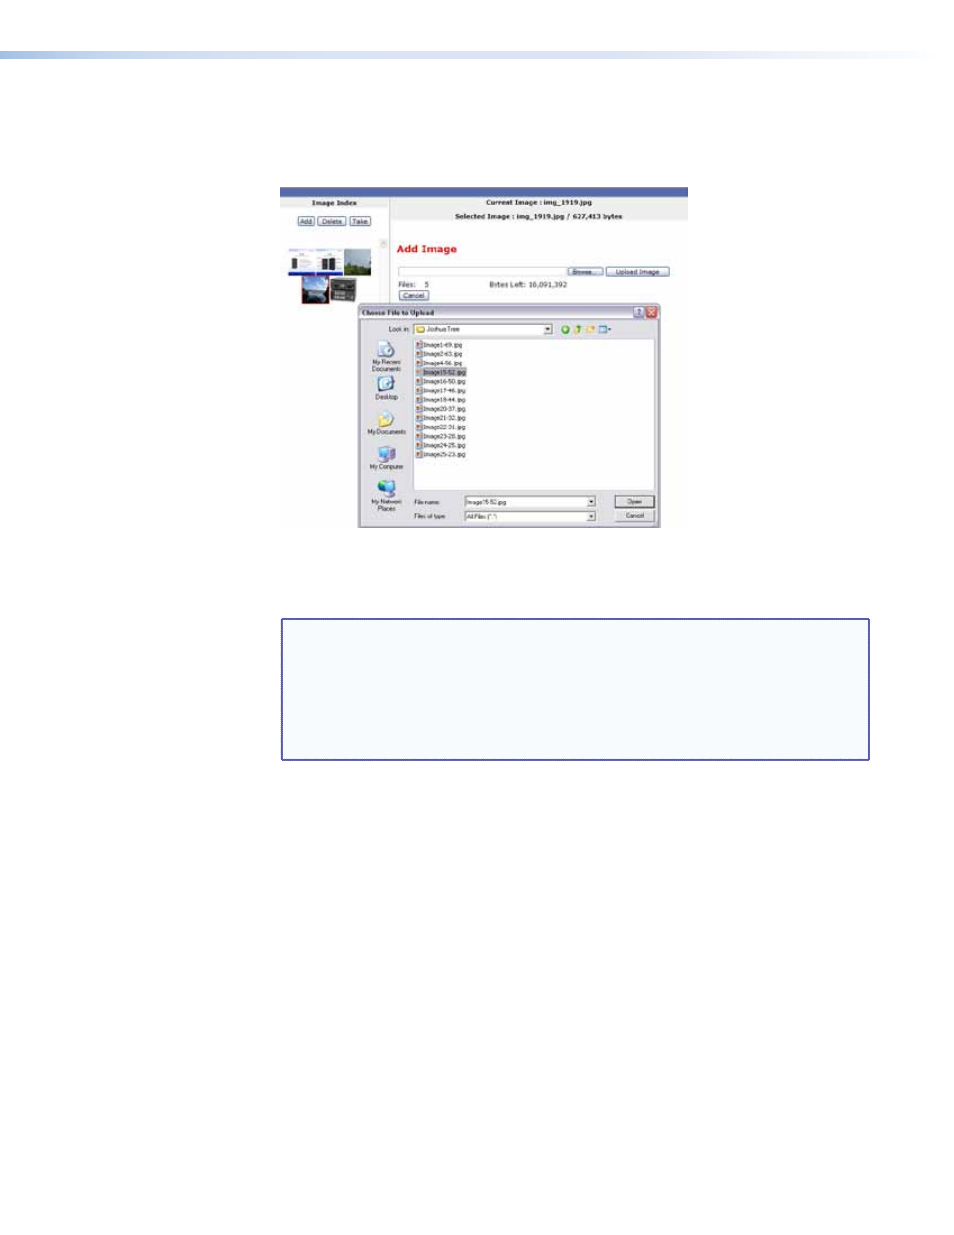
Uploading (adding) an image
Upload an image to the GSS 100 as follows:
1.
Click the
Add
button. The
Add Image
field appears (see figure 30).
Figure 30.
Uploading an Image
2.
Click the
Browse
button. The Choose File to Upload window appears.
3.
Browse through your system and select the desired image file.
NOTES: • The only valid file formats for uploaded image files are BMP and JPG.
• Valid file names are up to 240 alphanumeric characters with no spaces.
• Progressive JPG images are not supported.
• Bitmap (BMP) images must be formatted as 24-bit RGB.
• 1080i and 1080p files need to be mastered at a resolution of
1440 x 1080 instead of the expected 1920 x 1080.
4.
Click the
Open
button. The complete file path and name appear in the
Add
Image
field.
5.
Click the
Upload
Image
button. After several seconds, a thumbnail of the uploaded
image appears in the Image Index portion of the page and the image is available for
display.
Deleting a stored image
Delete a stored image from the GSS 100 as follows:
1.
Select (click) the thumbnail of the image to be deleted.
2.
Click the
Delete
button. A confirmation message appears.
3.
Click the
Ok
button.
Selecting a stored image
Select a stored image for the GSS 100 to output as follows:
1.
Select (click) the thumbnail of the image to be displayed. The file name and a larger
image appear in the Selected Image field.
2.
Click the
Take
button. After several seconds, GSS outputs the image and shows the
name of the displayed image in the
Current Image
banner on this page.
GSS 100 Graphic Still Store • HTML Control and IPL File Manager
44