Secondary disconnects, bullets – GE Industrial Solutions EntelliGuard R AKD-5 User Manual
Page 33
32
EntelliGuard R Circuit Breaker Retrofill AKD-5 Installation Manual DEH-41547 02/12
30. Continue rotating the racking handle clockwise until the position indicator first shows TEST,
then CONNECTED.
When approaching the CONNECTED position, effort to turn the racking handle increases as the
clusters engage with the cassette-mounted contacts. If a motor-spring charge or under-voltage-to-
release is installed, the device may operate when approaching the TEST position.
31. Keep cranking as required, that is, when any further torqueing can’t be done.
At this point, the fingers at the back of the circuit breaker have completely grabbed onto the
contacts at the back of the cassette.
32. Remove and store the racking handle in it storage location.
It is a good idea to keep the racking handle always in the same place for future use.
33. Note that the circuit breaker is now ready for normal operation.
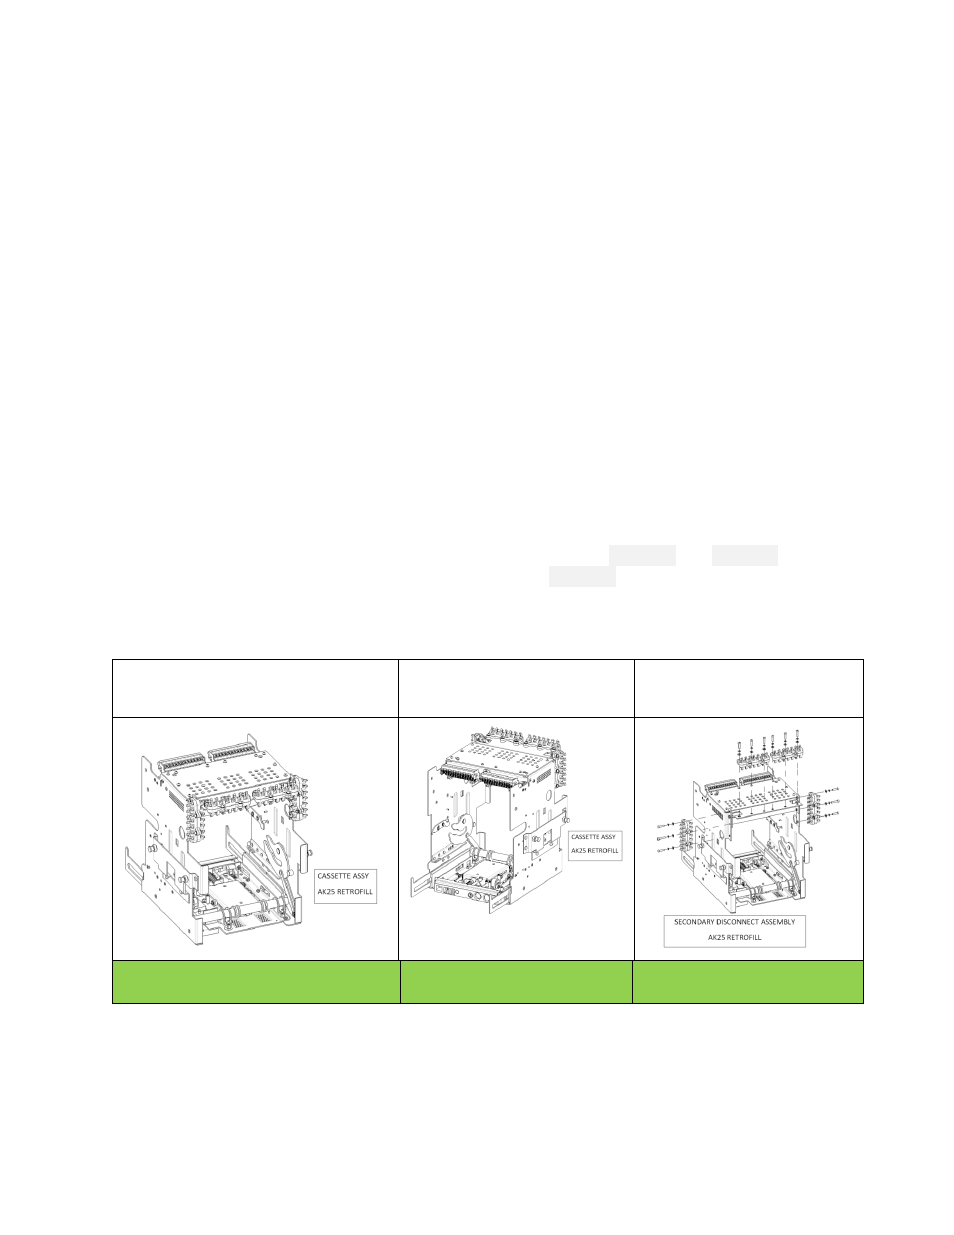
Secondary Disconnects, Bullets
The circuit breaker secondary disconnects are already located on, or wired to, the breaker’s cassette.
The landing of the wiring on the EntelliGuard R breaker cassette is done in the field. Up to 78 points are
available so that all breaker accessories can be wired to dedicated
disconnect-points in the cubicle.
Each breaker wire is identified with a unique label. The wireframes in
Figure 41
and
Figure 42
depict the
secondary disconnect assemblies for the AKD-5 AK25/AK50.
Figure 43
shows the exploded view of four
blocks of secondary disconnects. The cassette is a separate assembly from the retrofill breaker; first, the
cassette is to be wired and then installed in the switchgear, the followed by the breaker being racked
into the cassette.
Figure 41. AK25 Retrofill Breaker
Cassette Assembly (Rear View)
Figure 42. AK25 Retrofill
Breaker Cassette Assembly
(Front View)
Figure 43. AK25 Retrofill
Breaker Cassette Assembly
(Exploded View)
P/N 386A110G2
Retrofill Sec Disc Assy AKR
AKD5