Removal of the existing trip device – GE Industrial Solutions ProTrip Conversion Kits AK-15, AK-25, and AKU-25 User Manual
Page 6
6
7. Remove the two mounting screws and lock washers
attaching the bottom bracket to the escutcheon, as
shown in Figure 3.
8. Loosen the recessed Allen screw in the side of the
charging handle base and lift off the handle.
9. Remove the snap ring and flat washer on the
charging handle mounting shaft.
10. Remove the four Philips-head screws and lock
washers on the front of the escutcheon and lift off the
escutcheon.
11. Lift the bottom bracket from its back frame
attachment.
12. Remove the nuts and washers securing the front
frame to the two long studs from the back frame.
13. Remove the nuts and washers on the studs con-
necting the front frame bracket to the back frame
(one on each side).
14. Lift the front frame off the back frame.
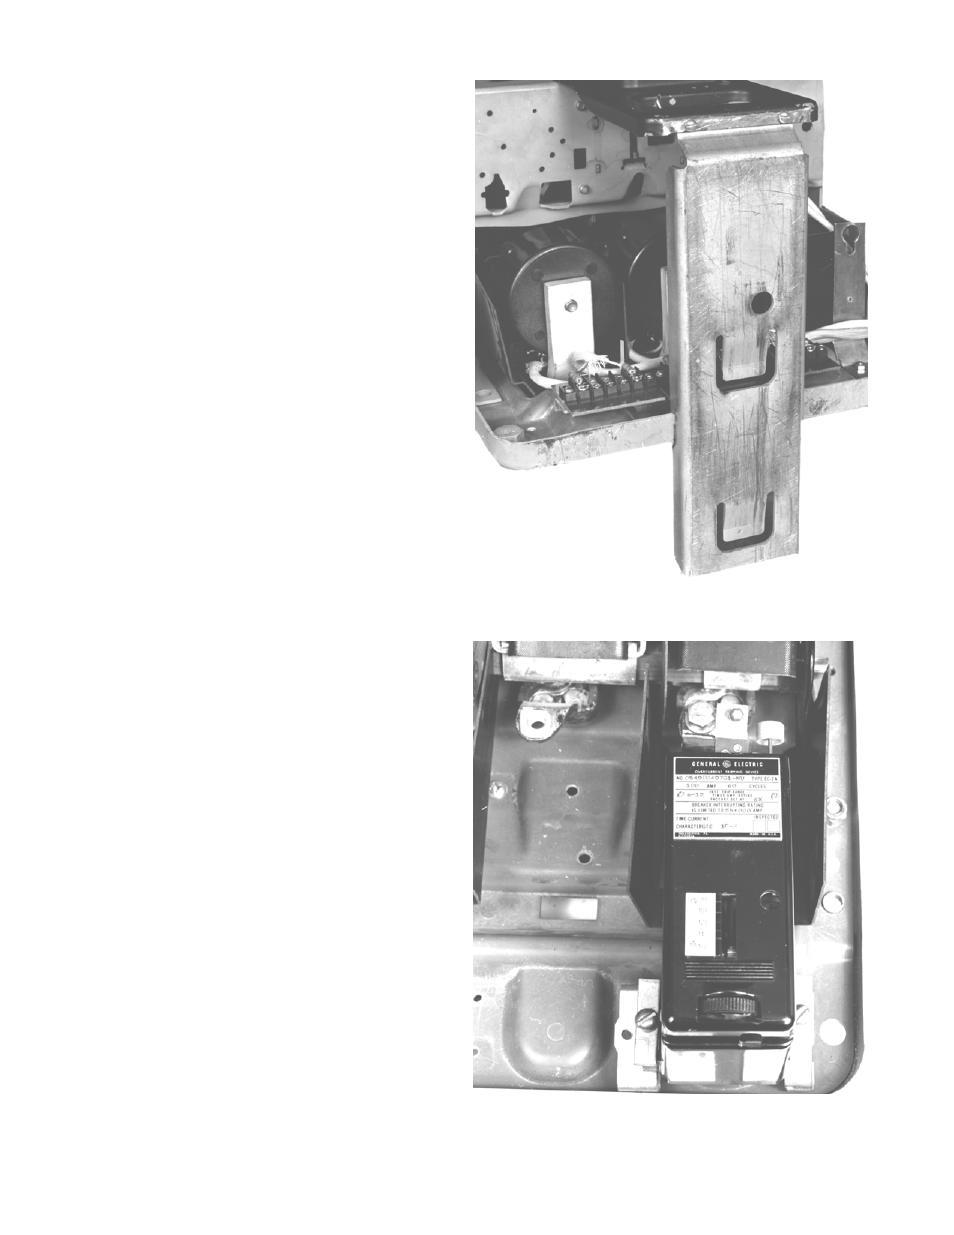
Removal of the Existing Trip Device
Figure 4 shows an existing Type EC-2A trip device with
the adjacent trip device already removed, to illustrate this
procedure.
1. Remove the existing overcurrent trip devices and trip
paddles.
2. On draw-out breakers, remove the primary dis-
connects from the bottom (load) copper studs.
3. Remove the three bottom (load) copper stud
assemblies. On Power Sensor-equipped breakers,
these will have been removed with the trip devices.
4. On breakers equipped with Type EC trip devices,
remove and discard the mounting brackets on the
lower front of the back frame.
Figure 3. Breaker bottom bracket connected to the
escutcheon and the back frame.
Figure 4. Type EC-2A trip device, with adjacent device
removed.