Rough Country 253X User Manual
Page 9
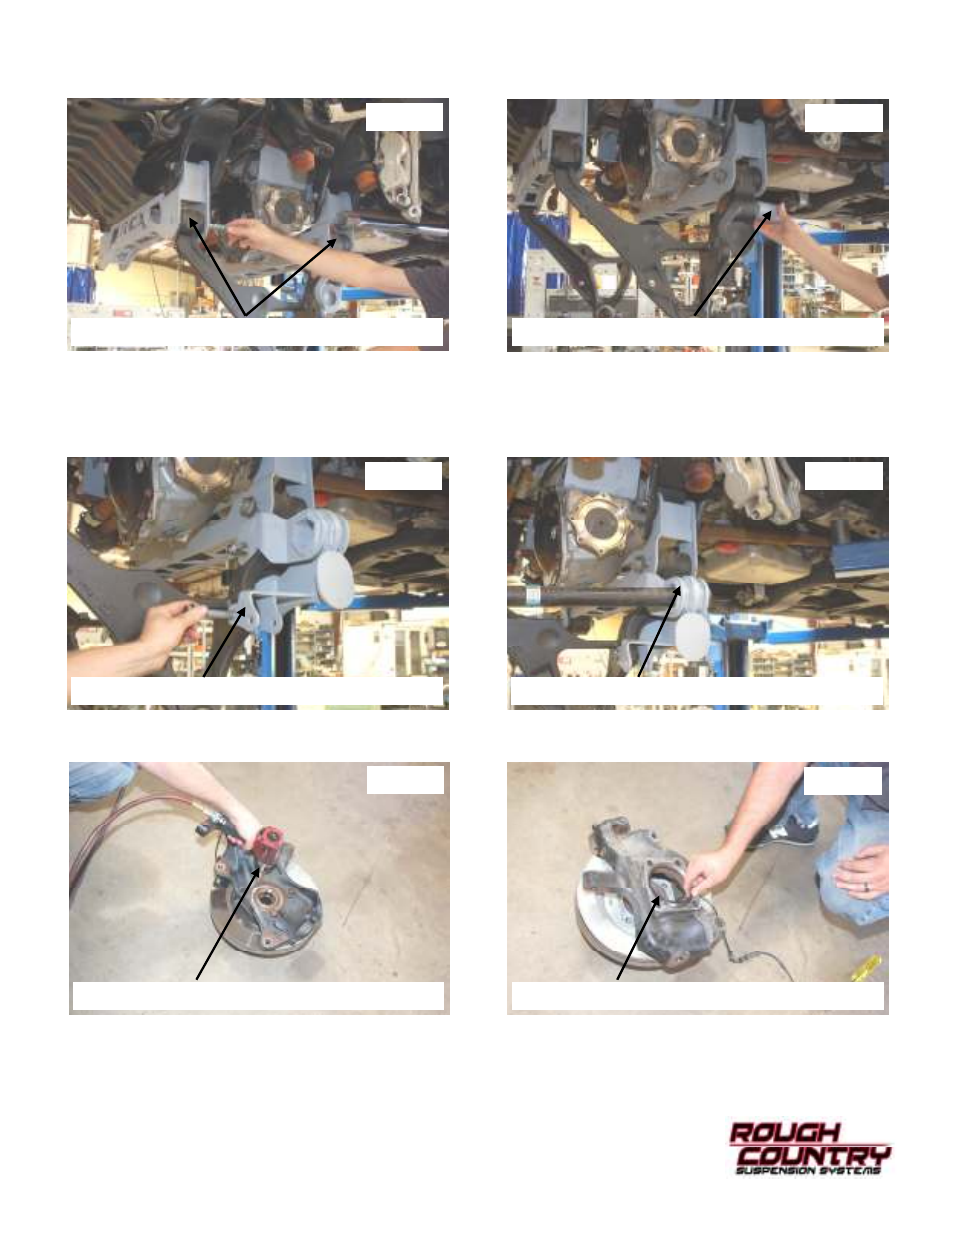
43. Reinstall the lower control arm with stock hardware. See Photo 31.
44. Install supplied NTD sleeve in lower arm. See Photo 32.
45. Install NTD bracket with the supplied 3/4” x 5 1/2” bolts, flat washers and 3/4” lock nut in 1253Bag8. See Photo 33.
Tighten using 1- 1/8 wrench. The stock shock bolt will be used in the other hole. Tighten using a 21mm wrench.
Slight grinding on the lower control arm may be needed for the bracket to seat properly.
46. Reinstall Torsion bar from front. Be sure to reinstall the passenger and driver side in the position as they were re-
moved. See Photo 34.
47. Remove hub bearing from knuckle as shown in Photo 35 using a 21mm socket.
48. Remove the o-ring in the stock knuckle and retain. See Photo 36.
Photo 31
Photo 32
Photo 33
Photo 34
Photo 35
Photo 36
INSTALL THE LOWER CONTROL ARMS
INSTALL THE TORSION BAR SLEEVE
INSTALL STOCK BOLT IN BRACKET
SLIDE TORSION BAR THROUGH BRACKET
REMOVE BEARING FROM STOCK KNUCKLE
REMOVE THE O-RING FROM THE KNUCKLE