Rough Country 253X User Manual
Page 14
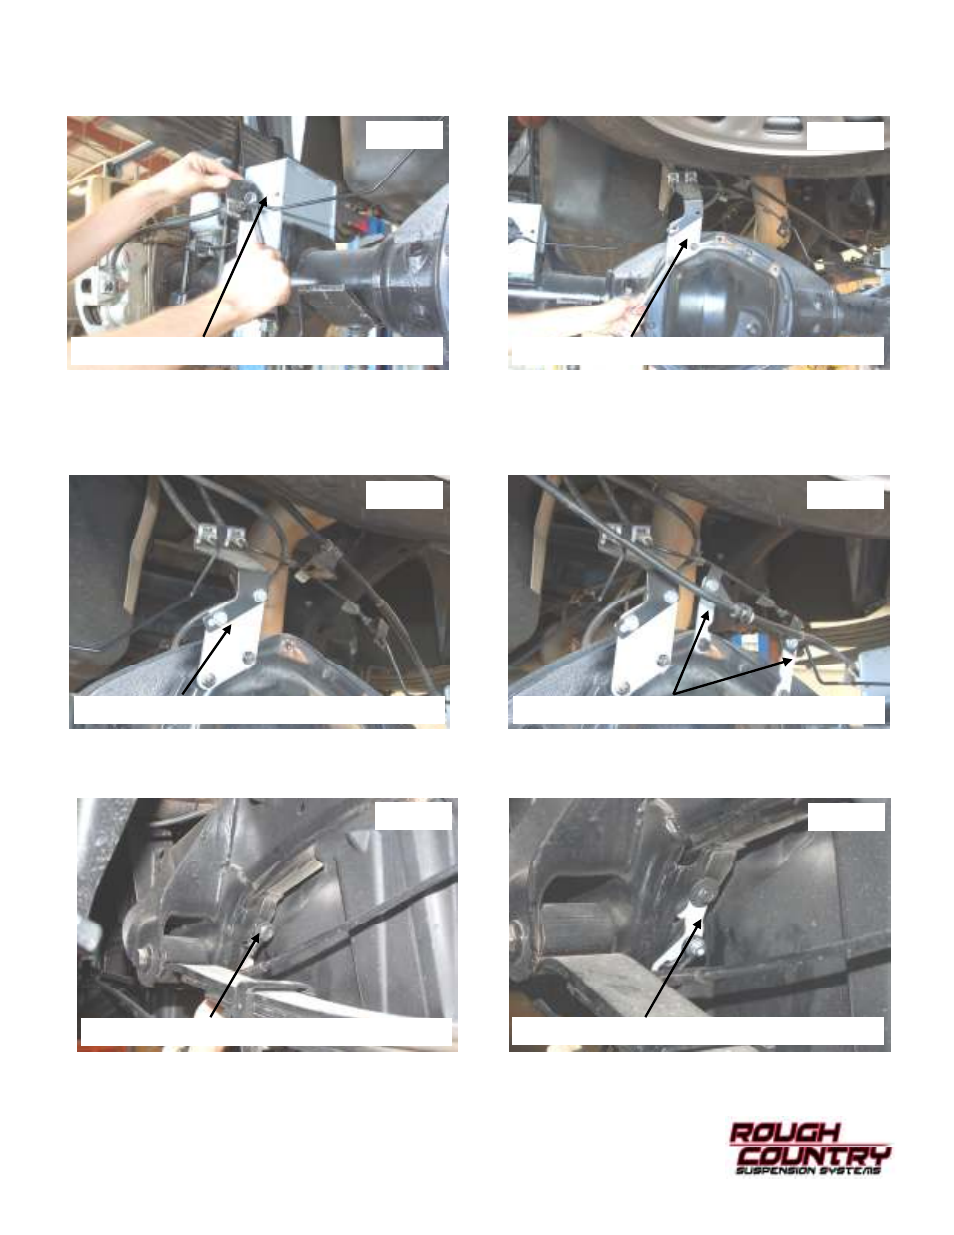
17. Reinstall the brake line on the bump stop bracket with the stock hardware. See Photo 13. Tighten using a 13mm
socket / wrench.
18. Install the new drop bracket on the differential as shown in Photo 14 with stock nuts.
19. Reinstall the brake line bracket on the new bracket with the supplied 5/16” x 3/4” bolt, flat washers and lock nuts
from 1253Bag4. See Photo 15. Tighten using a 1/2” socket / wrench.
20. Install the supplied brackets on the differential with the stock hardware. See Photo 16. Tighten using a 13mm
socket / wrench. Reinstall the stock brake line brackets on the new brackets using the supplied 5/16” x 3/4” bolts, flat
washers and lock nuts from 1253Bag4. Tighten using a 1/2” socket / wrench.
21. Remove the stock e-brake bracket as shown in Photo 17 using a 13mm socket.
22. Install the e-brake bracket as shown in Photo 18 with the stock hardware and reinstall the stock e-brake bracket on
the new bracket with the supplied 5/16” lock nut from 1253Bag4. Tighten using a 13mm socket.
23. Reinstall the ABS wire back onto the frame mount.
24. Install the new shock absorbers in the factory mounts using the factory hardware. Tighten using a 21mm socket /
wrench on the upper and lower mount.
Photo 13
Photo 14
Photo 15
Photo 16
Photo 17
Photo 18
INSTALL BRAKE LINE BRACKET TO BRACKET
INSTALL BRACKET TO DIFFERENTIAL
INSTALL BRAKE BRACKET TO NEW BRACKET
INSTALL THE BRAKE LINE BRACKETS
REMOVE THE E-BRAKE BRACKET
INSTALL NEW BRACKET