Rough Country 253X User Manual
Page 4
INSTALLATION INSTRUCTIONS
1. Chock the rear wheels.
2. Jack up the front of the vehicle.
3. Place jack stands on the frame behind the lower control arms.
4. Lower the vehicle onto the jack stands and remove the tires and wheels.
5. Place the floor jack under the differential.
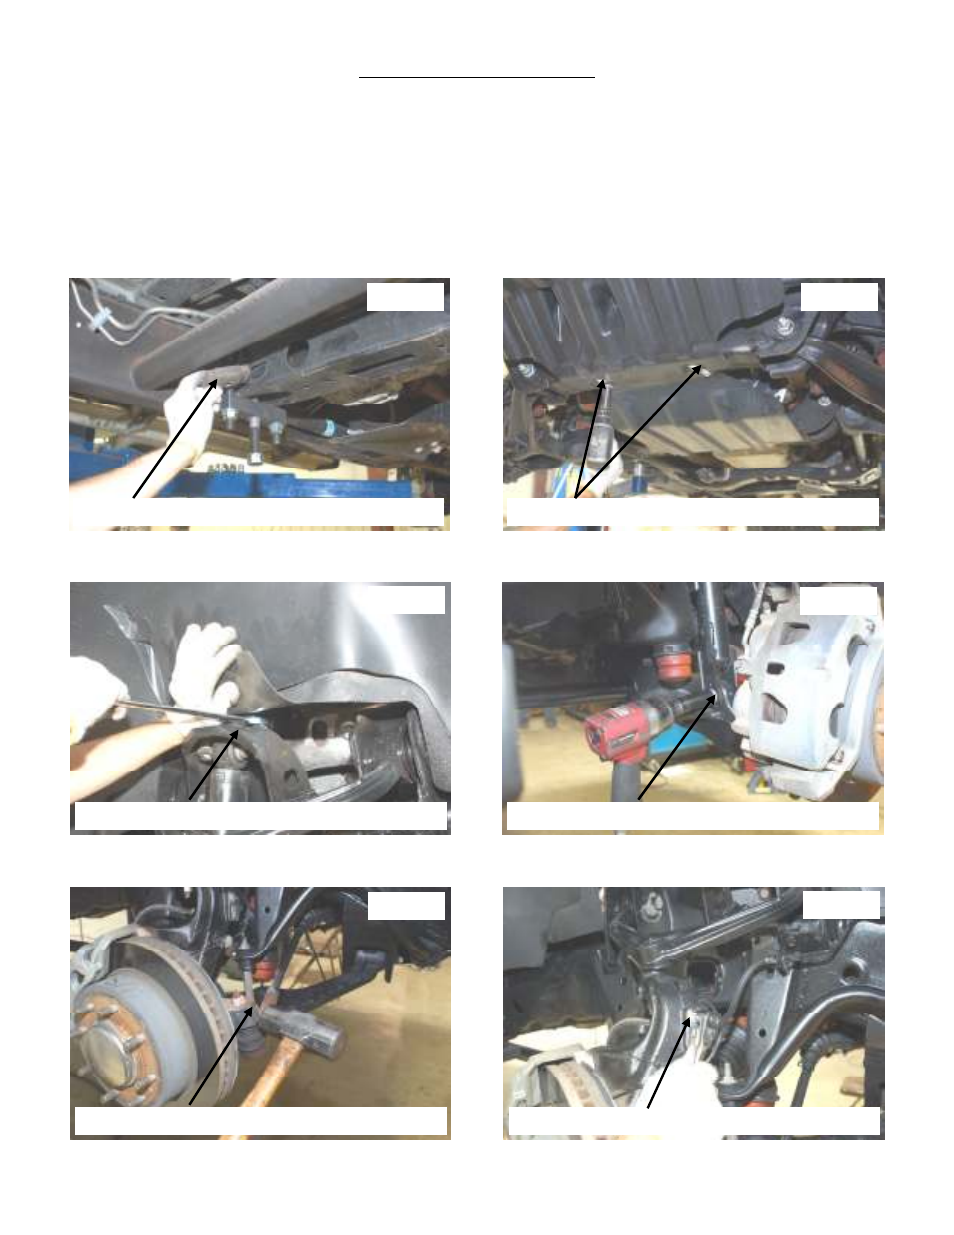
6. Using a torsion bar tool, unload the torsion bars using a 21mm socket and remove the threaded block. Retain the
stock hardware See Photo 1.
7. Slide the bars forward to disengage the torsion bar adjusters. Play attention to how the adjusters are positioned /
clocked in the cross-member.
8. Remove the torsion bars from the vehicle and be sure to mark bars driver and passenger side and front to rear.
9. Remove the skid plate from the frame using a 15mm socket. See Photo 2.
10. Remove the upper shock using a 21mm socket. See Photo 3.
11. Remove lower shock 21MM remove shock. See Photo 4.
12. Remove tie-rod using a 21mm socket / wrench. Retain the stock hardware. See Photo 5.
13. Remove brake line bracket from knuckle using a 10mm socket / wench. Retain the factory hardware. See Photo 6.
Photo 1
Photo 2
Photo 3
Photo 4
Photo 5
Photo 6
REMOVE THE TORSION BAR KEYS
REMOVE THE SKID PLATE
REMOVE THE FRONT SHOCKS
REMOVE THE FRONT SHOCKS
REMOVE THE TIE ROD
REMOVE THE BRAKE LINE BRACKET