Rough Country 253X User Manual
Page 11
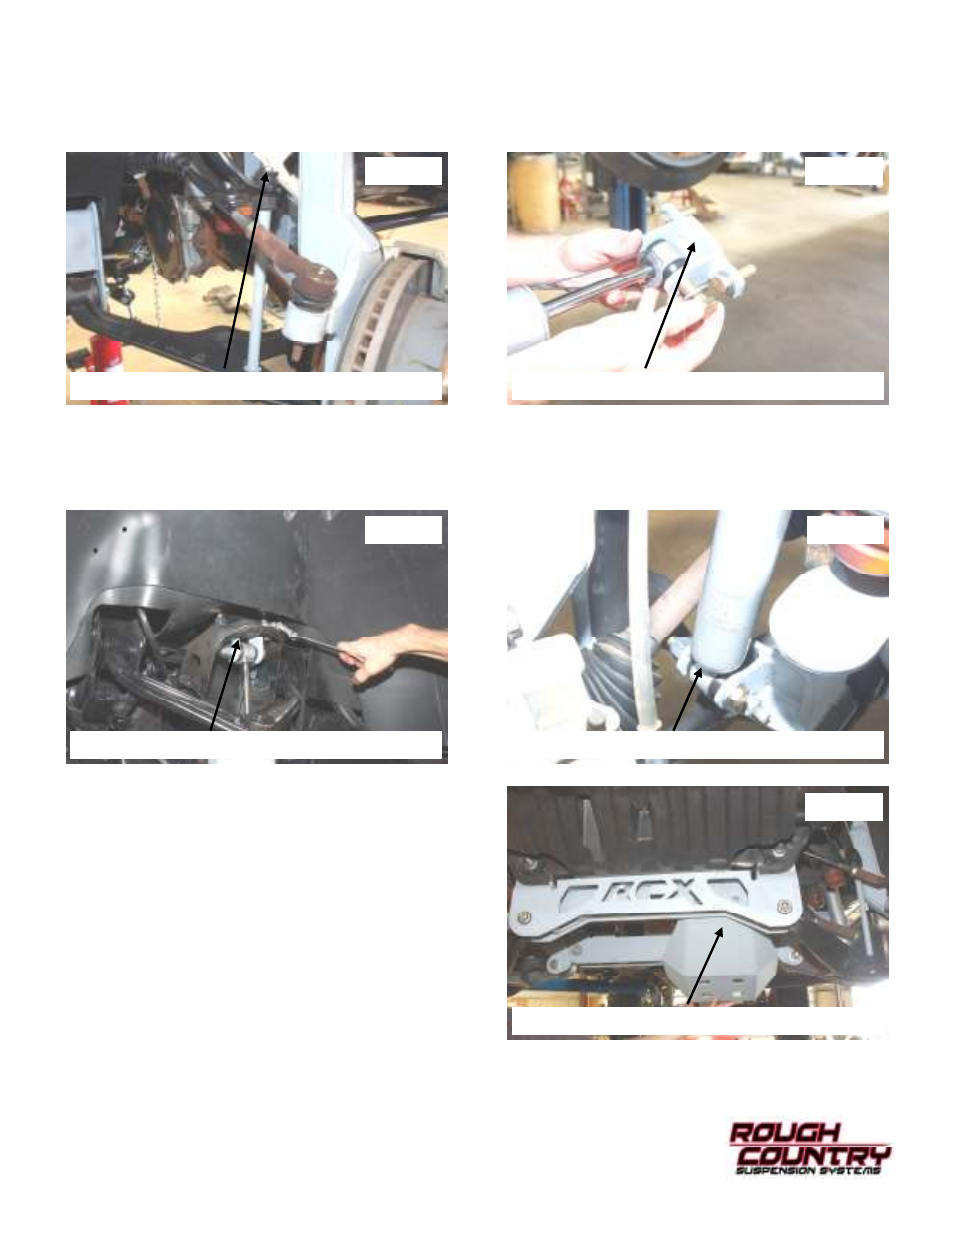
57. Install the stock sway bar bushings and secure with the supplied 7/16” x 3” bolts in 1253Bag3. Tighten assembly
using a 5/8” wrench. See Photo 43.
58. Install shock bracket on the front shock as shown with the supplied 9/16” x 3 1/2” bolts, flat washers and lock nuts
from 1253Bag3. See Photo 44. Flat washers are supplied for use as shims in the upper mount and should be used
as needed.
59. Install the shock bracket in the factory mount on the frame with the supplied 1/2” x 1 1/2” bolts, flat washers and lock
nuts from 1253Bag3. See Photo 45. Tighten using a 3/4” socket / wrench.
60. Install the shock in the lower shock mount with the supplied 9/16” x 3 1/2” bolts, flat washers and lock nuts from
1253Bag3. Flat washers are supplied for use as shims in the upper mount and should be used as needed. See
Photo 46.
61. Install the skid plate as shown in Photo 47 with the sup-
plied 3/8” x 1 1/4”, flat washers and lock nuts from
1253Bag3. Tighten using a 9/16” socket / wrench.
62. Using the torsion bar tool, reinstall the torsion bar keys as
they were removed and adjust the adjustment bolt as it was
stock.
63. Install the tires / wheels.
64. Jack up the vehicle.
65. Remove the jack stands and lower the vehicle to the
ground.
66. Tighten the lower control arms using a 21mm socket &
wrench.
67. Reattach the ABS harness.
68. Recheck all fasteners for tightness.
Photo 43
Photo 44
Photo 45
Photo 46
Photo 47
SECURE LINKS WITH SUPPLIED HARDWARE
INSTALL SHOCK BRACKET ON FRONT SHOCK
INSTALL ASSEMBLY IN FACTORY LOCATION
INSTALL SHOCK ON LOWER MOUNT
INSTALL SKID PLATE ON CROSS-MEMBERS