Rough Country 242N2 User Manual
Page 7
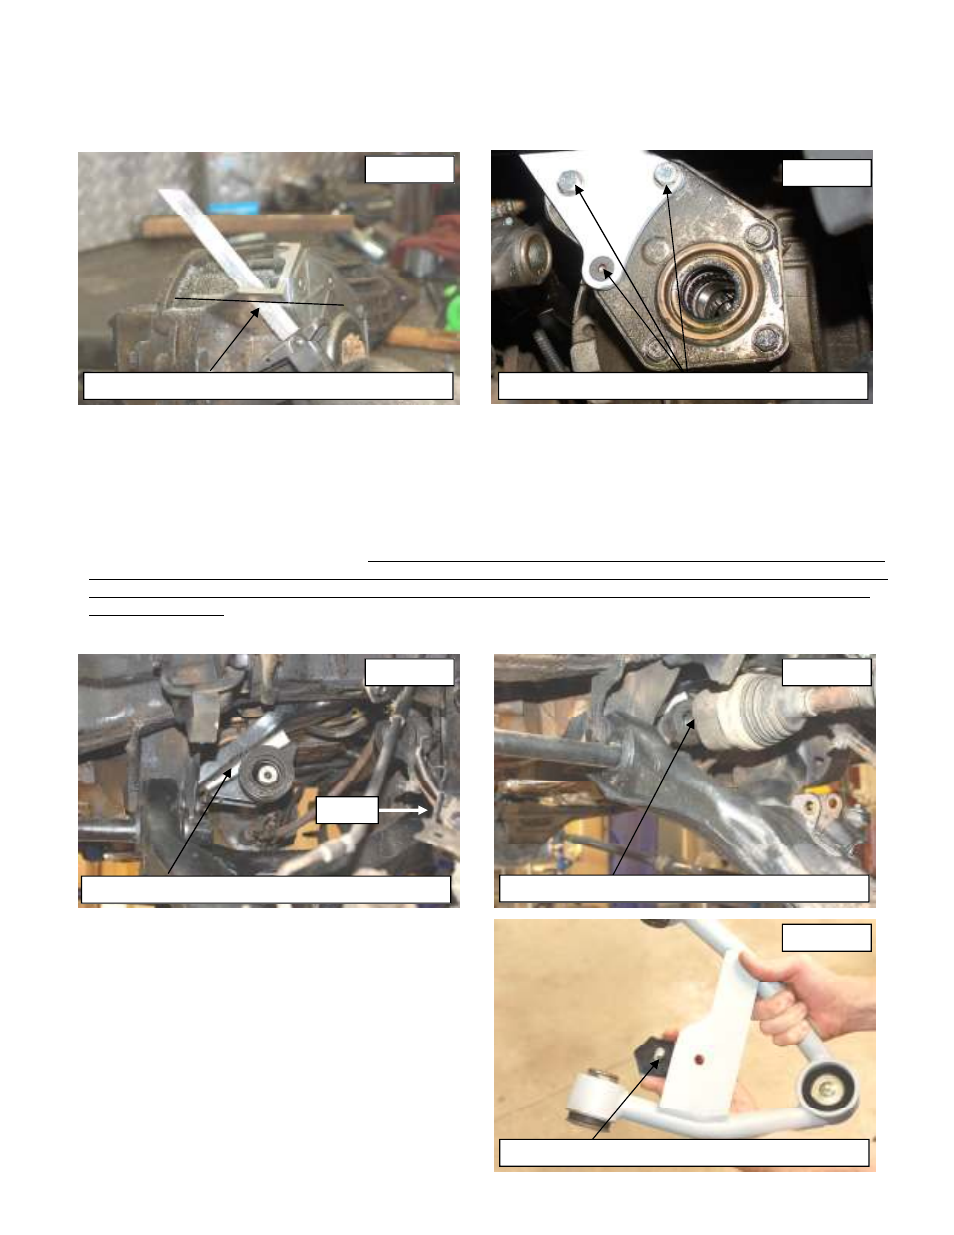
41. See Photo 31 showing cutting the differential. Be sure to cut straight across and do not harm the diff vent tube.
42. Assemble supplied bushings / sleeve in the diff bracket.
43. Install the bracket on the differential as shown in Photo 32 with the welded washers toward the differential. Apply a
thread locker to the supplied 8mm x 25mm bolts /flat washers and 8mm x 30mm conical bolt and install. Tighten us-
ing a 13mm socket and 8mm allen bit.
44. Reinstall the differential in the factory location using the factory hardware. Do not tighten at this time.
45. Install the passenger side drop diff bracket as shown in Photo 33 with the supplied 12mm x 50mm bolt in the front
hole with stock washer and nut. Use the stock bolt, washer and nut in the rear hole. Tighten the driver and passen-
ger side hardware using a 18mm Socket / wrench.
46. Reinstall the diff vent hose and wiring hardness.
47. Secure the harness clip in the stock location with the stock hardware and tighten using a 7mm socket.
48. Reinstall the drivers side control arm with the factory hardware. Do not tighten at this time.
49. Reinstall the axle shafts. See Photo 34. On some models the axle shaft could be secured with bolts instead of
the clip style as shown. In this case; after reinstallation, rotate the axle shaft to check for clearance between
the differential drop bracket and the half shaft hardware. If needed the bolt heads can be lightly ground to
clear the diff drop.
50. Install the bump-stop on the control arms with the supplied 3/8” lock nut and flat washers. Tighten using a 9/16”
socket. See Photo 35.
Front
USE CARE TO CUT LEVEL AND STRAIGHT
INSTALL THE PASS SIDE DIFF BRACKET
PHOTO 31
PHOTO 32
PHOTO 33
PHOTO 34
PHOTO 35
REINSTALL THE CV SHAFTS
INSTALL THE DIFF BRACKET
INSTALL THE BUMPSTOP ON THE ARM