Rough Country 242N2 User Manual
Page 4
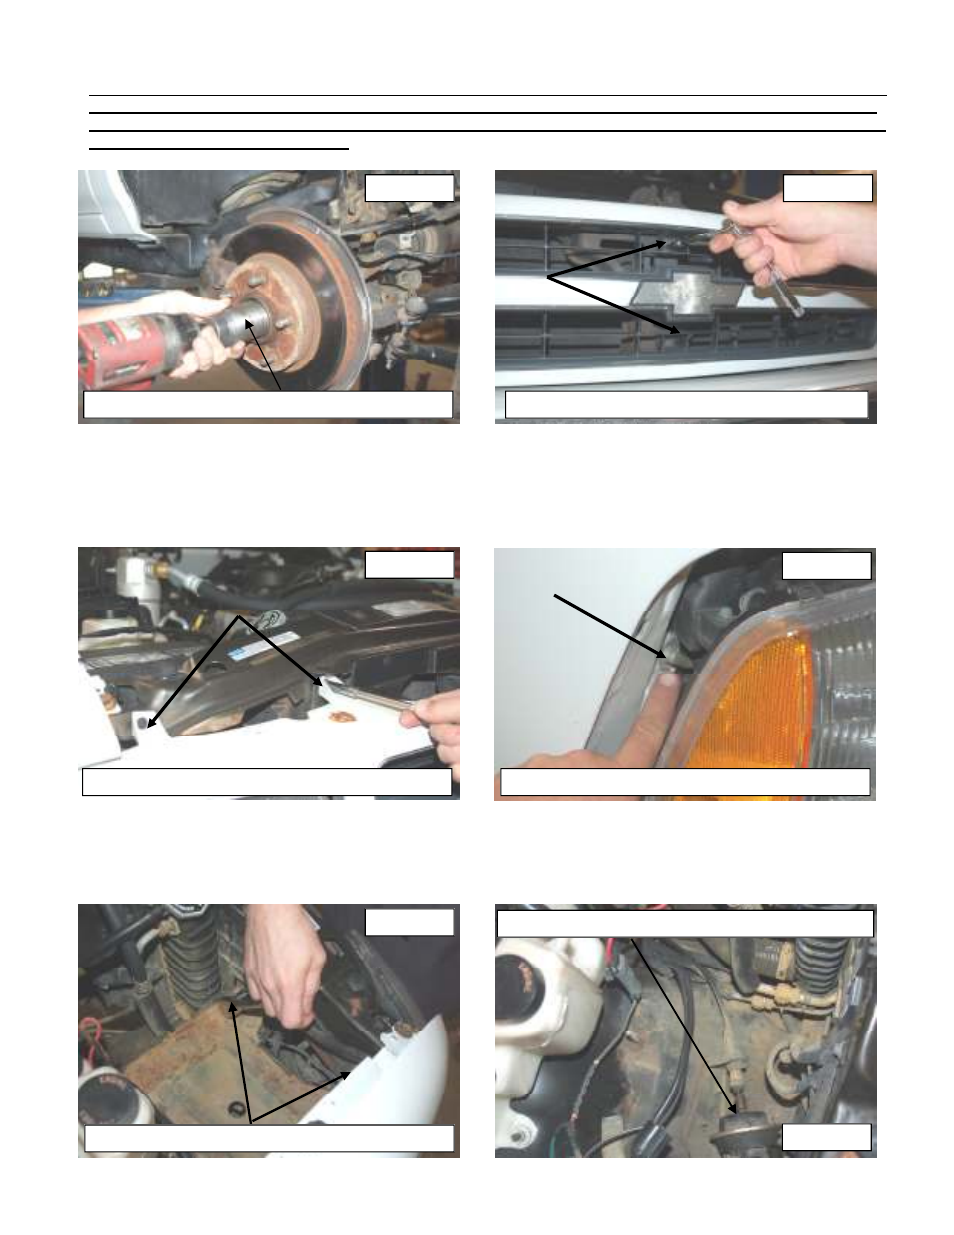
16. Remove the axle nut using a 35mm socket. Retain the hardware for reuse. See Photo 13.
17. On pickups / Blazers equipped with a cable floor shifter the following steps will be performed to disconnect the cable
shifter. Additionally the mounting hardware may vary and additional steps may need to be performed to access the
shifter cable. If the vehicle is equipped with an electronic push button 4WD selector these steps will NOT need to be
performed and will resume at Step 27. Please read the next steps before initiating.
18. Remove the two bolts as shown on the grill using a 7mm socket. Retain hardware for reuse. See Photo 14.
19. Remove the 4 other screws securing the grill to the support. Retain hardware for reuse. See Photo 15.
20. Remove the grill and place away from harm.
21. Photo 16 shows the bolt that is to be accessed. If the bolt on the vehicle resembles the pictured bolt, then the grill
will not need to be removed. On other applications this bolt can be accessed beside the headlight with a 13mm
socket and the grill will not need to be removed. All other variations, the grill will need to be removed. This bolt se-
cures the battery box to the body and is removed to access the shifter linkage.
22. Remove the battery retaining hardware using a 13mm socket. Retain hardware for reuse.
23. Remove the battery tray by removing the two bolts using a 13mm socket. The two bolts will be accessible on some
models in the engine compartment. On other applications this bolt was removed in Step 21 from out side the vehicle
by the headlight. Retain the hardware for reuse. See Photo 17.
24. Photo 18 shows the area exposed under the battery tray.
REMOVE THE AXLE NUT
REMOVE THE GRILL (CABLE SHIFT)
GRILL HARDWARE SHOWN (CABLE SHIFT)
NUT SHOWN THAT SECURES BATTERY TRAY
VACUUM SHIFT ASSIST SHOWN (CABLE SHIFT)
PHOTO 13
PHOTO 14
PHOTO 15
PHOTO 16
PHOTO 17
PHOTO 18
REMOVE THE BATTERY TRAY (CABLE SHIFT)