Rough Country 242N2 User Manual
Page 2
INSTALLATION INSTRUCTIONS
1. Chock rear wheels where the truck will not roll. Place vehicle in neutral.
2.
Raise the front with a floor jack, positioned underneath the front axle cross member. Place jack stands under the
frame rails, behind the front wheel wells and lower frame onto jack stands. Remove the front tires.
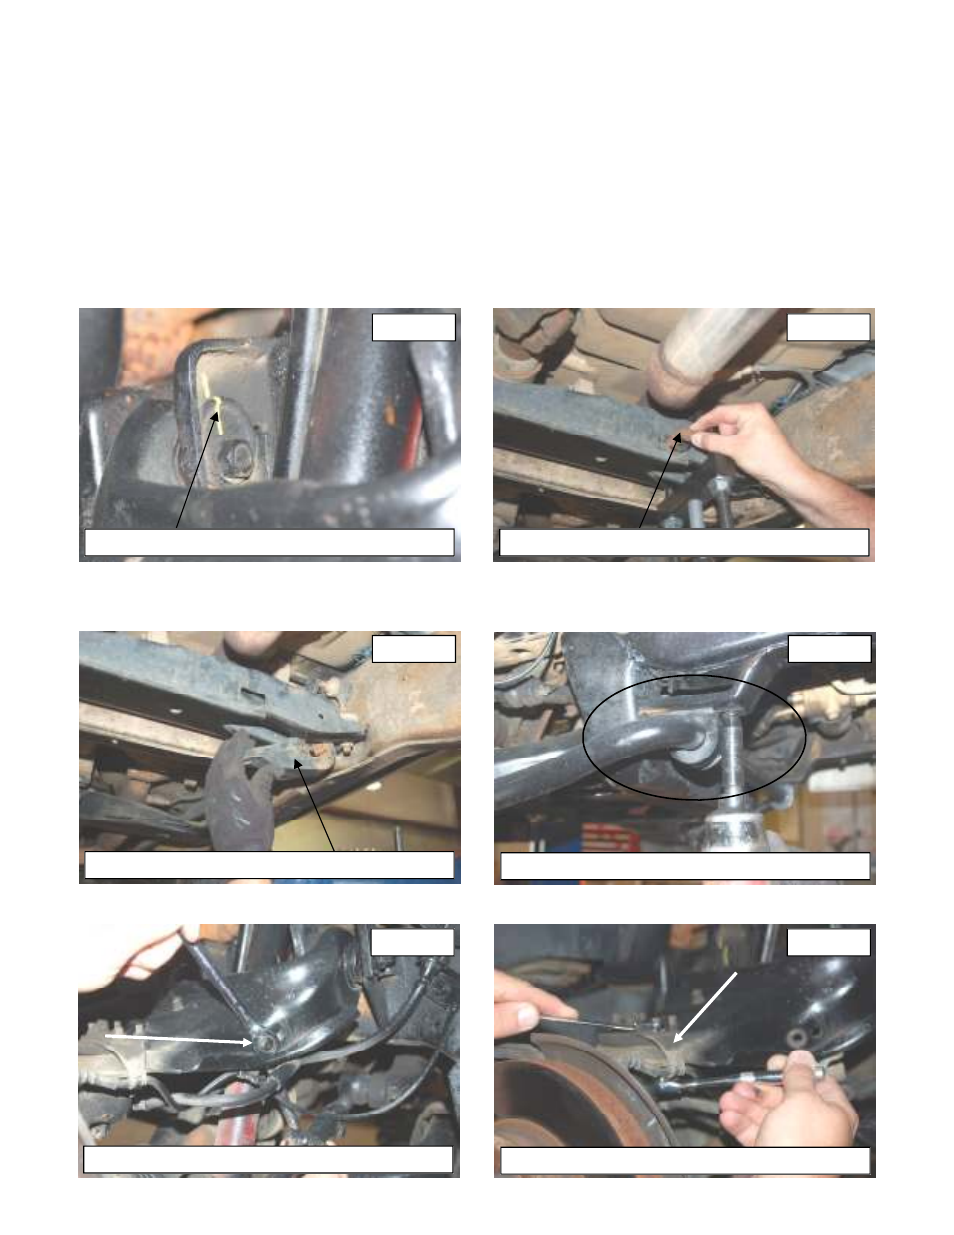
3.
Mark cam bolts. See Photo 1.
4.
The torsion bar keys are removed next and requires the use of a torsion bar tool. Torsion bar tool Part #1067 is
available from Rough Country.
5. Place the torsion bar tool on the cross member and tighten using a 1 1/16 socket until the stock torsion bar threaded
block is free. Make sure the torsion bar tool is properly placed on the torsion bar key to prevent the tool from slipping
and causing possible damage. Be extremely careful when loading or unloading the torsion bars: there is a tremen-
dous amount of stored energy in the bars. Be sure to keep your hands and body clear of the adjuster arm assembly
and puller tool in case anything slips or breaks.
6. Remove the stock torsion bar bolt using a 18mm socket and remove the threaded bock. See Photo 2.
7. Slide the torsion bar forward and remove the torsion bar key from the torsion bar cross-member. See Photo 3.
8. Remove the sway bar from the frame using a 10mm socket and 15mm wrench. Retain the stock hardware for reuse.
See Photo 4.
9. Remove the brake line and ABS line from control arm using a 13mm wrench. See Photo 5 & 6.
REMOVE THE TORSION BAR KEY
REMOVE SWAY BAR HARDWARE
REMOVE THE BRAKE LINE FROM ARM
REMOVE THE ABS CLIP FROM BALL JOINT
PHOTO 1
PHOTO 2
PHOTO 3
PHOTO 4
PHOTO 5
PHOTO 6
REMOVE THE ADJUSTER BOLT AND BLOCK
MARK CAM BOLTS