Rough Country 242N2 User Manual
Page 3
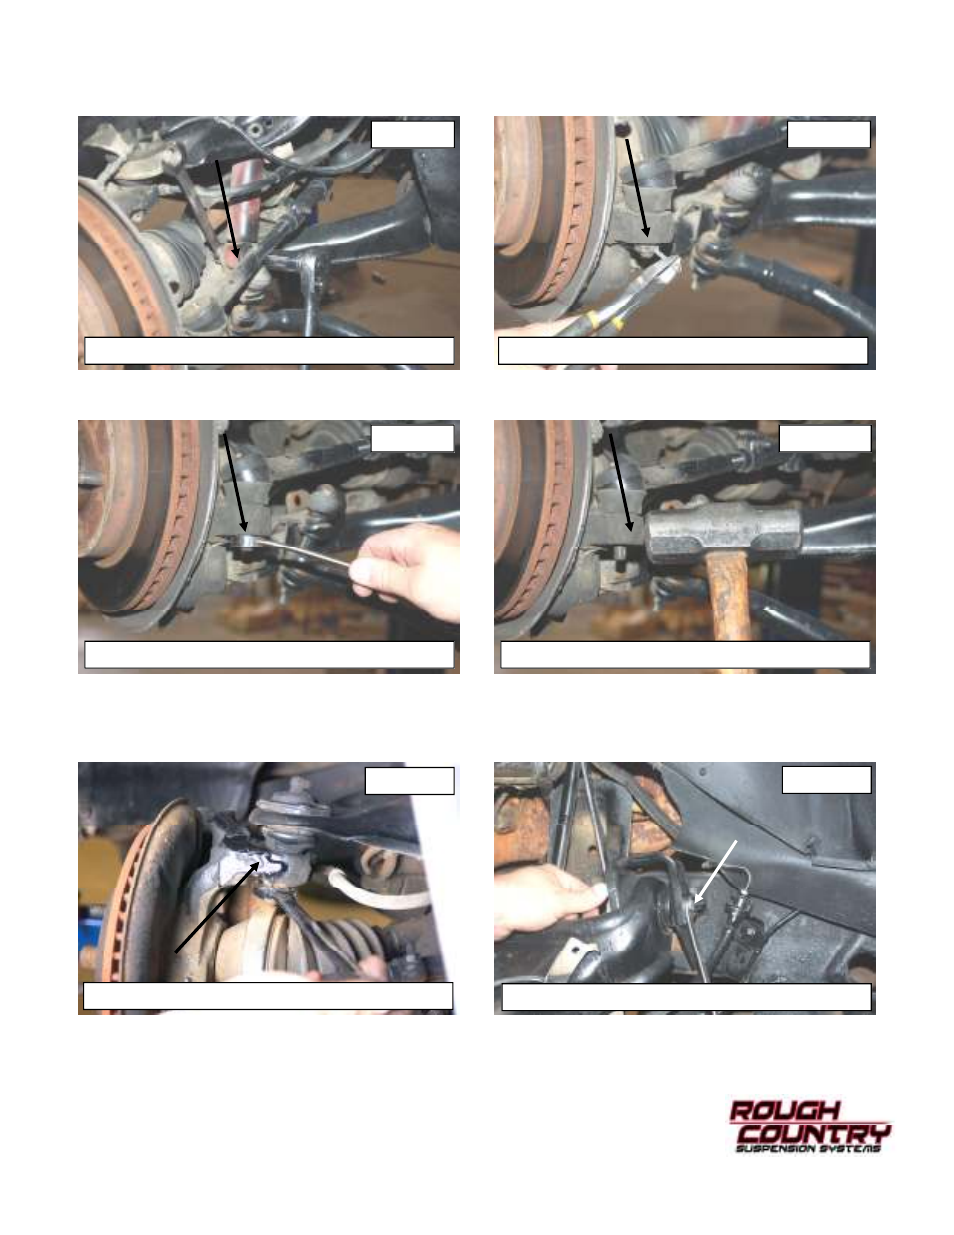
10. Remove the shock from the upper and lower shock mount using a 18mm wrench / socket. See Photo 7. Retain the
stock hardware for reuse. Remove the shock from the vehicle.
11. Remove the cotter pin from the tie rod end. Retain the stock hardware. See Photo 8.
12. Remove the nut from the tie rod end using a 18mm wrench. Retain the factory hardware. See Photo 9.
13. Strike the knuckle as shown to dis-lodge the tie rod end. See Photo 10.
14. Remove the cotter pin on the upper ball joint and remove the nut using a 18mm wrench. Strike the knuckle near the
ball joint to dis-lodge the ball joint. See Photo 11.
15. Remove the upper control arm hardware using a 18mm socket / wrench. Retain the hardware for reuse. See Photo
12.
REMOVE THE ABS CLIP FROM BALL JOINT
REMOVE THE SHOCK
REMOVE THE TIE ROD NUT
STRIKE TO DISLODGE TIE ROD
REMOVE THE UPPER BALL JOINT NUT
REMOVE THE UPPER ARMS
PHOTO 8
PHOTO 7
PHOTO 9
PHOTO 10
PHOTO 11
PHOTO 12
- PERF689 (12 pages)
- 1308 (4 pages)
- 576.20 (16 pages)
- 1010 (4 pages)
- 787.22 (14 pages)
- 282 (14 pages)
- 1098 (1 page)
- 598S (17 pages)
- 379.22 (8 pages)
- 1051 (1 page)
- 392.24 (6 pages)
- 1109 (2 pages)
- 1011 (4 pages)
- 263.22 (9 pages)
- 7599 (4 pages)
- 1169 (2 pages)
- 87496 (4 pages)
- 288.20 (8 pages)
- 324S (20 pages)
- 283N2 (2 pages)
- PERF677 (8 pages)
- 699 (2 pages)
- 1305 (4 pages)
- 774S (10 pages)
- 1403 (2 pages)
- 9219 (2 pages)
- 1186 (1 page)
- 592.20 (8 pages)
- 1113 (2 pages)
- 563.20 (8 pages)
- 1054 (4 pages)
- 479.20 (8 pages)
- 87349 (2 pages)
- 280N2 (12 pages)
- 1021 (4 pages)
- RC0342 (2 pages)
- 3592 (2 pages)
- 1776 (1 page)
- 1182 (1 page)
- 1040 (2 pages)
- 561.20 (4 pages)
- 1117 (4 pages)
- 75113-15 (16 pages)
- PERF662X (8 pages)
- 1156 (2 pages)