Rough Country PERF905 User Manual
Page 7
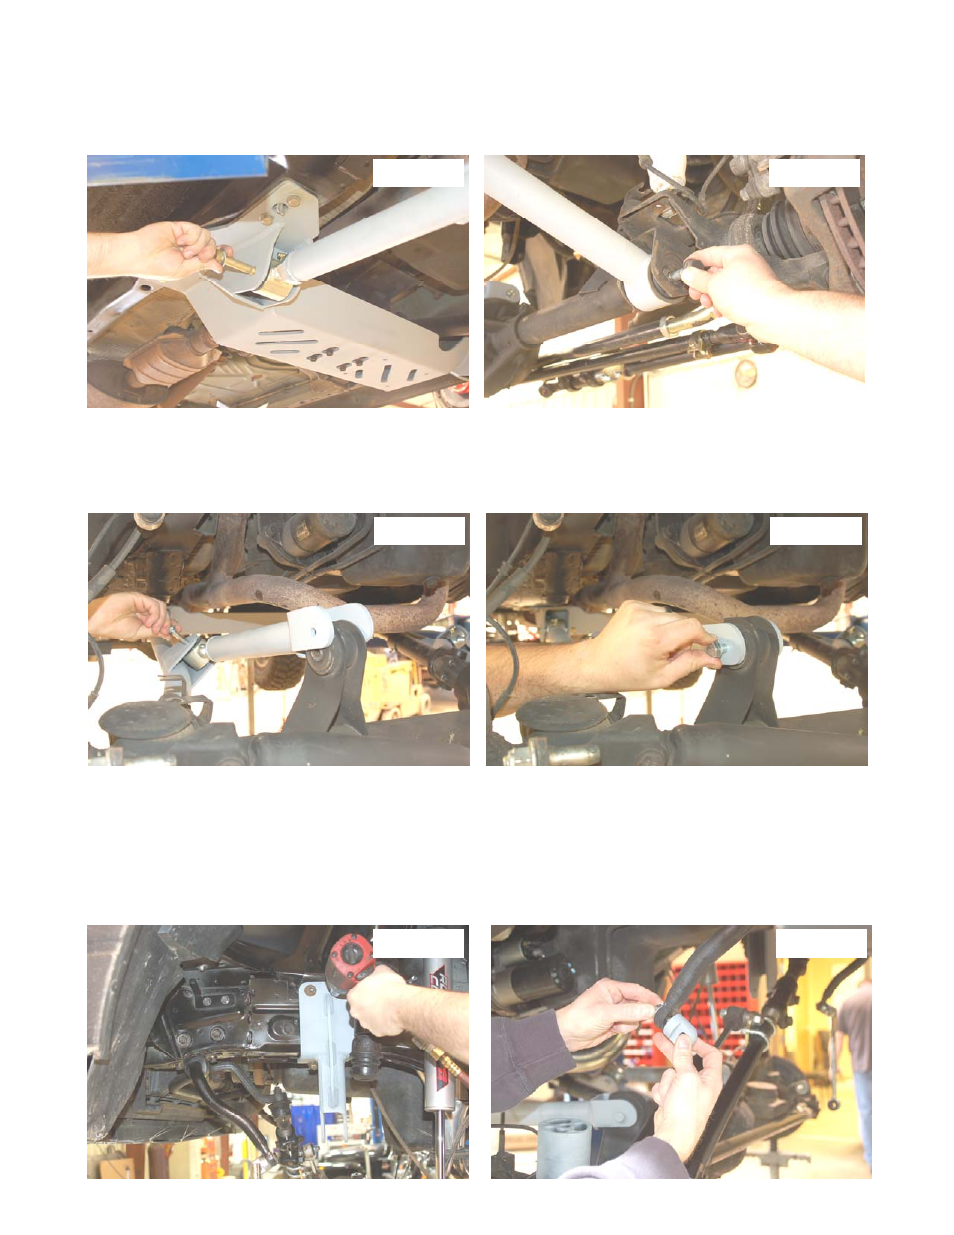
22. Thread the assembled 1 1/4” flex joint into lower arm and adjust the arm length to 29 5/16” long center hole to cen-
ter hole. Install the control arm into the cross-member using the supplied 9/16” X 4 bolts, washers, and nylocks. See
PHOTO 19.
23. Insert the factory cam bolts into the rubber bushing end of the lower control arm, align the cam bolt markings made
earlier. Tighten both ends of the lower control arm with a 21mm wrench and a 22mm socket. See PHOTO 20.
24. Thread the assembled 3/4” flex joint into the upper control arm and adjust the arm length to 15 3/8” long center hole
to center hole. Install the upper control arm as shown, using the supplied 10mm x 80 bolts, washers, and nylocks.
See PHOTO 21.
25. Using the factory hardware bolt the upper control arm to the axle bushing as shown. Tighten both ends of the upper
control arm with a 12mm socket and wrench. See PHOTO 22.
26. Tighten the upper jam nut with a 1 1/8” wrench and the lower jam nut with a 1 7/8” wrench or cresent wrench.
27. Repeat steps 20-24 on the passenger side.
28. Using the 4 supplied 3/8” x 1 bolts install the cross-member skidplate with a 9/16” socket.
29. Remove the 4 bolts holding the factory track bar bracket with a 18mm socket. Retain hardware for reused.
30. Install the supplied track bar bracket on the frame with the factory fasteners. Tighten with a 18mm socket. See
PHOTO 23.
31. Install the sway bar link mounting bracket to the sway bar with a 3/8” x 1 1/4 bolt, washer, and lock washer. Tighten
with a 9/16 wrench. See PHOTO 24.
PHOTO 19
PHOTO 20
PHOTO 22
PHOTO 21
PHOTO 24
PHOTO 23