Rough Country PERF905 User Manual
Page 12
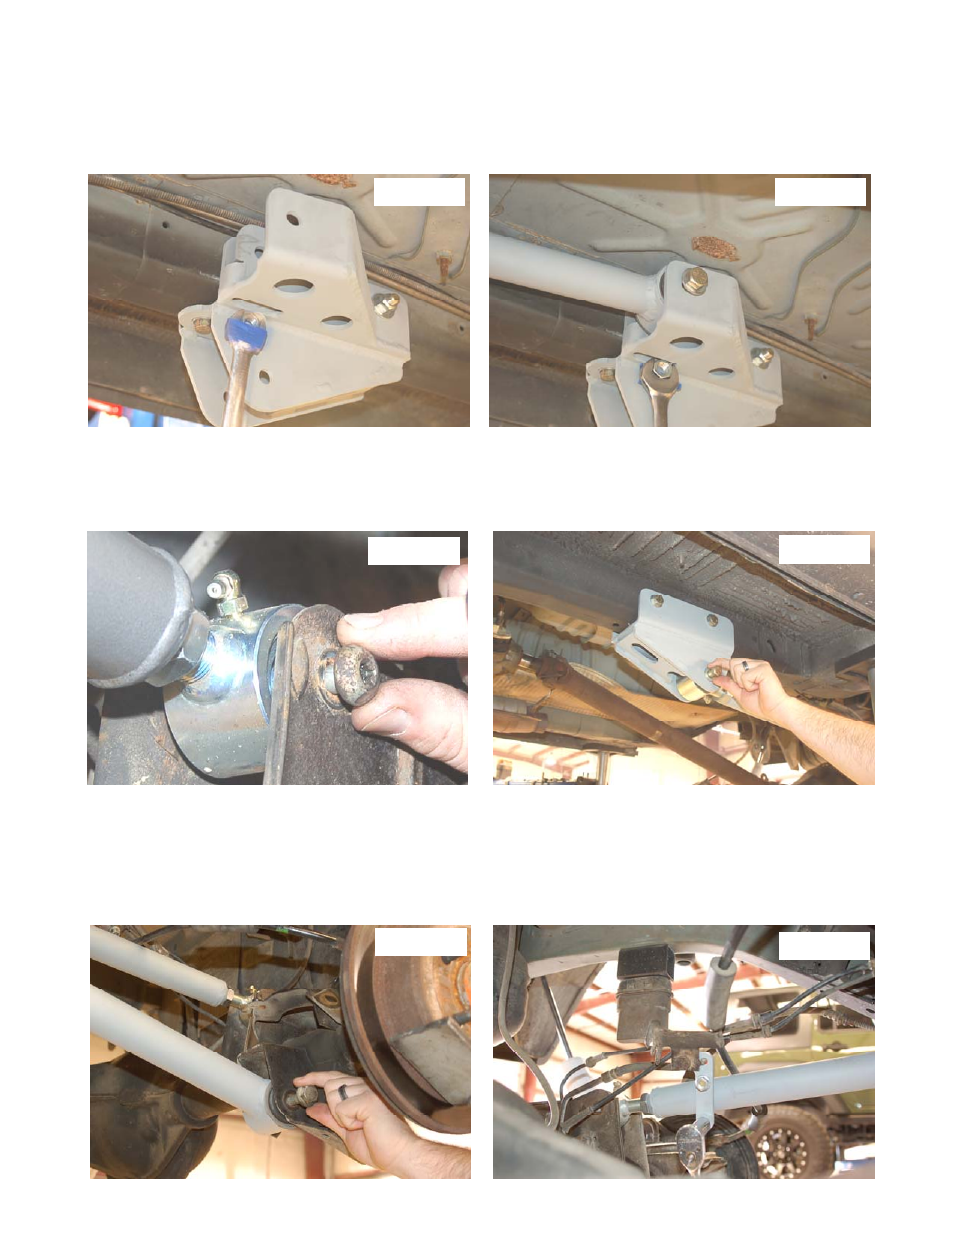
22. Using 2) 7/16” x 1.25 bolts and washers, bolt the upper control arm mount to the body. Tighten using a 5/8 socket.
Next install the 2) 1/2” x 5 bolts and washers through the bracket and crush sleeve. The bolt has to go in from the
outside, holding the 1/2” toplock nut in a 3/4 wrench slide the nut inside the cut out to tighten. See PHOTO 19.
23. Install the assembled 3/4” flex joint into the rear upper control arm, adjust the length to 39” center to center. Install
the rubber bushing end of the control arm into the frame bracket with a 9/16” x 4 bolt and washer. Holding the 9/16”
toplock nut with a 22mm wrench slide the nut inside the cut out. Hand tighten. See PHOTO 20.
24. Install the upper control arm into the axle mount with factory hardware with the head of the torx bolt towards the out-
side. Tighten with a 15mm wrench See PHOTO 21.
25. Install the 1 1/4” flex joint into the lower control arm , adjust the length to 38 7/8” center to center. Install the flex joint
end of the lower control arm to the frame bracket with a 9/16” x 4 bolt, washer, and nut. Tighten with a 21mm and
22mm wrench. See PHOTO 21.
26. Install the rubber bushing end of the lower control arm to the axle with factory hardware. Hand tighten. See PHOTO
23.
27. Tighten the upper jam nut with a 1 1/8” wrench and the lower jam nut with a 1 7/8” wrench or cresent wrench.
28. Repeat steps 17-27 on the passenger side.
29. Slide the 3/8 x 1 3/4 long u-bolt onto the control arm bolting up the brake line bracket. Tighten with 2) 3/8 flangelocks
and a 9/16 socket. See PHOTO 24. Next flip over the factory brake line bracket and use stock hardware to attach
with a 10mm wrench.
PHOTO 19
PHOTO 20
PHOTO 21
PHOTO 22
PHOTO 23
PHOTO 24