Rough Country PERF905 User Manual
Page 4
FRONT INSTALLATION
1. Place the vehicle on a level surface. Set the parking brake. Center the front wheels and chock the rear wheels.
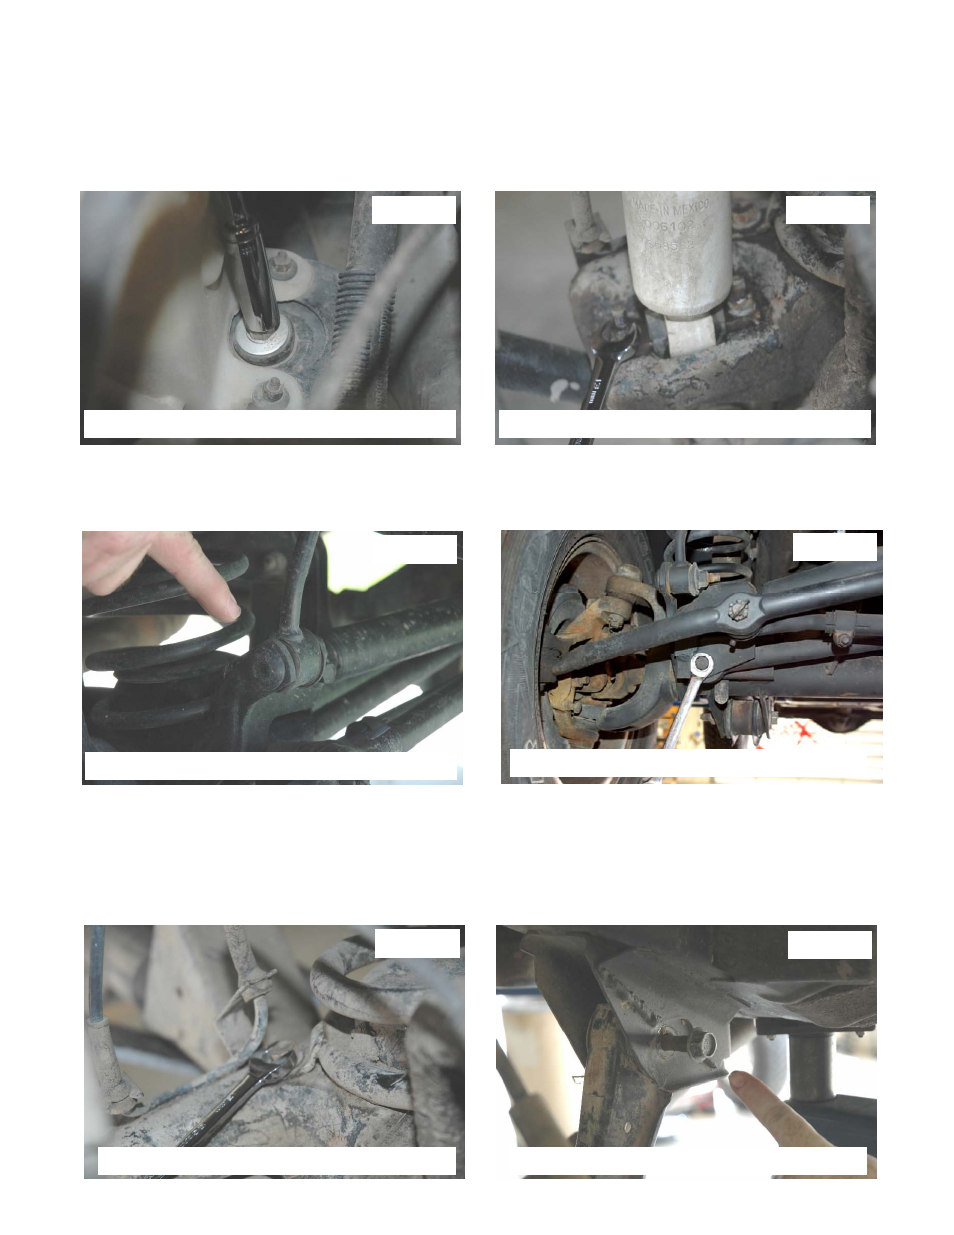
2. From inside the engine compartment, using a 13mm deep well socket, remove the upper stud nut, washer and bush-
ings from the front shocks. See PHOTO 1.
3. Jack up the vehicle and place jack stands on the frame rail behind the lower control arm mount.
4. Remove the front tires/wheels, using a 13/16 deep well socket.
5. Place a floor jack underneath the axle for support and remove the lower shock bolts from the front shocks using a
13mm socket and wrench. Retain the factory lower bolts for reuse. See PHOTO 2.
6. Using a 15mm wrench and 18mm wrench for the upper bolt and a T55 torx head for the lower bolt, remove the sway
bar links. See PHOTO 3.
7. Remove the lower track bar bolt on the axle side and the upper track bar bolt on the frame side, using a 15mm
socket. See PHOTO 4.
8. Using a 13mm wrench remove the driver and passenger side coil retainer. Lower the axle and remove the coil
spring. A coil spring or strut compressor may be needed to remove the stock coil. Pull the ABS sensor wire from the
stock mount. Spray the line with WD40 to allow the mount on the wire to slide. See PHOTO 5.
9. Mark the original position of the eccentric cams on lower control arm. Using a 21mm socket & 18mm wrench remove
the stock lower bolt from the axle. Using a 21mm socket and wrench, remove the frame bolt from the lower control
arm. Retain the factory hardware fro reuse. See PHOTO 6.
10. Using a 15mm socket and T50 torx head, loosen and remove the upper control arms.
PHOTO 1
PHOTO 2
PHOTO 3
PHOTO 4
PHOTO 5
PHOTO 6
REMOVE SHOCK FROM THE UPPER MOUNT
REMOVE SHOCK FROM AXLE
REMOVE THE SWAY BAR FROM THE AXLE
REMOVE TRACK BAR BOLT
REMOVE COIL CLIP
REMOVE THE LOWER CONTROL ARM