Installation of carrier into axle housing, Inst – Spicer Drive Axles Service Manual Wheel Reduction Drive Axles (EA-50) User Manual
Page 24
22
1.
1.
1.
1.
1. Thoroughly clean the inside of the carrier housing
and inspect the housing mounting surface for nicks
and general cleanliness. Stone the surface if
necessary to remove burrs or nicks. Bolt holes must
also be checked, to see that they are free of
contaminants.
INST
INST
INST
INST
INSTALLA
ALLA
ALLA
ALLA
ALLATION OF DIFFERENTIAL
TION OF DIFFERENTIAL
TION OF DIFFERENTIAL
TION OF DIFFERENTIAL
TION OF DIFFERENTIAL
CARRIER INTO AXLE HOUSING
CARRIER INTO AXLE HOUSING
CARRIER INTO AXLE HOUSING
CARRIER INTO AXLE HOUSING
CARRIER INTO AXLE HOUSING
FFFFFigur
igur
igur
igur
igure 1
e 1
e 1
e 1
e 11
1
1
1
1
Loctit
Loctit
Loctit
Loctit
Loctite 5
e 5
e 5
e 5
e 51
1
1
1
18
8
8
8
8
Ga
Ga
Ga
Ga
Gask
sk
sk
sk
sket Eliminat
et Eliminat
et Eliminat
et Eliminat
et Eliminator
or
or
or
or
2.
2.
2.
2.
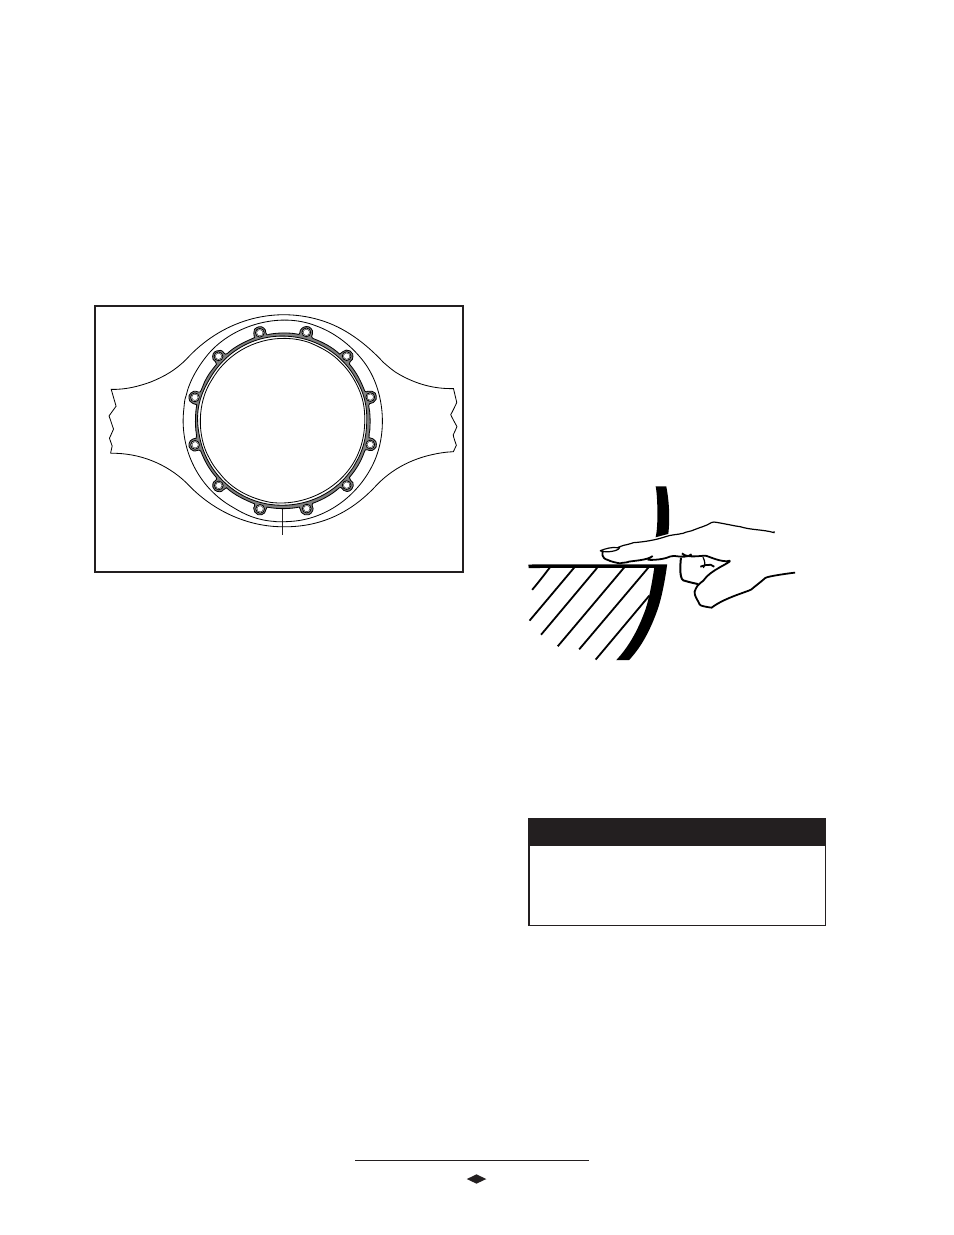
2. Apply an .125 inch (3.175 mm) diameter bead of
Loctite 518 gasket eliminator onto the axle housing
mounting flange and around each bolt hole. See
See
See
See
See
FFFFFigur
igur
igur
igur
igure 1
e 1
e 1
e 1
e 11.
1.
1.
1.
1.
3.
3.
3.
3.
3. Thread two studs into the axle housing 180
0
apart.
This will eliminate rotation of the carrier assembly
after it makes contact with the gasket material.....
4.
4.
4.
4.
4. Install the carrier assembly into the axle housing.
If reinstalling used bolts, clean the mounting bolts,
and coat with Loctite #277, and install. Tighten
bolts evenly in cross pattern. Torque bolts
240-260 Lb-Ft (325-352 N-m).
5.
5.
5.
5.
5. Allow one hour cure time for gasket material before
adding hypoid gear lubricant.
6.
6.
6.
6.
6. Remove the old axle flange gasket and clean mating
surfaces of the hub and axle flange.
7
7
7
7
7.....
Install the new axle flange gasket.
8.
8.
8.
8.
8. Install the axle shafts to proper location.
Torque the axle flange nuts to vehicle manufacturers
specifications.
9.
9.
9.
9.
9. Clean drain plug and install. Torque drain plug to
35-45 Lb-Ft (47-61 N-m) Fill unit to proper
level with hypoid gear lubricant.
1
1
1
1
10.
0.
0.
0.
0. Install fill plug and torque to 35-45 Lb-Ft
(47-61 N-m).
NOTE : Lubricant close enough to bottom of fill hole to be seen
or touched is not sufficient. Lubricant must be level with the fill
hole.
S
SS
SS 2
2
2
2
23
3
3
3
30-S/SL
0-S/SL
0-S/SL
0-S/SL
0-S/SL
4
4
4
4
48.8
8.8
8.8
8.8
8.8
2
2
2
2
23.1
3.1
3.1
3.1
3.1
S2
S2
S2
S2
S26
6
6
6
60-SB
0-SB
0-SB
0-SB
0-SB
**
**
**
**
**
5
5
5
5
52.9
2.9
2.9
2.9
2.9
2
2
2
2
25.0
5.0
5.0
5.0
5.0
S2
S2
S2
S2
S26
6
6
6
60-SB
0-SB
0-SB
0-SB
0-SB
***
***
***
***
***
5
5
5
5
55.2
5.2
5.2
5.2
5.2
2
2
2
2
26.1
6.1
6.1
6.1
6.1
Model
Model
Model
Model
Model
Pint
Pint
Pint
Pint
Pintsssss
Lit
Lit
Lit
Lit
Liter
er
er
er
ersssss
CAP
CAP
CAP
CAP
CAPA
A
A
A
ACITIES (Appr
CITIES (Appr
CITIES (Appr
CITIES (Appr
CITIES (Appro
oo
ooxima
xima
xima
xima
ximattttte*):
e*):
e*):
e*):
e*):
* Lube capacity will vary depending upon the housing angle
in each vehicle. Capacities given above are for an angle of
4°. Fill to the lower edge of the fill hole in the axle housing
as shown above.
** Capacity for fabricated housing
*** Capacity for cast housing