Vista Imaging Vista Routing User Manual
Page 70
Using VistARad in a Routing System
Routing User Guide
To use on-demand routing
1
Log into VistARad. The VistARad workstation used for on-demand routing must be
logged into a VistA system that includes a Routing Gateway.
 If you have access to more than one division, log into the division where the exams
to be routed originate from.
2
Use the exam lists in the VistARad Manager to select the exams you want to send.
3
Click the Route Exams button, located in the upper right corner of the exam list.
 If the Route Exams button is not present, your user account does not have any of
the security keys for on-demand routing assigned.
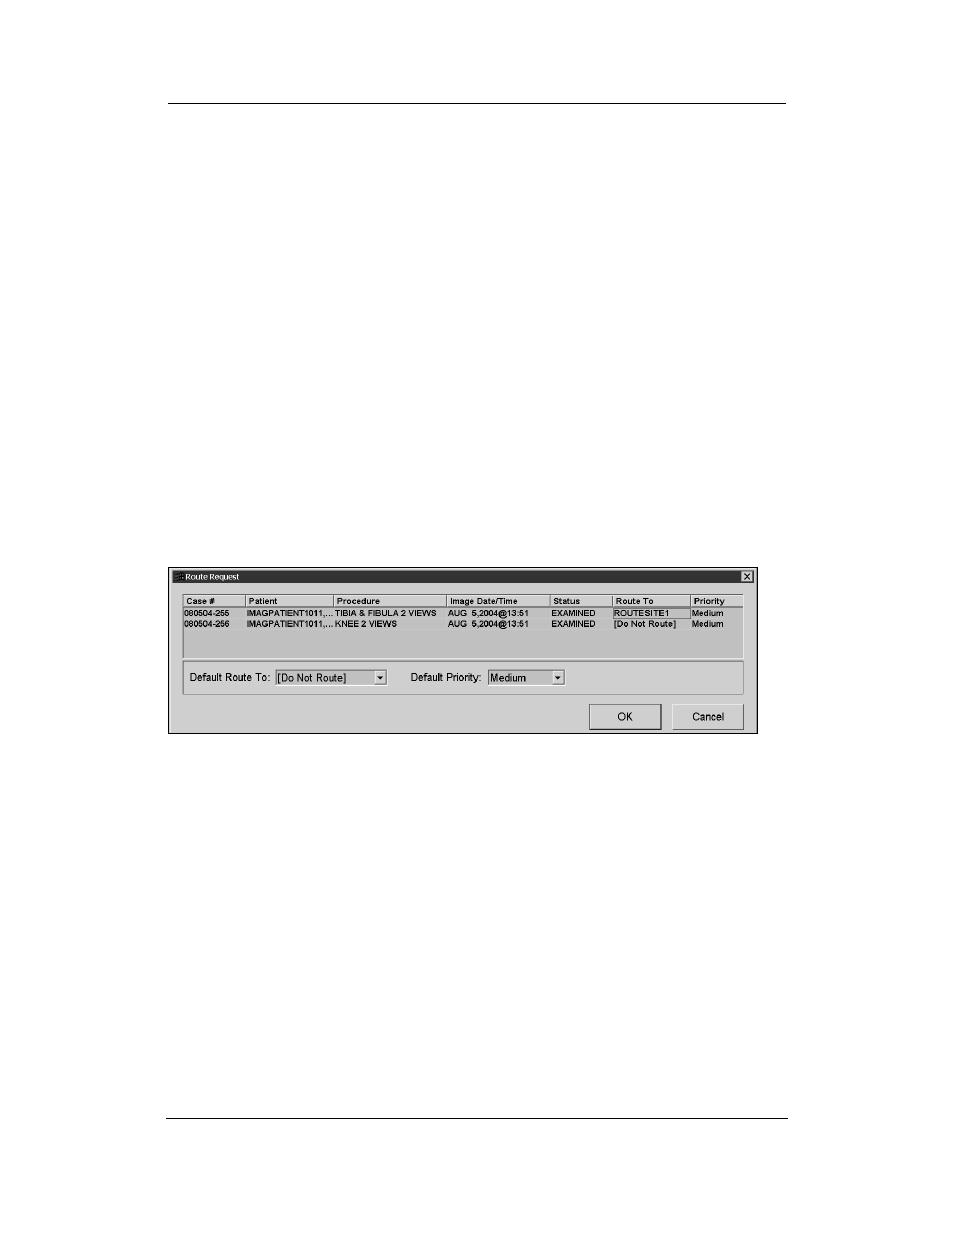
4
When the Route Request dialog opens, make sure all the exams you selected are
shown.
 If a selected exam is not “online” (not available in short-term storage), a message
will appear at the bottom of the Route Request window indicating that exam has
been requested from the jukebox (long-term storage). Once the exam is available
in short-term storage, you can select it for on-demand routing.
5
For each exam, click the ‘Route To’ field to select where you want to send the exam.
 In the ‘Route To’ field, the first destinations listed are Imaging destinations, such
as remote VistARad workstations. If there are any DICOM destinations (such as
film printers) defined, they will appear at the bottom of the ‘Route To’ field and
will be preceded by “dcm”.
 Use the Default Route To box near the bottom of the Route Request window to
choose a single destination for all listed exams.
6
For each exam, use the Priority field to select the priority used to send the exam.
 Use the Default Priority box near the bottom of the dialog to choose a single
priority for all listed exams.
VistA Imaging V. 3.0, Patch 18
April 2006
62