Ricoh 450 User Manual
Page 29
13
2
3
4
5
6
7
8
0
9
1
C
aa
Speed Dial
On Hook Dial
Pause /
Redial
Tone
6
7
8
9
10
11
12
26
25
24
23
22
21
20
19
C
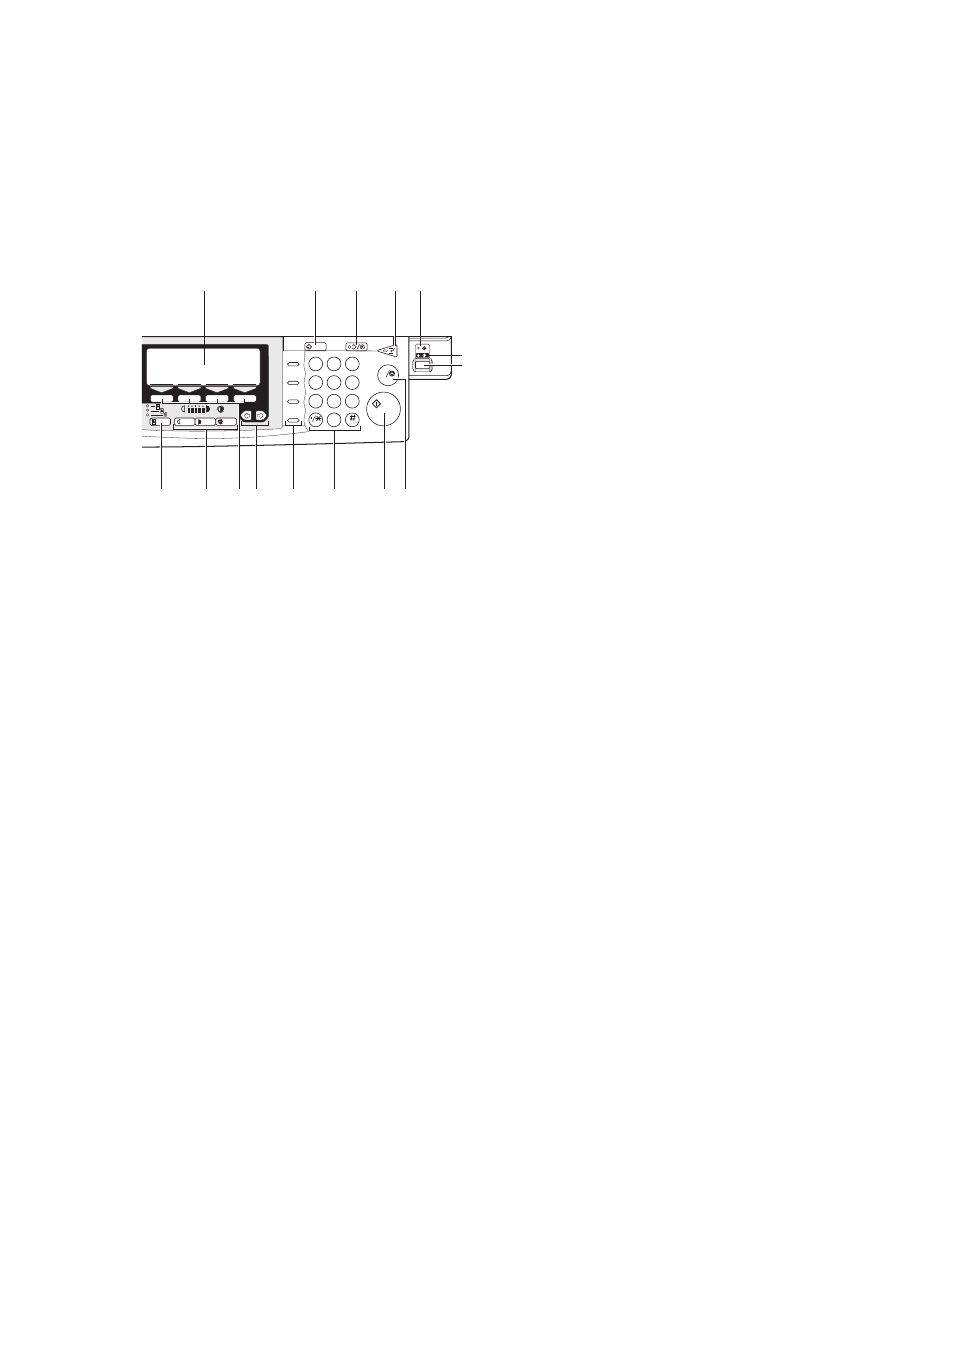
12.
Operation switch
Press this switch to turn the power on
(the
On
indicator lights up). To turn the
power off, press this switch again (the
On
indicator goes off).
13.
{
Enhanced Image
} key
Reproduces copies with a better image
quality.
14.
{
Menu
} key
Displays the names of available func-
tions.
15.
Shortcut keys
Press to use the stored functions you fre-
quently use.
16.
{
Zoom
} key
Changes the reproduction ratio in 1 %
steps.
17.
{
Auto Reduce/Enlarge
} key
Enlarges or reduces the image automati-
cally according to the specified paper
size.
18.
{
Function
} keys
Press to change modes. To use copy func-
tions, press the
{
Copy
} key.
19.
{
Original Type
} key
Press to select the type of your originals.
20.
{
Lighter
} and {
Darker
} keys and
{
Auto Image Density
} key
Adjusts the copy image density.
21.
{
Selection
} keys
Press the key under the item you wish to
select.
22.
<
<
<
<>
>
>
> keys (Cursor keys)
Press to select an item on the panel dis-
play.
23.
Operation panel for facsimile
mode (for machines with optional
fax function)
See the “Facsimile Reference”.
24.
{
Number
} keys
Use to enter the desired number of copies
and data for selected modes.
Use the
{
#
} key to enter data in selected
modes.
25.
{
Start
} key
Press to start copying. Use to set the Auto
Start. See
⇒
P.64 “Auto Start—Entering
Copy Job Settings During The Warm-up Pe-
riod”.
26.
{
Clear/Stop
} key
While entering numbers, press to cancel a
number to have entered. While copying,
press to stop copying.