Audio (input) function section – Panasonic AG-HPX500E User Manual
Page 16
16
C
h
ap
te
r 2 P
ar
ts a
n
d t
h
eir F
u
n
ct
io
n
s
1
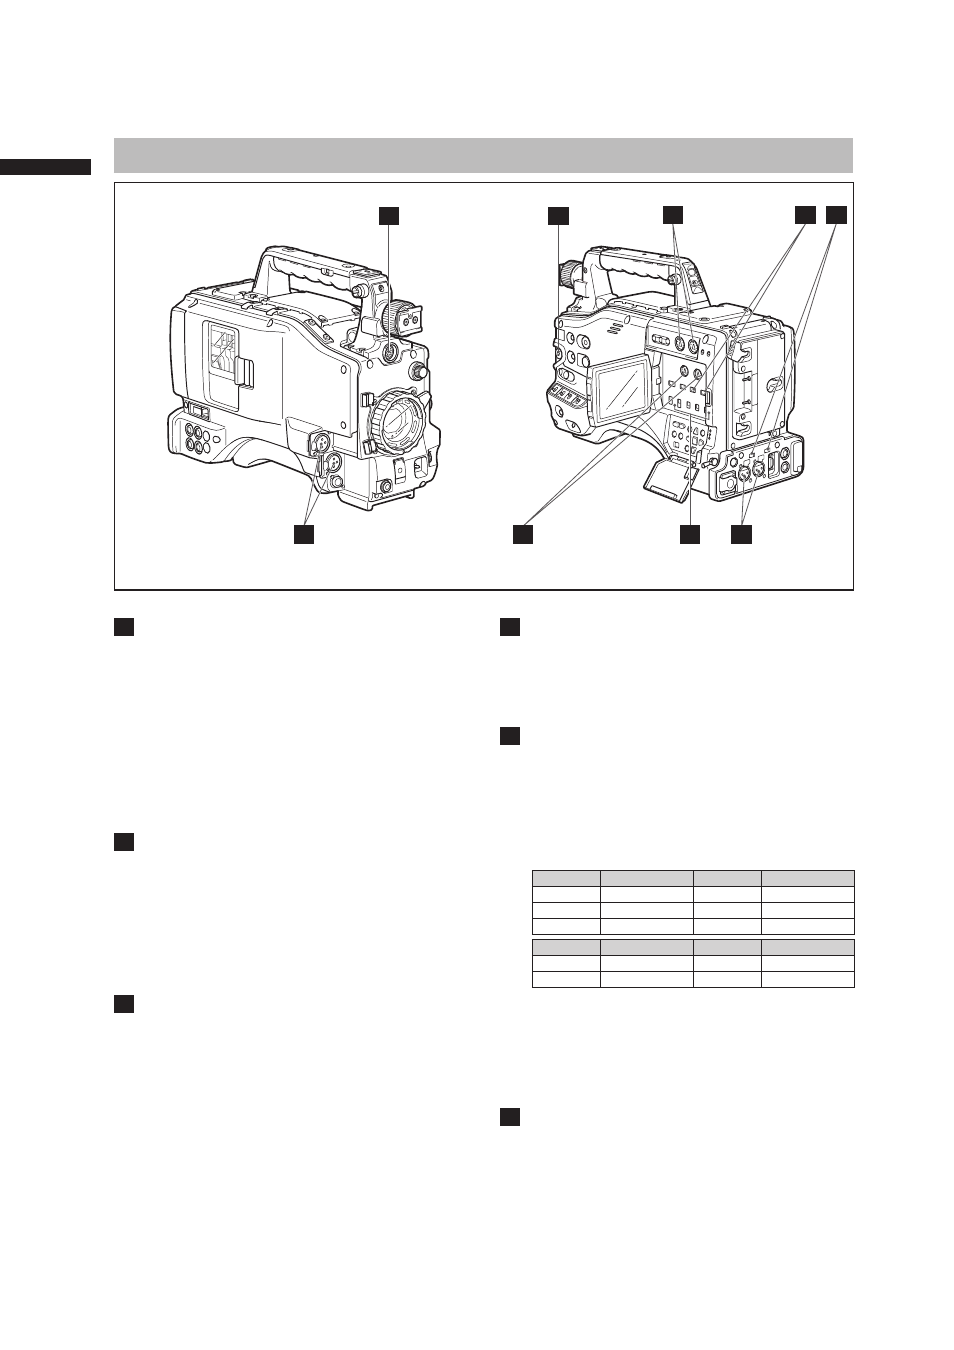
MIC IN (microphone input) jacks
FRONT1/FRONT2 (XLR, 3-pin)
• Connect microphones (optional accessories) to
these jacks. Power for the microphone comes
from this jack.
• A phantom-powered microphone may be
connected. To use a phantom-powered
microphone, set the menu option F.MIC
POWER1/F.MIC POWER2 to ON in the
For details, refer to [Preparing for Audio Input]
(page 98).
2
AUDIO LEVEL CH1/CH2 (audio channel 1
& 2 recording level adjustment) controls
• With the AUDIO SELECT CH1/CH2 switch
positioned to [MAN], these controls can be used
to adjust the recording levels for Audio Channels
1/2.
• Note that the controls are designed to be locked.
For adjustment, each control must be depressed
while turning.
3
AUDIO SELECT CH1/CH2 (audio channel
1 & 2 automatic/manual level adjustment
selector) switch
Use this switch to select recording level control
mode for Audio Channels 1 and 2.
AUTO: Recording level automatically controlled.
MAN: Recording level manually controlled.
4
AUDIO LEVEL CH3/CH 4 (audio channel 3
& 4 recording level adjustment) controls
Set the menu option AUTO LEVEL CH3/AUTO
LEVEL CH4 to OFF in the
5
AUDIO IN (audio input selector) switch
Use this switch to select the signals recorded
through Audio Channels 1 - 4.
FRONT: Signal from the microphone connected
to the MIC IN jack is recorded.
REAR: Signal from the audio device or
microphone connected to the REAR 1/
REAR 2 connector is recorded.
CH1
Input
CH2
Input
FRONT1
FRONT1 jack
FRONT
FRONT2 jack
FRONT2
FRONT2 jack
REAR
REAR2 jack
REAR
REAR1 jack
—
—
CH3
Input
CH4
Input
FRONT
FRONT1 jack
FRONT
FRONT2 jack
REAR
REAR1 jack
REAR
REAR2 jack
With a front microphone (such as AG-MC200G)
connected only to the FRONT2 jack, setting CH1 of
the AUDIO IN switch to FRONT2, setting CH2-CH4
to FRONT and setting the MONITOR SELECT CH1/2
/ CH3/4 selector switch to CH3/CH4 will result in no
sound output to CH3.
6
REAR 1/REAR 2 (audio input channel 1 &
2) connectors (XLR, 3-pin)
Audio devices or a microphone may be
connected here.
For details, refer to [When Using Audio Devices]
(page 99).
Audio (input) Function Section
1
8
6
4
2
3
7
5
9