Before recording, About temporary hdd storage (time shift buffer), Accessing the hdd (hard disk storage) setup menu – Philips DVDR3435H User Manual
Page 28: Continued)
E
n
g
lis
h
8
9
Before Recording
About temporary HDD
storage (Time Shift Buffer)
As soon as you switch on this recorder,
the currently selected TV program will
be stored in a temporary hard disk
storage called ‘TSB’ (Time Shift Buffer),
(up to 6 hours of programs.)
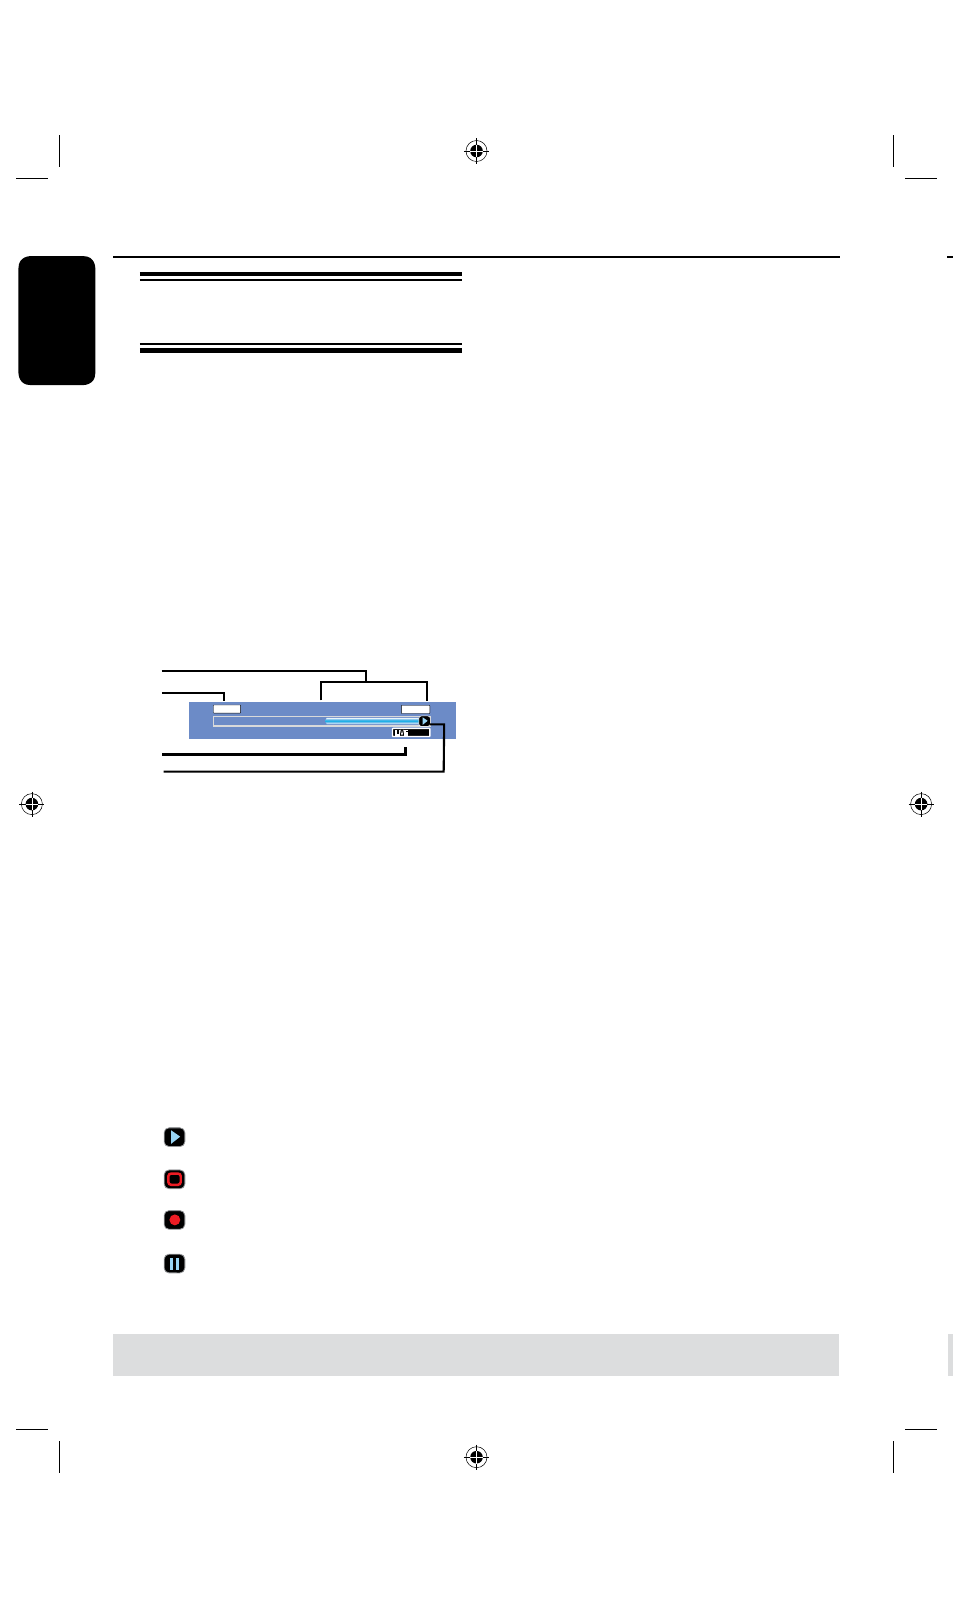
In tuner mode, the Time Shift video bar
will appear on the screen, it indicates the
status and timing of the TV programs
stored in the temporary HDD storage.
You can choose to display or remove the
video bar by pressing the
DISPLAY
key
on the remote control.
LIVE
10:15:36
04:15:36
SP
The Time Shift video bar consists of the
following information :
a
Content temporarily saved in the time
shift buffer.
b
The TV program start time.
Once it has exceeded
6
hours, the
content stored at the beginning will be
deleted and the start time will be updated
accordingly.
c
Status of source of video input.
“LIVE” or the time of current playback
being viewed “HH:MM:SS”.
d
Icon which shows the status of the time
shift buffer.
– playback of content stored in the
time shift buffer.
– marks the beginning of content
recording.
– marks the current recording in
progress.
– the current screen has been paused
from playback. (This will not pause
recording.)
WARNING!
The TV programs stored in the
temporary HDD storage will be deleted
once it has exceeded the storage buffer
or when you press STANDBY-ON
2
to turn off the recorder.
In addition, executing the following
actions will also clear the contents in the
temporary HDD storage:
l
Press
DV on the remote control.
press SOURCE will not delete TSB.
OR
l
Use the option {
Delete HDD } to
erase all contents of your hard disk
storage. See “Before Recording – HDD
Settings” for details.
a
b
c
d
Accessing the HDD (Hard
Disk Storage) Setup Menu
You can preset the behavior of your hard
disk storage of the recorder. This
recorder offers various options for easy
management of your hard disk recording.
A
Press SETUP.
The system setup menu appears.
B
Use keys to highlight
{ SETUP MENU - HDD } and press
to access the menu.
HDD Info
Space Management
Automatic
Save Time Shift Buffer
Delete HDD
Erase Disk
No
SETUP MENU - HDD
Show
OK
OK
C
Use keys to highlight the option and
press OK to access its options.
D
To exit, press .
Before Recording
(continued)
TIPS:
Press to go back to previous menu item.
Press SETUP to exit the menu.
TIPS:
Press DISPLAY to display the time shift video bar or help text.