Manual programmed recordings, Programming a recording (timer), 66 manual programmed recordings – Philips DVD Recorder/Hard Disk DVDR 725H/02 User Manual
Page 71
66
Manual programmed recordings
Preparation:
•) Switch on the TV, and if necessary, select the programme number
for the DVD recorder.
•) Switch on the DVD recorder.
1 Press TIMER s
7
on the remote control.
P
The 'Schedule' screen appears.
a
I will see some information about the
GUIDE Plus+
®
System
b
The GUIDE Plus+
®
System was not installed yet. Read therefore in
the chapter 'The GUIDE Plus+
®
System' the section 'Set up the
GUIDE Plus+
®
System'.
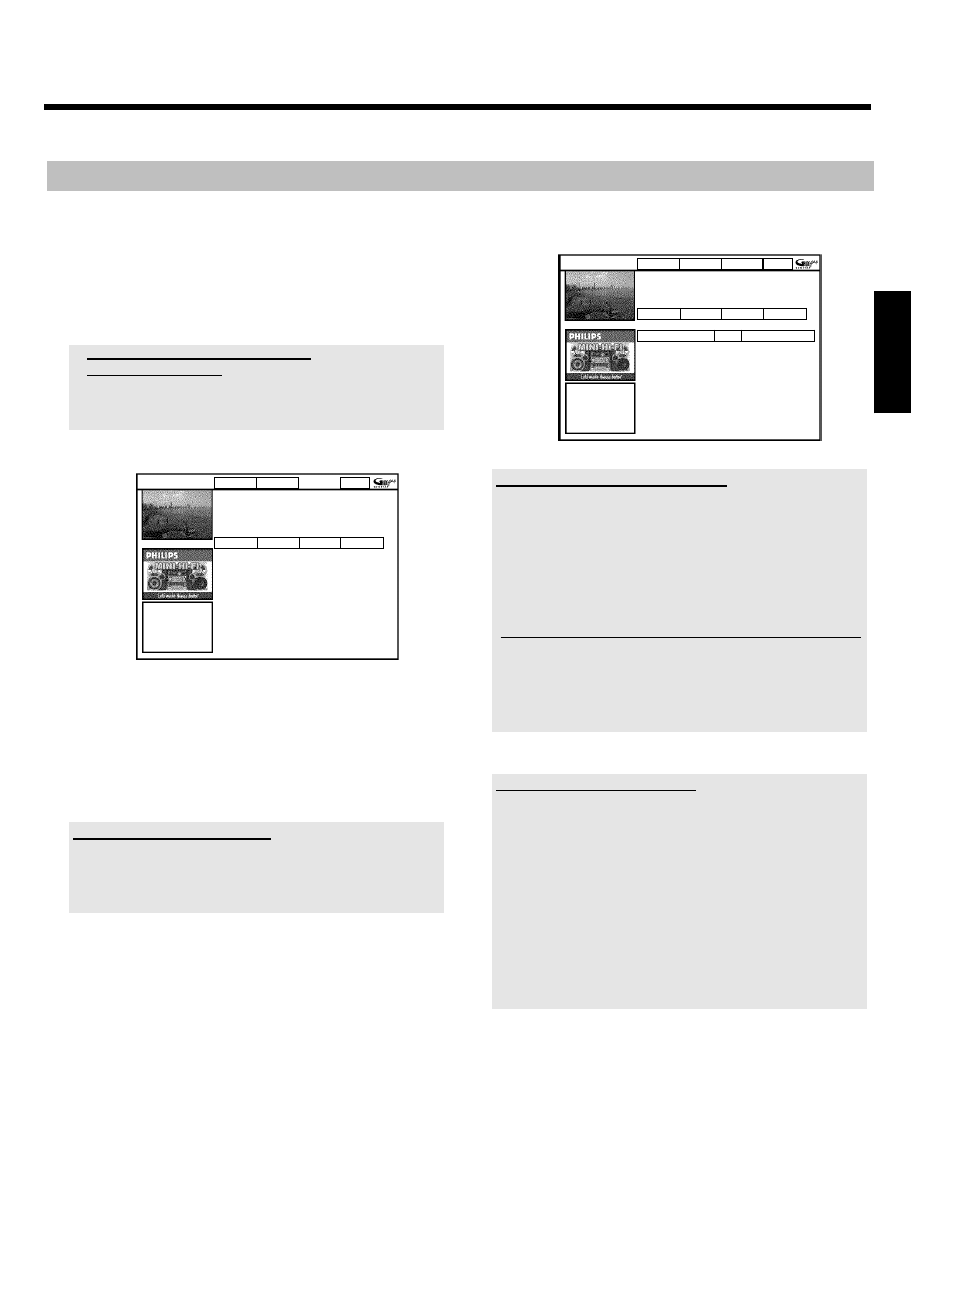
ShowView Manual
Home
Schedule displays programmes for Watch or Record.
Press
Bto use. Press the Red button for ShowView
recording. Press the Green button for Manual
recording. Press
Dfor Search. Press Cfor Info.
Grid
Search
Schedule
Info
No programmes
2 Press the green button
E
.
P
The current date will be displayed.
3 Enter the date using the number buttons 0..9 .
4 Confirm with OK
L
.
How can I correct wrong entries?
If you have already confirmed the entry with OK
L
,you can select
one of the following functions:
Repeat entry: Green colour button
E
Cancel: Red colour button
D
5 Enter the start time for the show using the number buttons 0..9 .
Confirm with OK
L
.
6 Enter the finish time for the TV show using the number buttons
0..9 Confirm with OK
L
.
7 Check the data you entered.
O
If necessary, go back a position to change entered data using
the green function button
E
.
8 Enter the programme number of the TV channel using the number
buttons 0..9 .
Frequency VPS/PDC
Home
,
Grid
Search
Schedule
Info
/Record
Freq. Timing
21-Oct 20:00
21:30 BBC1
Once +0
Selecting a TV channel from the listing
You can only use this function if data from the GUIDE Plus+
®
system is
already available.
- Press the yellow function button
F
. You will see an overview of all
channels
- Select the TV channel you want to program using
D
K
,
C
M
,
B
O
,
A
I
. You can browse back or forth using
CHANNEL
q
P
, CHANNEL
r
S
.
Programme numbers of the scart sockets 'EXT1' and 'EXT2'
You can also program recordings from external sources.
Control of the recording with 'VPS/PDC' is not possible from
the scart sockets.
- Select the corresponding input socket using
B
O
or
A
I
.
'EXT1' ( EXT1 TO TV-I/O
N
),'EXT2' ( EXT2 AUX-I/O
M
).
9 Confirm with OK
L
.
Changes using the colour buttons
You can use the colour function buttons to make the following settings.
Make sure that the right tile is selected.
'Frequency': Green function button
E
'Once': single recordings
'M-F': Repeated daily recordings (Monday to Friday).
'Mon': Repeated weekly recordings (every week on the
same day,e.g. Monday).
Activate VPS/PDC ('Timing'): Yellow function button
F
Using this button,you can activate
(appears) or deactivate ('VPS/PDC'
disappears) 'VPS/PDC' in tile
'Timing'
0 To end, press TIMER s
7
.
A To find out how you can go back and change the data, read the
section on 'How to change or delete a programmed recording
(TIMER)'
If any of the TIMER blocks are in use, 'TIMER' will light up on the
recorder display.
ENGLISH
Programming a recording (TIMER)