Panasonic KX-PS8100 User Manual
Page 63
63
Setup
3
Make sure the SCSI ID No. of the scanner is 2 (default
setting).
•
If other devices are connected to the computer, make sure that
each SCSI device has a different ID No.
•
To change the scanner’s ID No., use the ID No. switches (#1, #2,
#3) located on the back of the scanner. See Table 1 on
4a
If the scanner is the last device, set its terminator switch
(#4) to ON. Go to step 5.
4b
If the scanner is not the last device, make sure the
terminator switch (#4) is set to OFF (default setting).
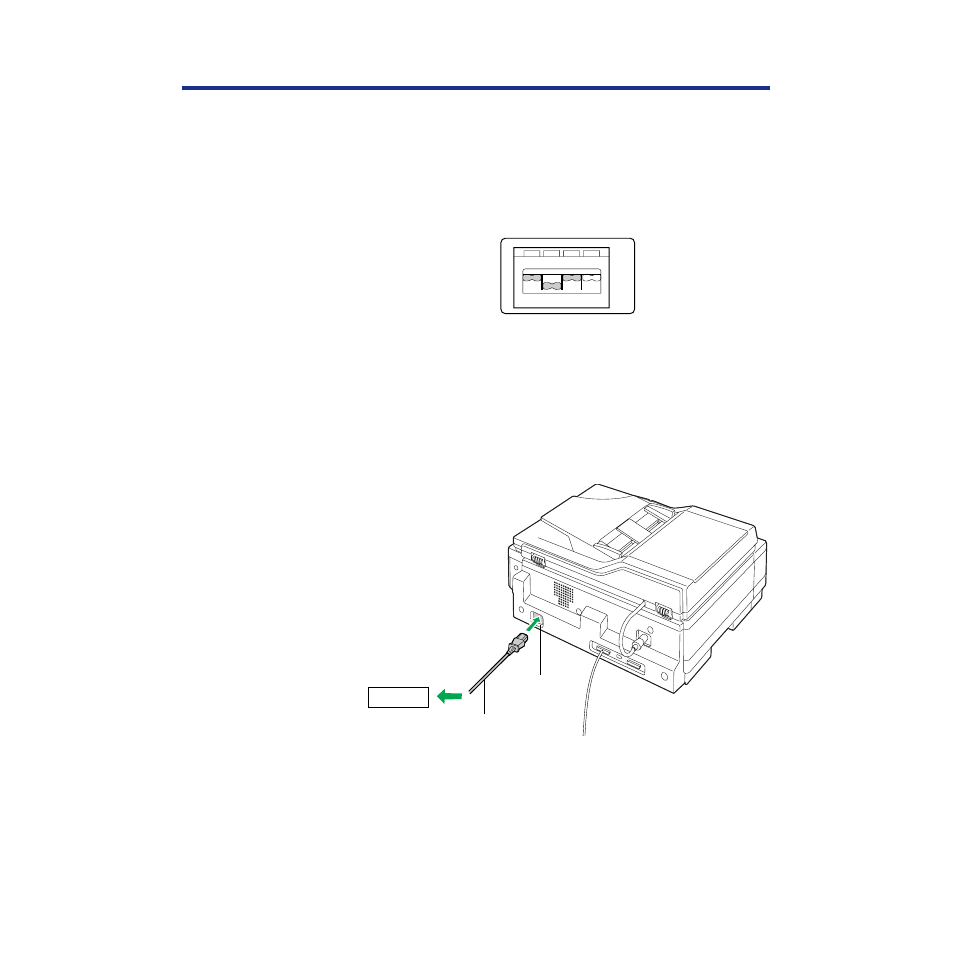
5
Connect the power cord to the scanner’s AC inlet and to
an AC outlet.
1
2
3
4
ON
AC inlet
Power cord
AC outlet
See also other documents in the category Panasonic Printers:
- DP-4510 (12 pages)
- KX-MB271 (96 pages)
- 3000 (138 pages)
- KX-P2023 (88 pages)
- KX-FP205 (56 pages)
- KX-PW93CL (24 pages)
- DP-3000 (180 pages)
- KX-FG2451 (76 pages)
- KX-P7510 (68 pages)
- KX-FLB751 (84 pages)
- KX-FLB756AL (88 pages)
- Panafax UF-5950 (158 pages)
- KX-MB2000 (116 pages)
- KX-PW501DL (20 pages)
- KX-PW607DL (24 pages)
- DP-200 (63 pages)
- KX-PW95CL (24 pages)
- KX-PW201CL (24 pages)
- KX-CL500 (6 pages)
- KX-CL500 (32 pages)
- 150FP (153 pages)
- SV-P20U (62 pages)
- DP-8130 (6 pages)
- KV-SS010 (16 pages)
- KX-FT33HK (74 pages)
- KX-MB2025EX (124 pages)
- FP7750 (64 pages)
- KX-RC105 (132 pages)
- DP-3530 (6 pages)
- KX-FPC165 (112 pages)
- KX-P4440 (152 pages)
- KX-P1131E (49 pages)
- KX-FLB882CX (4 pages)
- WORKiO KX-CL500 (1 page)
- KX-FLM600 (156 pages)
- DA-AR250 (161 pages)
- KX-P3626 (76 pages)
- KX-P8410 (165 pages)
- DP-8016P (4 pages)
- DP2000 (44 pages)
- KX-PW708DLE5 (20 pages)
- KX-MC6260 (2 pages)
- KX-FLB811 (106 pages)
- KX-P6100 (44 pages)
- WORKIO CL500 (5 pages)