Lexmark C520 User Manual
Page 88
Replacing the fuser after long-term storage
88
Maintaining the printer
3
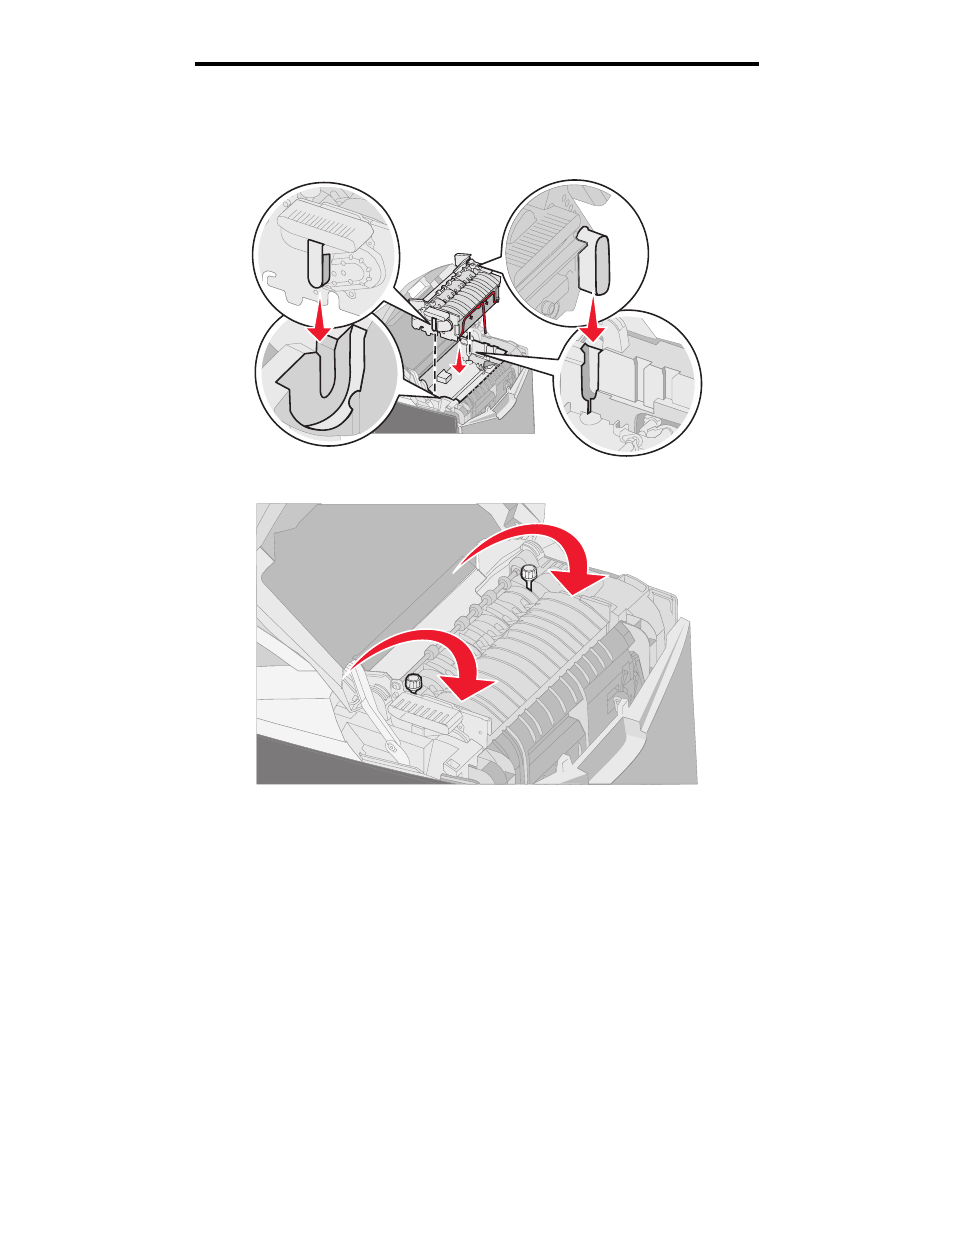
Grasp the fuser by the handles and align it with its opening. Align the tab on the right with the groove. Align the
u-shaped part on the left of the fuser with the u-shaped groove.
4
Gently lower the fuser into place. Push it down until it is firmly seated.
5
Turn the thumbscrews clockwise to tighten them.
Warning:
Make sure the thumbscrews are tightened fully before closing the upper door.
6
Close the upper door.
7
Turn the printer on.
If the fuser is installed improperly or it is missing,
87 Fuser Missing
appears on the operator panel. If this message
appears, remove the fuser, and reinstall it correctly.
See also other documents in the category Lexmark Printers:
- E260d (142 pages)
- 6600 Series (173 pages)
- 10N0227 (1 page)
- Z12 (2 pages)
- 301 (144 pages)
- NO. 35 (1 page)
- Z65n (111 pages)
- dn2 (217 pages)
- 10E (144 pages)
- Z2300 (54 pages)
- 230 (213 pages)
- 310 Series (2 pages)
- PRO700 (24 pages)
- C 720 (18 pages)
- X656 MFP (104 pages)
- Prospect Pro207 (27 pages)
- 337 (258 pages)
- OptraImage 242 (207 pages)
- T64x (6 pages)
- C524 (146 pages)
- 4098-001 (70 pages)
- 1200 Series (21 pages)
- X650 Series (8 pages)
- 5300 (179 pages)
- 302 (274 pages)
- 4549 (235 pages)
- 202 (320 pages)
- 4076-0XX (89 pages)
- 10N0016 (1 page)
- 5025 (171 pages)
- 1361760 (1 page)
- C 546dtn (6 pages)
- Interpret S400 (40 pages)
- x6575 (2 pages)
- 27S2156-001 (2 pages)
- MENUS AND MESSAGES C522 (55 pages)
- Z35 (101 pages)
- Z25 (24 pages)
- series x5100 (77 pages)
- Z82 (105 pages)
- 2500 Series (76 pages)
- 1200 (208 pages)
- Z33 (114 pages)
- 7600 Series (181 pages)