Removing an optional hard disk – Lexmark C520 User Manual
Page 129
Removing an optional hard disk
129
Installing and removing options
7
Press the ribbon cable connector into the connector on the system board.
8
Flip the hard disk over, and then press the three posts on the mounting plate into the holes on the system board.
The hard disk snaps into place.
9
Replace the metal plate. See Replacing the system board metal plate.
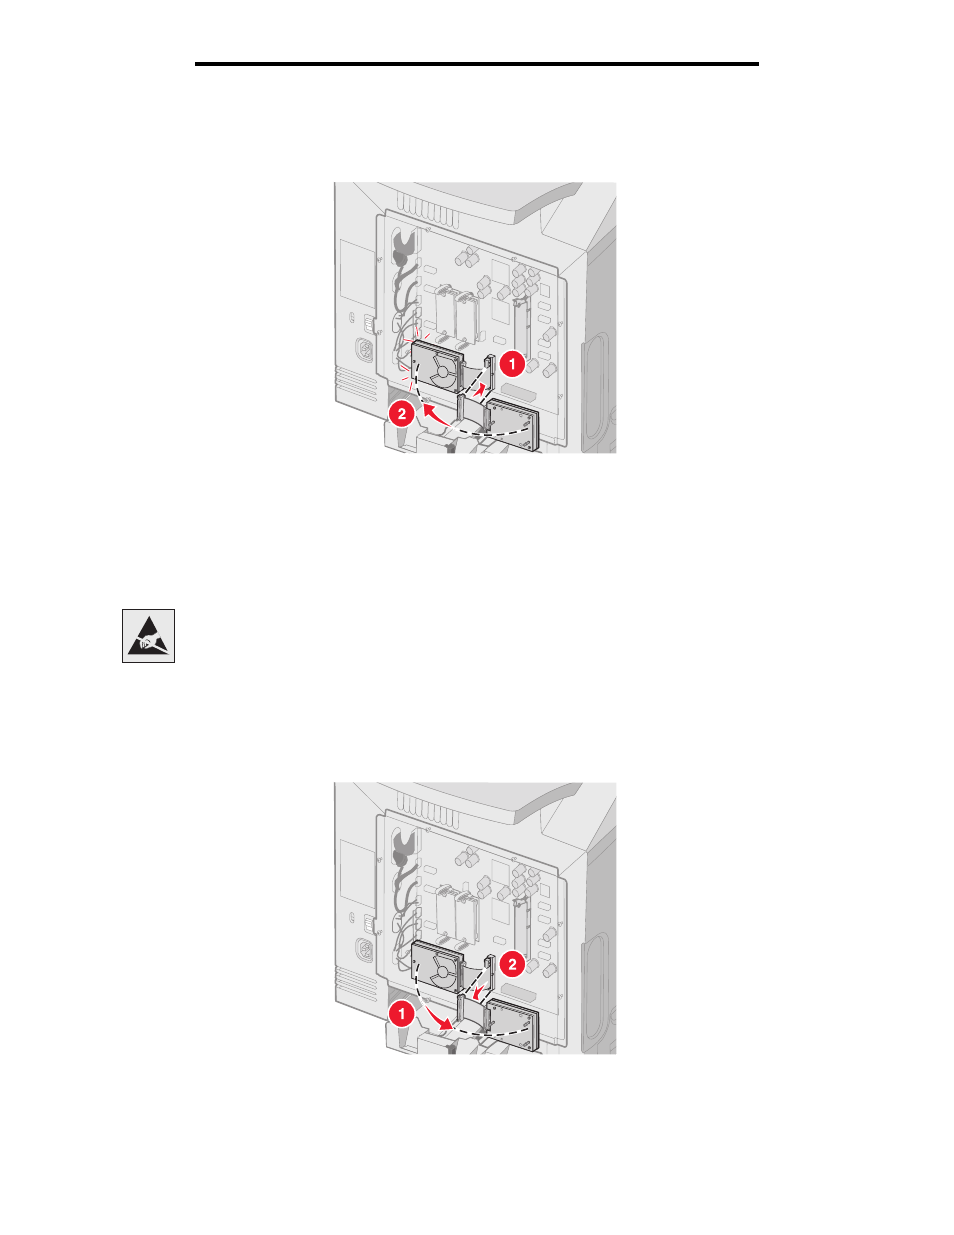
Removing an optional hard disk
1
Remove the system board metal plate (see Accessing the system board).
2
Pull the three posts on the mounting plate from the holes on the system board, and flip the hard disk over. Pull the
ribbon cable connector from the connector on the system board.
3
Replace the metal plate. See Replacing the system board metal plate.
Warning:
Hard disks are easily damaged by static electricity. Touch something metal on the
printer before touching a disk.
- E260d (142 pages)
- 6600 Series (173 pages)
- 10N0227 (1 page)
- Z12 (2 pages)
- 301 (144 pages)
- NO. 35 (1 page)
- Z65n (111 pages)
- dn2 (217 pages)
- 10E (144 pages)
- Z2300 (54 pages)
- 230 (213 pages)
- 310 Series (2 pages)
- PRO700 (24 pages)
- C 720 (18 pages)
- X656 MFP (104 pages)
- Prospect Pro207 (27 pages)
- 337 (258 pages)
- OptraImage 242 (207 pages)
- T64x (6 pages)
- C524 (146 pages)
- 4098-001 (70 pages)
- 1200 Series (21 pages)
- X650 Series (8 pages)
- 5300 (179 pages)
- 302 (274 pages)
- 4549 (235 pages)
- 202 (320 pages)
- 4076-0XX (89 pages)
- 10N0016 (1 page)
- 5025 (171 pages)
- 1361760 (1 page)
- C 546dtn (6 pages)
- Interpret S400 (40 pages)
- x6575 (2 pages)
- 27S2156-001 (2 pages)
- MENUS AND MESSAGES C522 (55 pages)
- Z35 (101 pages)
- Z25 (24 pages)
- series x5100 (77 pages)
- Z82 (105 pages)
- 2500 Series (76 pages)
- 1200 (208 pages)
- Z33 (114 pages)
- 7600 Series (181 pages)