Lexmark 24XX-100 User Manual
Page 100
4-40
Service Manual
24xx
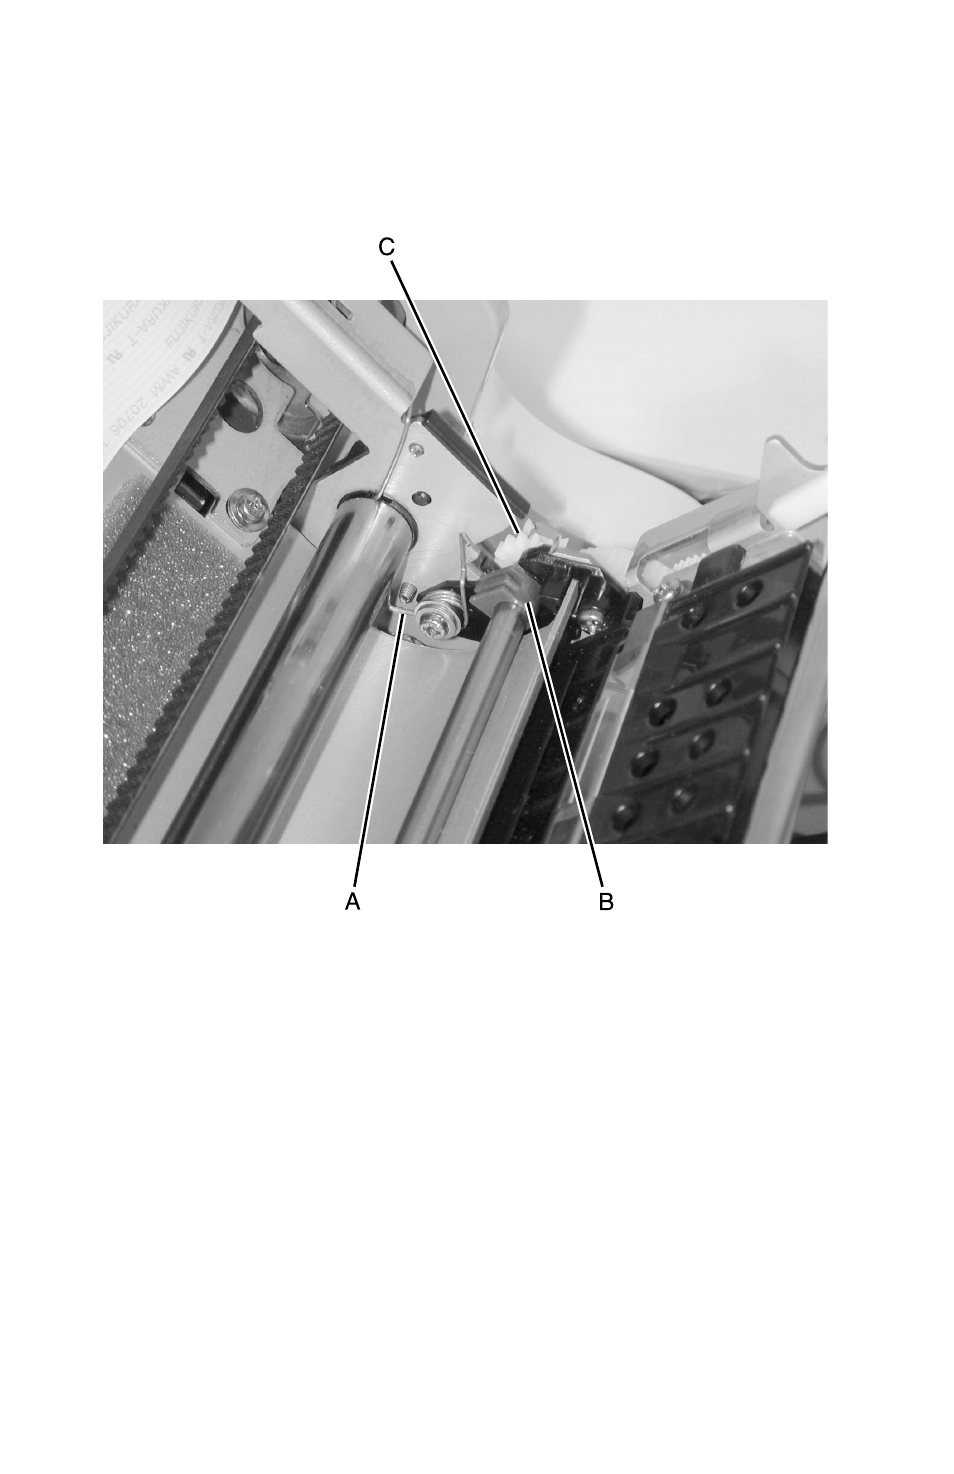
9. Unhook the spring clip [A] from the left end of the lower pinch
roller shaft and push it off the gray slotted spring block [B]
toward the back of the printer, as shown.
10. Slide the carrier to the center of the printer.
11. Slide the gray slotted spring blocks [B], on each end, toward the
center of the roller shaft, taking care that the blocks remain with
the shaft during removal.
12. Slide the carrier to the right side of the printer.
13. While holding the lower pinch roller shaft by the gear [C], move
the shaft to the left approximately one half inch. Lift the shaft up
and to the back of the printer and carefully remove the lower
pinch roller and shaft.
14. Be sure to perform the Printhead-to-Platen Gap Adjustment
procedure. Go to
- E260d (142 pages)
- 6600 Series (173 pages)
- 10N0227 (1 page)
- Z12 (2 pages)
- 301 (144 pages)
- NO. 35 (1 page)
- Z65n (111 pages)
- dn2 (217 pages)
- 10E (144 pages)
- Z2300 (54 pages)
- 230 (213 pages)
- 310 Series (2 pages)
- PRO700 (24 pages)
- C 720 (18 pages)
- C520 (145 pages)
- X656 MFP (104 pages)
- Prospect Pro207 (27 pages)
- 337 (258 pages)
- OptraImage 242 (207 pages)
- T64x (6 pages)
- C524 (146 pages)
- 4098-001 (70 pages)
- 1200 Series (21 pages)
- X650 Series (8 pages)
- 5300 (179 pages)
- 302 (274 pages)
- 4549 (235 pages)
- 202 (320 pages)
- 4076-0XX (89 pages)
- 10N0016 (1 page)
- 5025 (171 pages)
- 1361760 (1 page)
- C 546dtn (6 pages)
- Interpret S400 (40 pages)
- x6575 (2 pages)
- 27S2156-001 (2 pages)
- MENUS AND MESSAGES C522 (55 pages)
- Z35 (101 pages)
- Z25 (24 pages)
- series x5100 (77 pages)
- Z82 (105 pages)
- 2500 Series (76 pages)
- 1200 (208 pages)
- Z33 (114 pages)
- 7600 Series (181 pages)