Ribbon drive motor assembly removal, Ribbon drive motor assembly removal -35 – Lexmark 4227-X00 User Manual
Page 98
Repair Information
4-35
4227-X00
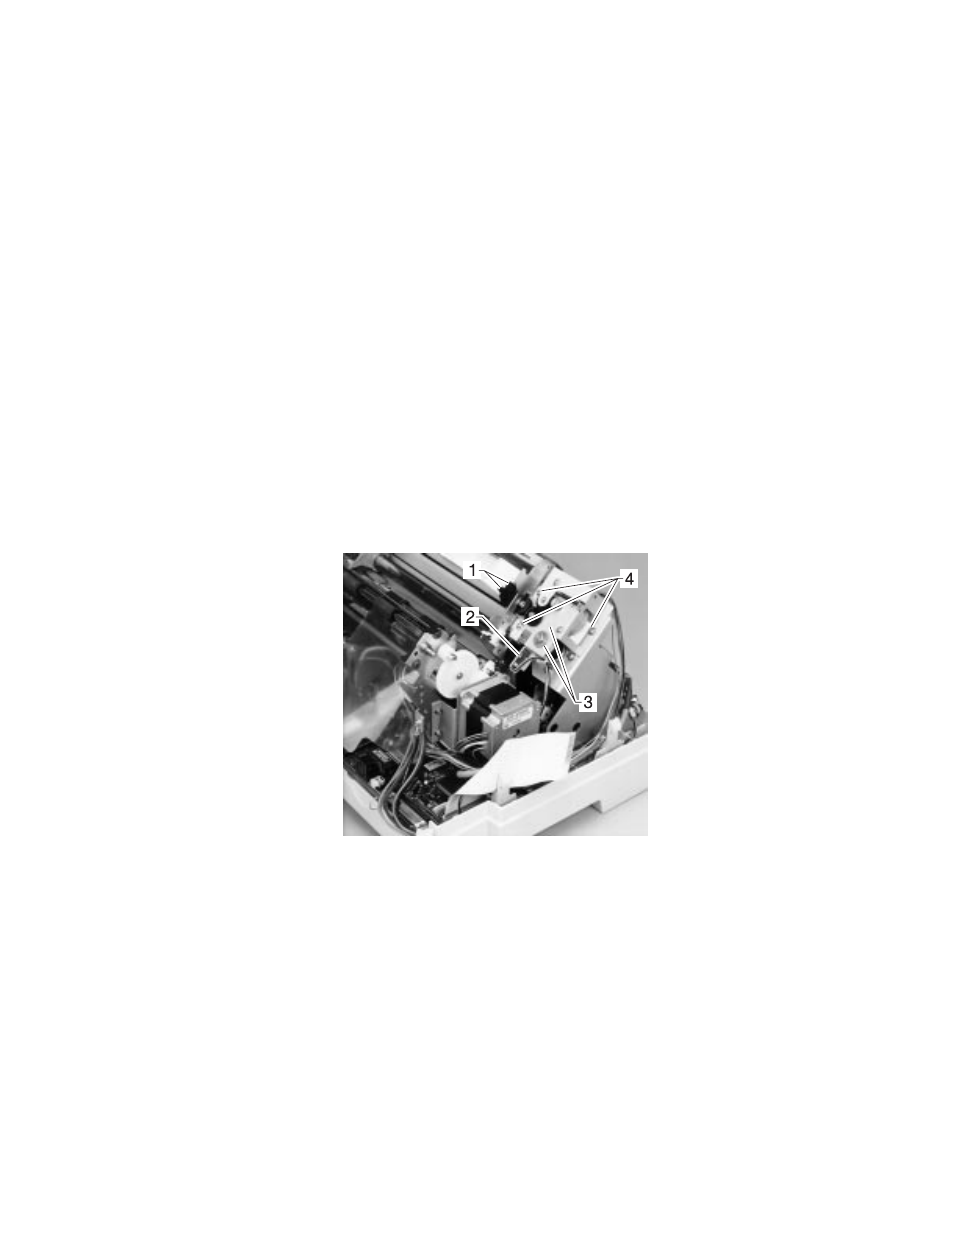
Ribbon Drive Motor Assembly Removal
1. Remove the top cover.
See
“Top Cover Removal” on page 4-6
.
2. Remove the sub logic board.
3. Remove the ribbon drive post cover and the ribbon drive post
[1].
4. Remove the auto gap sensor [2] from the motor bracket.
5. Disconnect ribbon motor connector CN19 from the main logic
board.
6. Remove the carrier motor bearing retainer and bearing [3] from
the ribbon motor bracket.
7. Remove the three screws [4] holding the ribbon drive motor
bracket and remove the ribbon drive motor assembly.
See also other documents in the category Lexmark Printers:
- E260d (142 pages)
- 6600 Series (173 pages)
- 10N0227 (1 page)
- Z12 (2 pages)
- 301 (144 pages)
- NO. 35 (1 page)
- Z65n (111 pages)
- dn2 (217 pages)
- 10E (144 pages)
- Z2300 (54 pages)
- 230 (213 pages)
- 310 Series (2 pages)
- PRO700 (24 pages)
- C 720 (18 pages)
- C520 (145 pages)
- X656 MFP (104 pages)
- Prospect Pro207 (27 pages)
- 337 (258 pages)
- OptraImage 242 (207 pages)
- T64x (6 pages)
- C524 (146 pages)
- 4098-001 (70 pages)
- 1200 Series (21 pages)
- X650 Series (8 pages)
- 5300 (179 pages)
- 302 (274 pages)
- 4549 (235 pages)
- 202 (320 pages)
- 4076-0XX (89 pages)
- 10N0016 (1 page)
- 5025 (171 pages)
- 1361760 (1 page)
- C 546dtn (6 pages)
- Interpret S400 (40 pages)
- x6575 (2 pages)
- 27S2156-001 (2 pages)
- MENUS AND MESSAGES C522 (55 pages)
- Z35 (101 pages)
- Z25 (24 pages)
- series x5100 (77 pages)
- Z82 (105 pages)
- 2500 Series (76 pages)
- 1200 (208 pages)
- Z33 (114 pages)
- 7600 Series (181 pages)