Image adjustment, Video input image adjustment – Sanyo Multimedia PLC-XD2600 User Manual
Page 40
40
Video Input
Image Adjustment
1
2
Press the Point
◄
button to decrease the contrast; press the
Point
►
button to increase the contrast (from 0 to 63).
Press the Point
◄
button to decrease the brightness; press
the Point
►
button to increase the brightness (from 0 to 63).
Contrast
Brightness
Press the Point
◄
button to lighten red tone; press the Point
►
button to deepen red tone (from 0 to 63).
white balance (Red)
Press the Point
◄
button to lighten green tone; press the
Point
►
button to deepen green tone (from 0 to 63).
white balance (Green)
Press the Point
◄
button to lighten blue tone; press the
Point
►
button to deepen blue tone (from 0 to 63).
white balance (Blue)
Use the Point
◄►
buttons to select the desired Color temp.
level (High, Mid, Low, or XLow).
Color temp .
Press the Point
◄
button decrease the intensity of the color;
press the Point
►
button increase the intensity of the color
(from 0 to 63).
Press the Point
◄►
buttons to adjust the tint value to get a
proper color balance (from 0 to 63).
Color
Tint
✔
Note:
• When the
white balance Red, Green or Blue is adjusted, the Color temp. level will change to User.
• Tint cannot be selected when the video system is
PAL, SECAM, PAL-M or PAL-N (p.38).
• When
Blackboard(Green) or Colorboard is selected in Image select, Color temp . will change to
Blackboard or Colorboard.
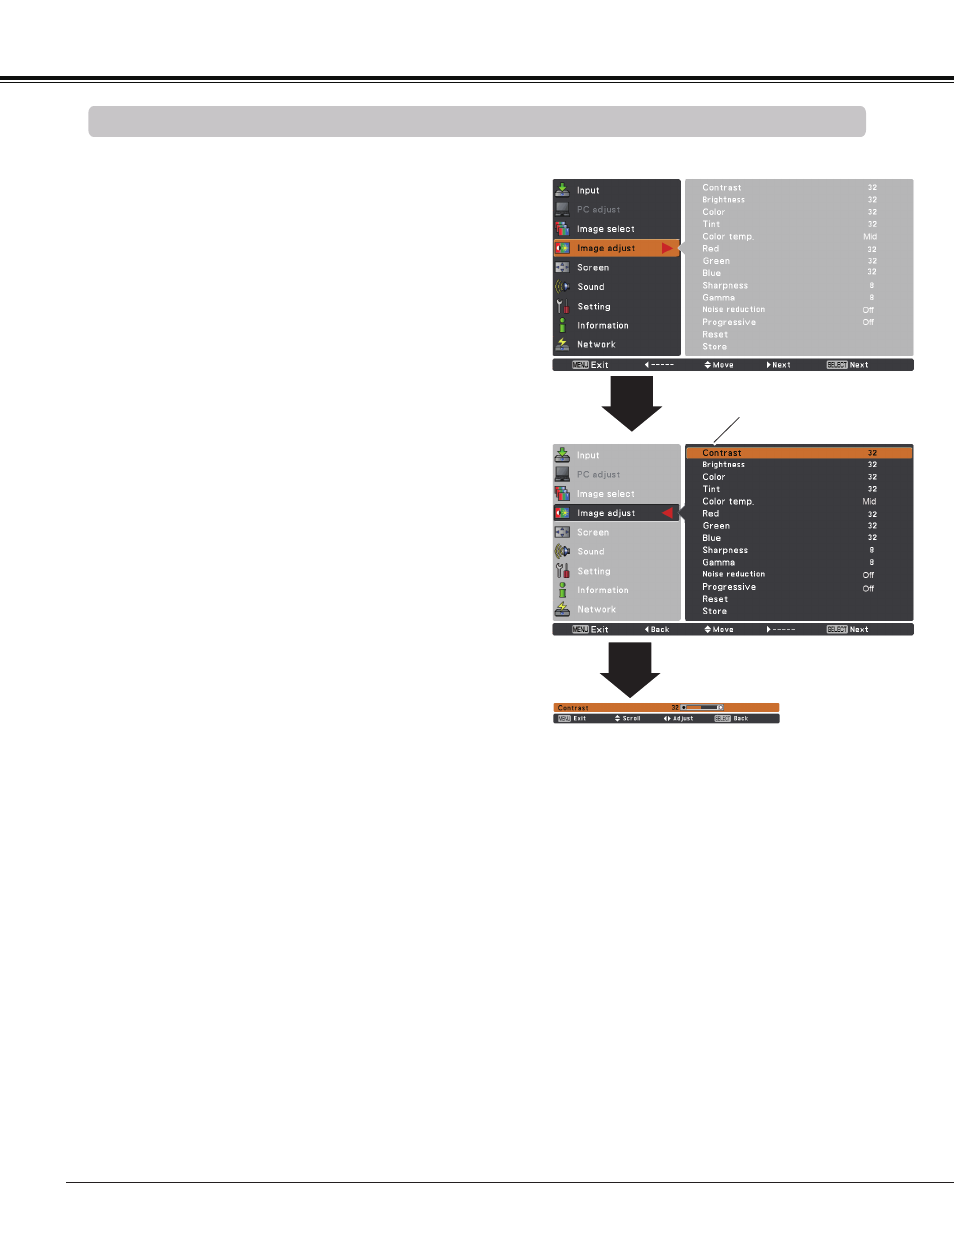
Image Adjust Menu
Press the MENU button to display the On-Screen
Menu. Use the Point
▲▼
buttons to select
Image
adjust and then press the Point
►
or the
SELECT
button.
Use the Point
▲▼
buttons select the desired item
and then press the SELECT button to display the
adjustment dialog box. Use the Point
◄►
buttons to
adjust the setting value.
Selected Image mode
Use the Point
◄►
buttons to adjust the
setting value.