English – Sanyo VPC-HD1010GX User Manual
Page 157
English
138
NORMAL
/PLA
YB
A
C
K
4
Specify the start point of the extract.
h Use the procedure below to specify the frame from which the video
clip extract will start.
h Play the video clip until approximately the desired point, pause the
video clip, then play the video clip one frame at a time, stopping at the
start point of the extract. This will be the first frame of the extract.
h If the start point of the video clip is also the start point of the extract,
proceed to step 5.
Play:
After pausing playback, press and hold the SET button to the right for
about 2 seconds for forward playback, or to the left for reverse
playback.
Pause:
During playback, press the SET button.
Accelerated playback:
During playback, toggle the SET button to the left or right to change
the playback speed.
Single frame:
After pausing playback, toggle the SET button to the right to move
forward one frame, or to the left to move back one frame.
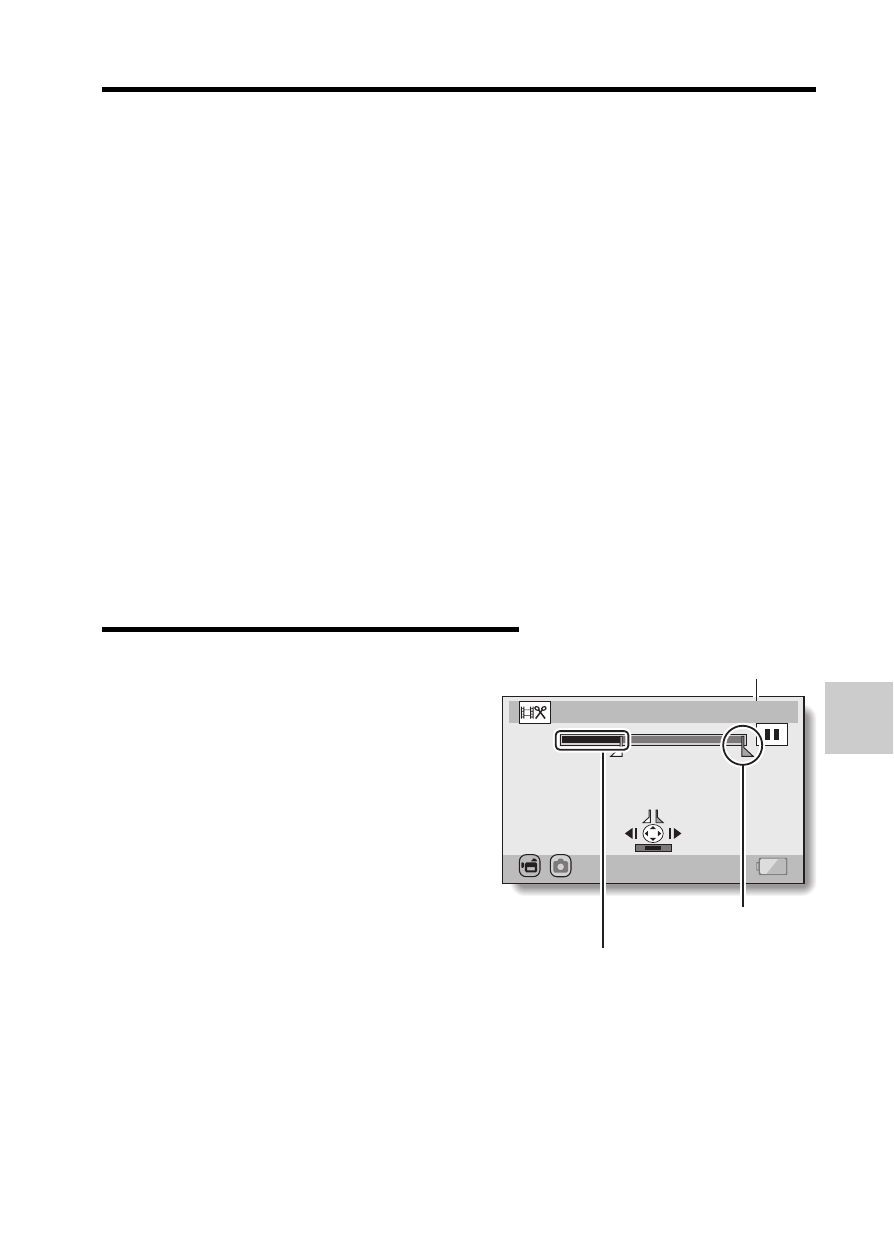
5
Toggle the SET button up.
h The start point of the video clip
extract is set, and the screen to
specify the end point appears.
h Specify the end point of the
extract by following the same
procedure as in step 5.
h Each time the SET button is
toggled down, the sections to
delete and the sections to
save are reversed.
2 Specify the end point of the
extract. The frame following the
end point of the extract will be
the start point of the latter portion
to be joined.
00:00:06
CUT
SAVE
/
End point
Portion to be deleted
Approximate playback time