Making scanner settings, P.22 – Savin 1075 User Manual
Page 26
Preparations for Use as a Network Scanner
22
2
BBBB
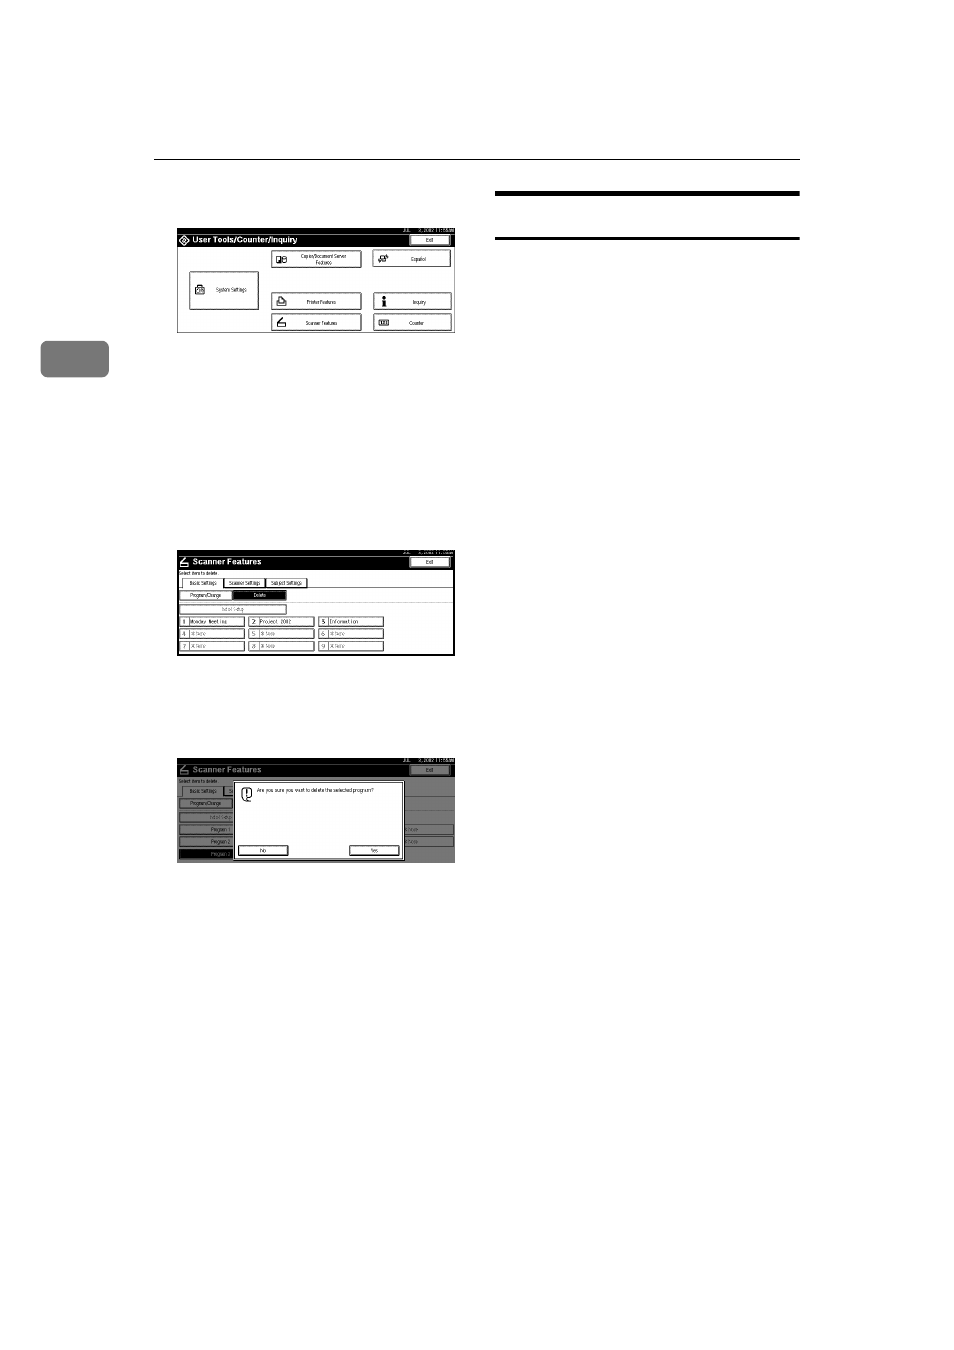
Press [Scanner Features].
The Scanner Features screen is dis-
played.
CCCC
Verify that the [Basic Settings] tab
is shown.
DDDD
Press [Delete].
EEEE
Select the setting you want to de-
lete.
A confirmation message is dis-
played.
FFFF
Press [Yes].
The selected scan setting is delet-
ed.
GGGG
Press [Exit].
The screen returns to the User
Tools/Counter/Inquiry.
HHHH
Press [Exit].
The main menu is shown again.
Making Scanner Settings
This section explains how to switch
from network TWAIN scanner mode
to network delivery scanner or docu-
ment server mode, and how to set the
compression of image data and initial
values for setting originals.
The scanner settings consist of the fol-
lowing. For the list about settings and
factory defaults, see p.17 “Scanner
settings”.
❖
❖
❖
❖ Send/Store Connection Timeout
When using the machine as a net-
work delivery scanner or docu-
ment server, scanning request to
the machine as a TWAIN scanner
will switch the machine to the net-
work TWAIN scanner mode. This
setting determines the delay until
the machine switches to network
TWAIN scanner mode.
• Selecting [Immediate] causes the
network TWAIN scanner mode
to be activated at once.
• When you select [Set Time], you
can enter the delay time with
the number keys (3 - 30 sec-
onds). When the TWAIN scan-
ner mode is activated, only the
time specified here passes from
the last key operation.
❖
❖
❖
❖ Compression (Black & White)
This setting determines whether
image data read with the black-
and-white setting is to be com-
pressed. Compression reduces the
time required for transferring the
scan data to the computer.