Procedure), The same wiring closet – Juniper Networks EX4200 User Manual
Page 131
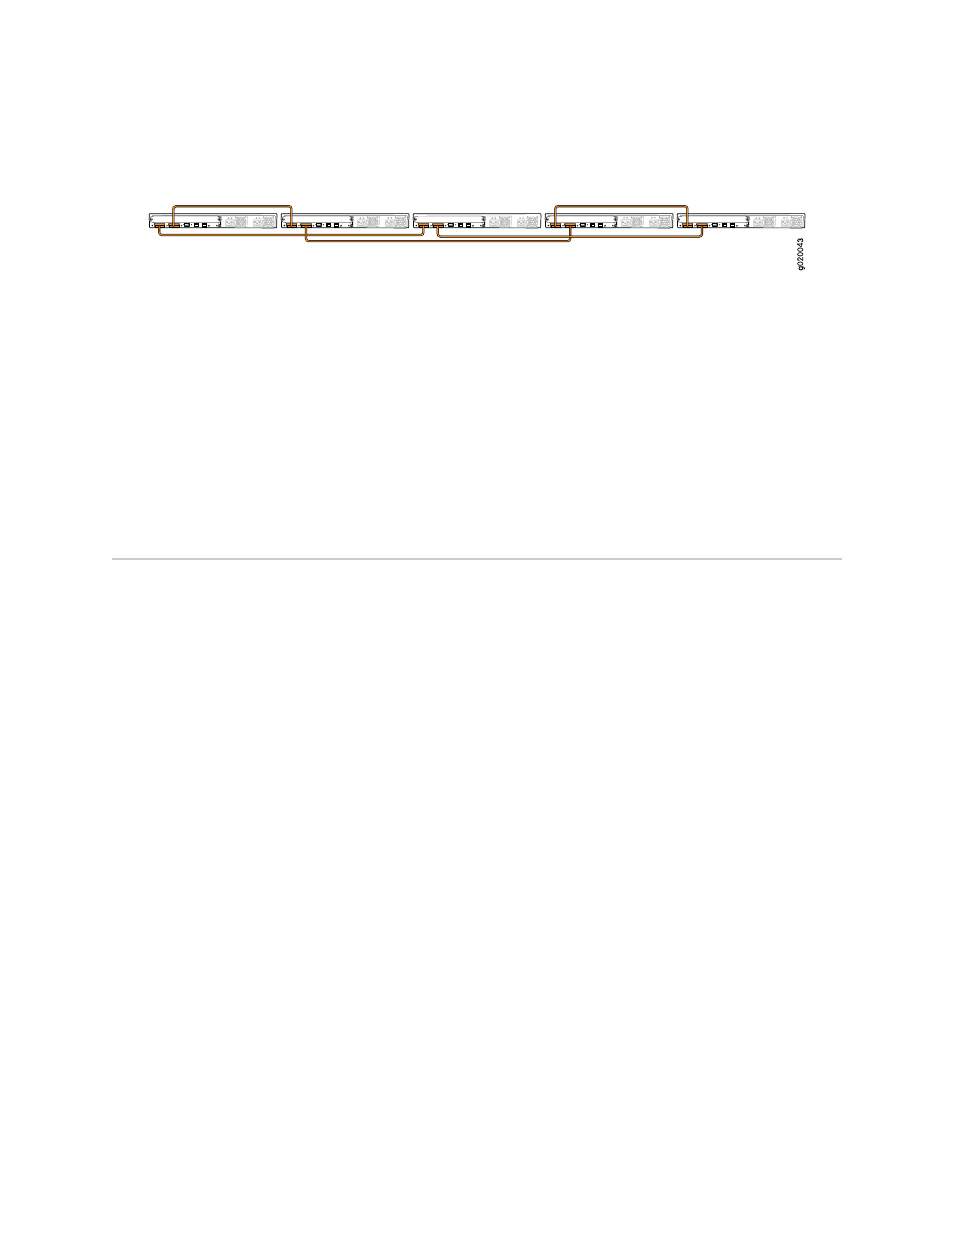
Figure 35: EX4200 Switches Mounted on Adjacent Racks and Connected in a Ring
Topology Using Medium and Long Cables: Option 2
Related Topics
■
Understanding Virtual Chassis Hardware Configuration on an EX4200 Switch on
page 101
■
Understanding Virtual Chassis Components
■
Planning the Virtual Chassis on page 102
■
Virtual Chassis Ports Connector Pinout Information for EX4200 Switches on
page 74
■
Example: Configuring a Virtual Chassis Interconnected Across Multiple Wiring
Closets
Adding a New Switch to an Existing Virtual Chassis Configuration (CLI Procedure)
You can add one or more EX4200 switches to an existing Virtual Chassis configuration.
Up to ten EX4200 switches can be included within a Virtual Chassis configuration.
You can add the new switches to either type—nonprovisioned or preprovisioned—of
Virtual Chassis configuration. See Configuring a Virtual Chassis (CLI Procedure) for
descriptions of these types.
To add a switch to an existing Virtual Chassis configuration, use the procedure that
matches what you need to accomplish:
■
■
■
Adding a New Switch to an Existing Virtual Chassis Configuration Within the Same Wiring
Closet
Before you begin, be sure you have:
■
Mounted the new switch in a rack.
■
Confirmed that the new switch is powered off.
■
If you are expanding a preprovisioned configuration, made a note of the serial
number (on the back of the switch). You will need to edit the Virtual Chassis
configuration to include the serial number of the new member switch.
■
If you are expanding a preprovisioned configuration, edited the existing Virtual
Chassis configuration to include the serial number of the new member switch.
Adding a New Switch to an Existing Virtual Chassis Configuration (CLI Procedure)
■
105
Chapter 8: Planning the Virtual Chassis