Connecting to a video titler, Make connections, Prepare playing deck – JVC SR-VS20EK User Manual
Page 62: Prepare recording deck, Locate start point, Prepare video titler, Engage record-pause mode, System connections (cont.)
62
1
2
3
4
5
6
7
8
9
1
2
1
2
3
0
3
4
4
When you edit from the DV deck to the VHS deck (or from the
VHS deck to the DV deck), you can enter a title to a scene by
connecting a video titler.
Connecting To
A Video Titler
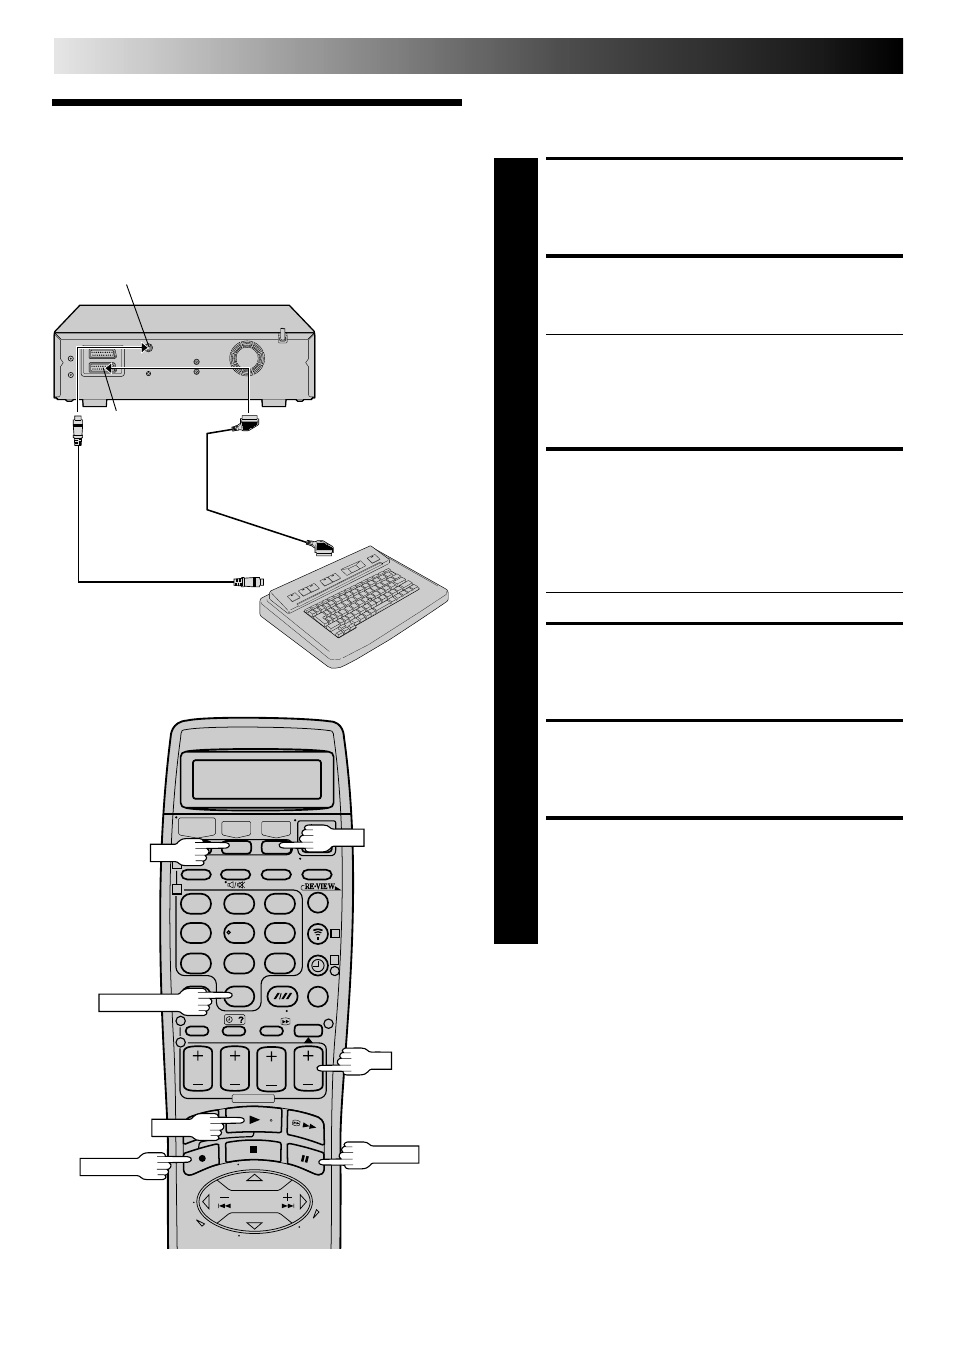
MAKE CONNECTIONS
1
Connect the recorder and the video titler as shown in
the illustration in the left column.
PREPARE PLAYING DECK
2
Insert a cassette for playback and make the title you
want to display.
● When using the DV deck as the source player, set
"S-VHS/AUDIO OUT" to "DV" (
੬
pg. 51).
When using the VHS deck as the source player, set
"S-VHS/AUDIO OUT" to "VHS" (
੬
pg. 51).
● For details of making a title, refer to the instruction
manual for the video titler.
PREPARE RECORDING
DECK
3
Insert a cassette for recording and press DV or VHS for
the recording deck.
To set recording deck's input mode, press NUMBER key
"0" and /or PR to select "L-2".
● Set "L-2 SELECT" to "A/V" (
੬
pg. 50).
LOCATE START POINT
4
Press DV or VHS for the playing deck.
Press PLAY to start playback and find the beginning of
the scene you want to edit, then press PAUSE.
PREPARE VIDEO TITLER
5
Prepare the video titler so that the title can be dis-
played.
ENGAGE RECORD-PAUSE
MODE
6
Press DV or VHS for the recording deck, then press and
hold PAUSE and press RECORD so that the recording
deck enters its Record-Pause mode.
Video Titler
21-pin SCART Cable
(not provided)
S-Video Cable
(not provided)
S OUT
AV2 (L-2) IN/
DECODER
SYSTEM CONNECTIONS (cont.)
NUMBER "0"
DV
PLAY
RECORD
VHS
PAUSE
PR