Quick set up guide (cont.), Important – JVC SR-VS20EK User Manual
Page 10
10
IMPORTANT
Ⅲ In certain reception conditions, station names may not be stored correctly, and auto Guide Program Number Set may not work
properly. If the Guide Program numbers are not set properly, when you timer-record a TV programme using the VIDEO Plus+
system, the recorder will record a TV programme of a different station. When programming the timer using the VIDEO Plus+
system, be sure to check that the preset position corresponding to the broadcasting station you wish to record has been
selected (
੬
pg. 20, "VIDEO Plus+ Timer Programming").
Ⅲ Your video recorder memorizes all detected stations even if reception of some of them is poor. In these cases picture quality
may be poor. To delete those stations which have an unacceptable picture
੬
"Delete A Channel" on page 67.
Ⅲ If any of the above problems occur, refer to pages 66 – 69 to input station names (
੬
"Set Stations") or delete unnecessary
stations (
੬
"Delete A Channel"). You can also change station preset positions (
੬
"Change Station Preset Position").
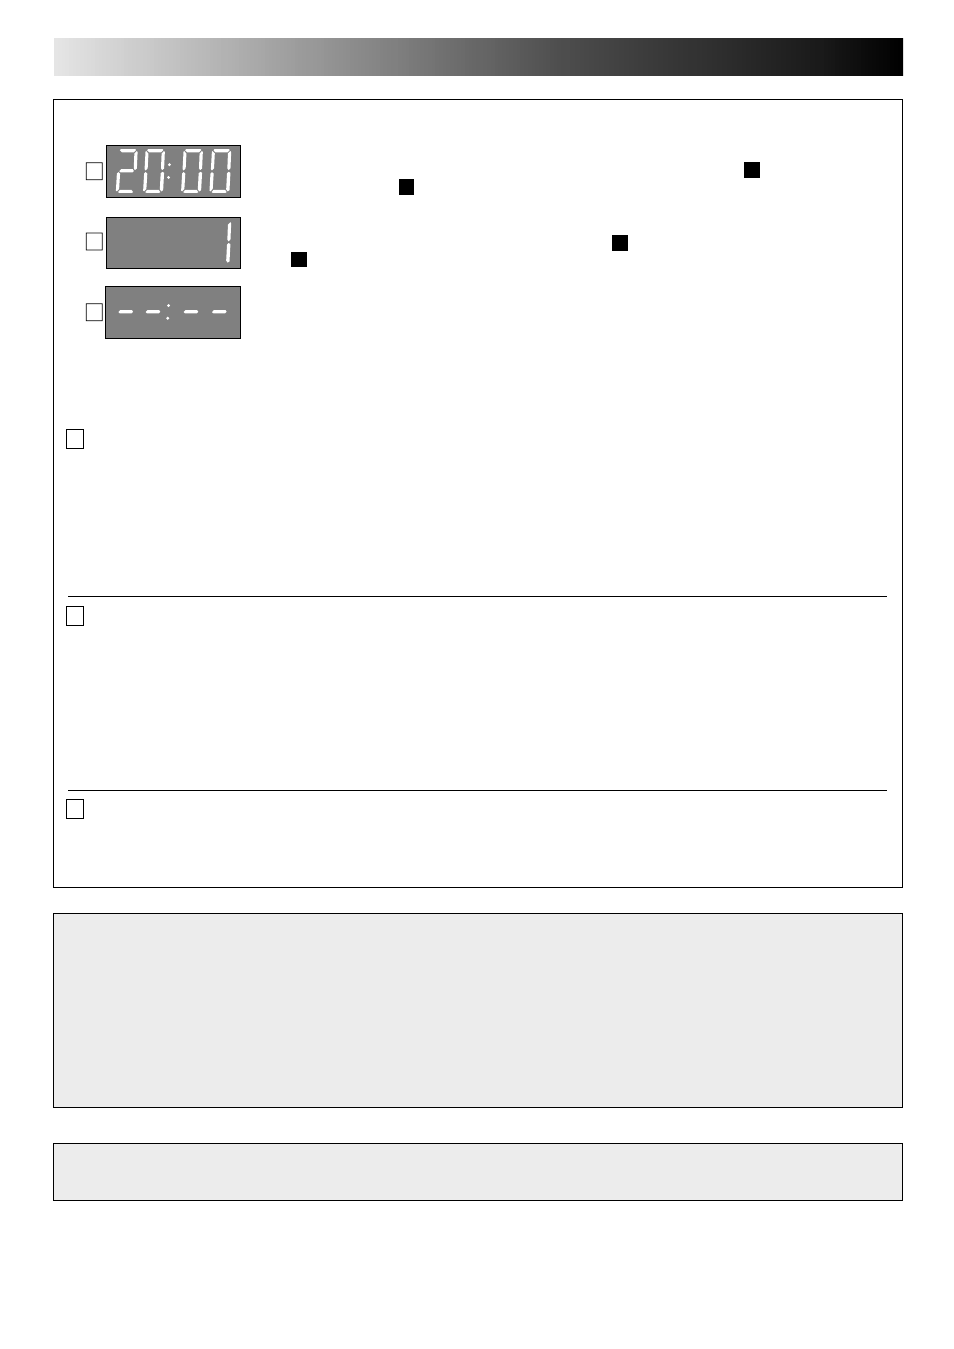
Auto Set Up/Preset Download results appear on the display panel
When neither auto channel set nor auto clock set has been completed successfully, "– –:– –"
will be displayed.
* You can check if the Guide Program numbers have been set correctly when you perform the VIDEO Plus+ Timer Programming
(
੬
pg. 20); if the correct preset position number is displayed in step 4, this confirms that the Guide Program number for the
PlusCode number you enter in step 3 has been set correctly.
A If both auto channel set and auto clock set have been performed successfully:
1
Turn on the TV and select its AV mode, then make sure that all necessary stations have been stored in the recorder's memory
by using the PR button(s).
● If station names (ID —
੬
pg. 70) have also been stored in the recorder's memory, the station name will be displayed at the
top left corner of the screen for about 5 seconds each time the recorder is tuned to a different station.
● If you want to set the tuner manually such as to add or skip channels, to change preset positions, or to set or change station
names, see pages 66 – 69.
Now you have finished the basic set up and can use your recorder for both playback and recording.
B If auto channel set has succeeded but auto clock set has not:
1
Turn on the TV and select its AV mode, then make sure that all necessary stations have been stored in the recorder's memory
by using the PR button(s).
● If station names (ID —
੬
pg. 70) have also been stored in the recorder's memory, the station name will be displayed at the
top left corner of the screen for about 5 seconds each time the recorder is tuned to a different station.
● If you want to set the tuner manually such as to add or skip channels, to change preset positions, or to set or change station
names, see pages 66 – 69.
2
Perform "Clock Set" on page 72.
Now you have finished the basic set up and can use your recorder for both playback and recording.
C If both auto channel set and auto clock set have failed:
1
Make sure that the TV aerial cable is connected properly to the recorder, or that the 21-pin SCART cable is connected
properly between TV and the recorder. Turn off the recorder power once, then turn the recorder power back on again.
2
Perform "Auto Set Up" on page 8 or "Preset Download" on page 9.
If you have any difficulty with the above procedures call the JVC Customer Service Hot Line
on 020 8208 7654
A
B
C
When both auto channel set and auto clock set have been completed successfully the
correct current time will be displayed after the OK button is pressed in item
2
on page 8 or
after performing item
2
on page 9.
When auto channel set has been completed successfully but auto clock set has not, "(PR)1"
will be displayed after the OK button is pressed in item
2
on page 8 or after performing
item
2
on page 9.
QUICK SET UP GUIDE (cont.)