Ip address settings (continued) – JVC VN-C20 User Manual
Page 22
22
ⅷ IP Address setting at the computer
Set the computer to an IP address that enables communication with VN-C20.
1.
Click [Start]
● Select in the order of [Control Panel] - [Network Connections] - [Local Area].
2.
The computer with which Internet Explorer is launched automatically selects the connected network
● Right-click and select [Properties].
● Check to ensure that the [Client for Microsoft Networks] and [Internet Protocol(TCP/IP)] check
boxes are selected.
3.
Select [Internet Protocol(TCP/IP)] and click [Properties].
4.
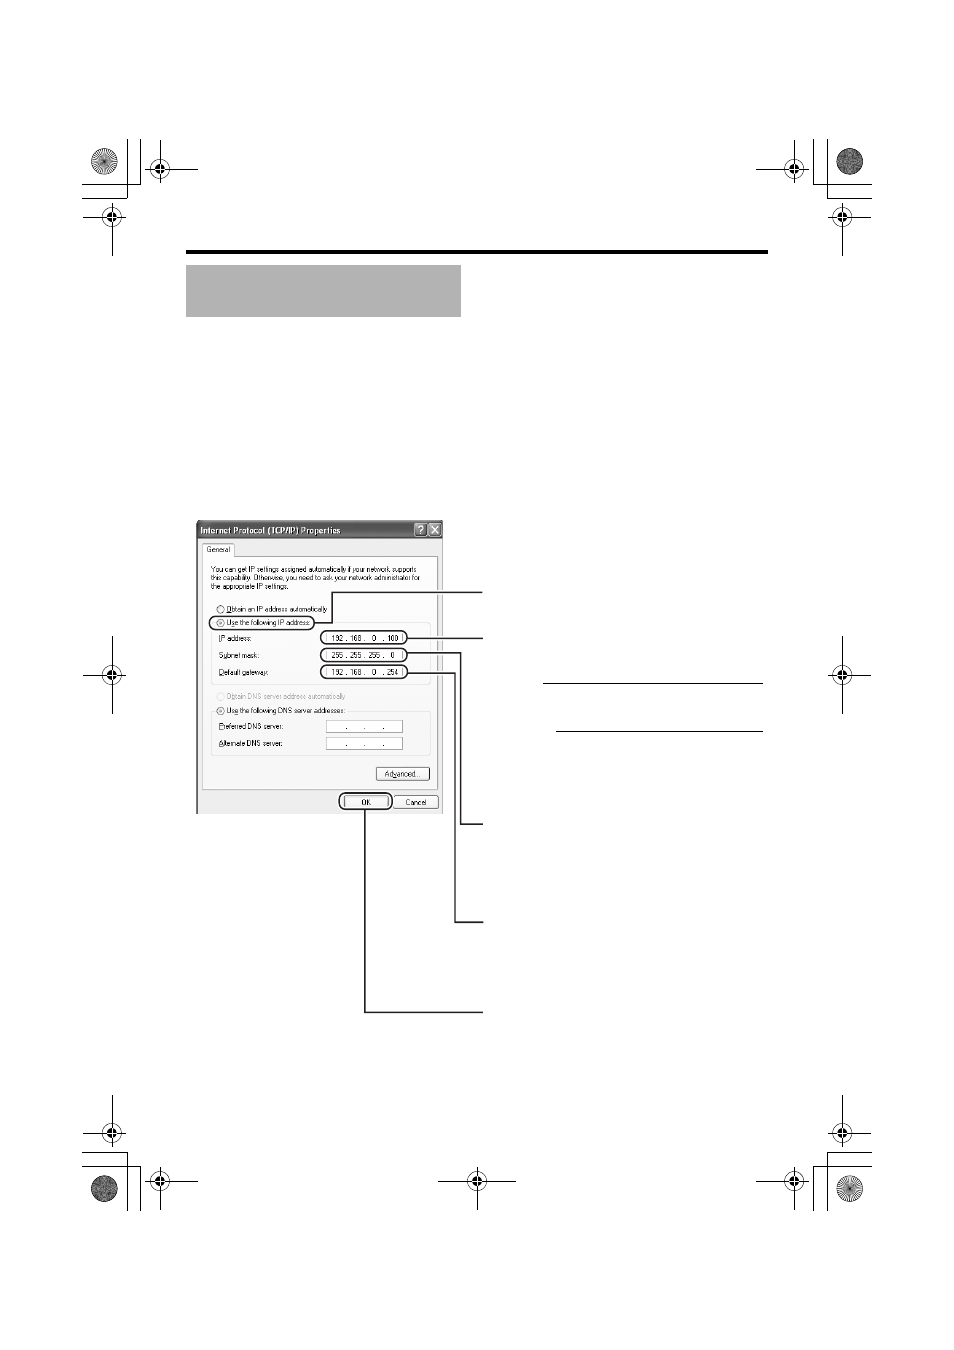
Set the IP address
5.
Click [OK] on the [RESERVED] screen
IP Address Settings
(continued)
A
B
C
D
E
Click [OK].
Set the [IP address]. (For example, use
192.168.0.100 when VN-C20 is in its default
settings)
Note:
Make sure that you take note of the original IP
address before altering.
Cation:
When setting, ensure that a duplicate IP
address is not used within the same network
environment.
Set [Subnet mask] to a value that is
appropriate for the setting operation. Clarify
with the network administrator if you have any
queries.
(Use 255.255.255.0 when the camera is in its
default settings)
Select [Use the following IP sddress].
When a [Default gateway] is present, make
use of the IP address (e.g., 192.168.0.254),
VN-C20_EN.book Page 22 Tuesday, January 31, 2006 1:51 PM