Mounting the camera – JVC VN-C20 User Manual
Page 18
18
Connection / Installation (continued)
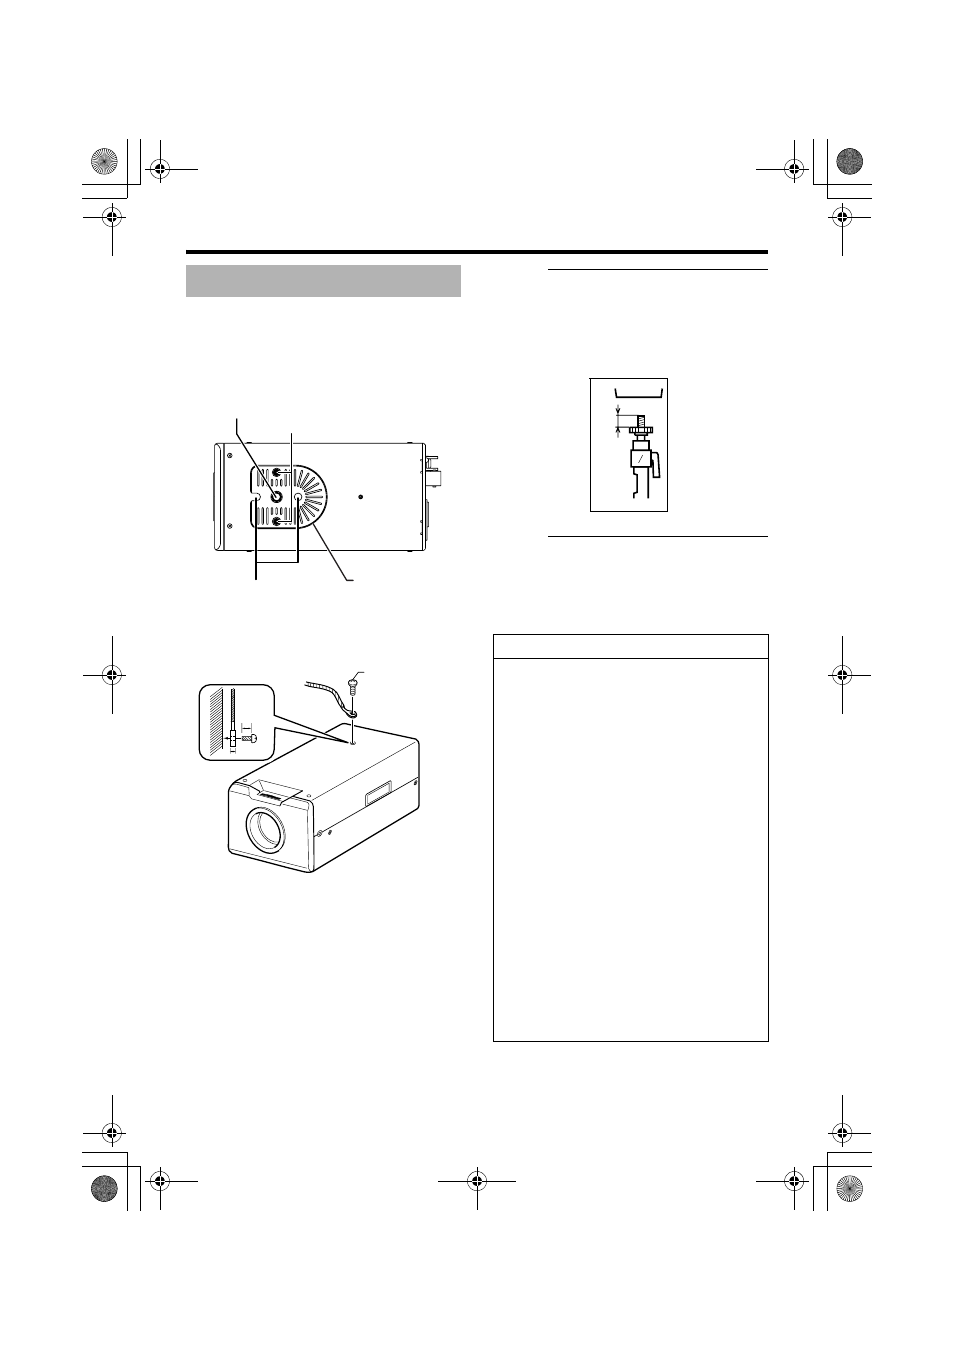
Use the screw hole on the camera mounting
bracket when mounting this camera to a fixer or
rotating platform.
Cation:
● When mounting the camera, use screws with
a length of 7 mm or shorter from the
mounting surface. Screws beyond the
specified length must not be used as doing
so may damage the interior.
Cation:
● The camera mounting bracket is mounted on
the top surface of the camera by default. To
mount it to the bottom surface, do so by
removing the 2 fastening screws from the
camera mounting bracket.
Mounting the Camera
M2.6 x 4 mm
2 mm
4 mm
Camera
mounting
screw hole
Screws for the bracket
(x 2: M2.6 x 6 mm)
Fall-preventive
holes
Bracket for
camera
mounting
Fall-prevention wire
Warning
● Special attention is required when
mounting the camera to a wall or ceiling.
Mounting operations should not be carried
out by the users but by professional
contractors. Failure to do so may cause the
camera to fall and result in injuries and
accidents.
● When mounting the camera to a fixer or
rotating platform, ensure that the camera is
firmly mounted by using the rotation-
prevention holes to prevent it from falling.
● To prevent the camera from falling, ensure
that it is connected to a firm place (ceiling
slab or channel) using a fall-prevention
wire.
● Pay also careful attention to the length,
strength, wiring and material (insulation
quality) of the fall-prevention wire to be
used.
● Mount the fall-prevention wire using the
black screw on the top surface of the
camera unit.
● Designated screw for fastening of fall-
prevention wire (M2.6
ן 4 mm): Screws
beyond the specified length must not be
used as doing so may damage the interior.
MAX.
7 mm
VN-C20_EN.book Page 18 Tuesday, January 31, 2006 1:51 PM