Grizzly 50/65 Ton Ironworker G0646 User Manual
Page 26
-24-
G0646/G0647 50/65 Ton Ironworker
7. Use the spanner wrench to fully tighten the
punch assembly onto the pressure plate.
8. Insert the die into the punch bolster with the
larger opening down, but do not tighten the
set screws (see
Figure 22).
9. Set the controls to Punch and Inch, then
reconnect the machine to power.
10. Turn the machine ON, press the foot actua-
tor to bring the punch near—but not into—the
die, then stop the motor.
11. Press the emergency stop button to avoid
unexpected movement of the tooling.
12. Align the die with the punch, then tighten the
set screws on both sides of the punch bolster
to hold the die in place.
Note: If you have difficulty aligning the punch
with the die, you may have to reposition the
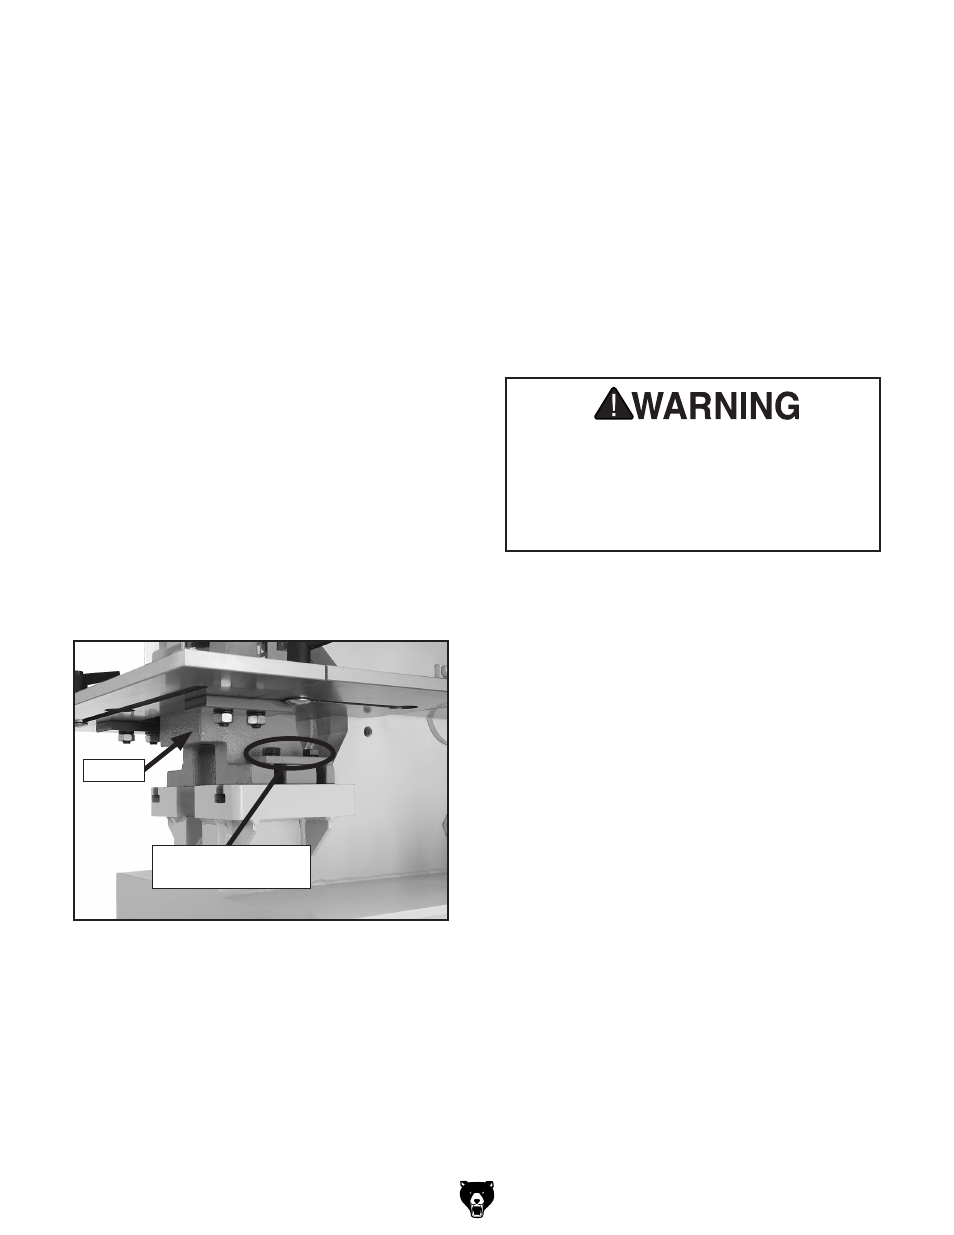
punch bolster. Use a 19mm wrench to loosen
the bolster mounting hex bolts (see
Figure
23), move the bolster and die into alignment
with the punch, then re-tighten the hex bolts.
13. Properly re-position the stripper and safety
guard assembly, reset the emergency stop
button, then continue to jog the punch toward
the die.
Note: Be prepared to quickly lift your foot
from the pedal actuator to stop the punch if
you suspect a mis-alignment or other prob-
lem.
14. Set the controls to Normal, then move the
punch in and out of the die several times to
ensure proper operation of the tooling before
mounting a workpiece onto the table.
To avoid tooling or workpiece breakage and
the risk of possible injury to the operator,
never attempt to cut a workpiece that is not
adequately supported and held in place.
Never attempt a cutting operation that is
beyond the capacity of your machine.
Figure 23. Punching bolster mounting hex bolts.
Mounting Hex Bolts
(2 of 4 shown)
Bolster