FujiFilm PICTOGRAPHY 3500 User Manual
Page 23
3. INSTALLATION
21
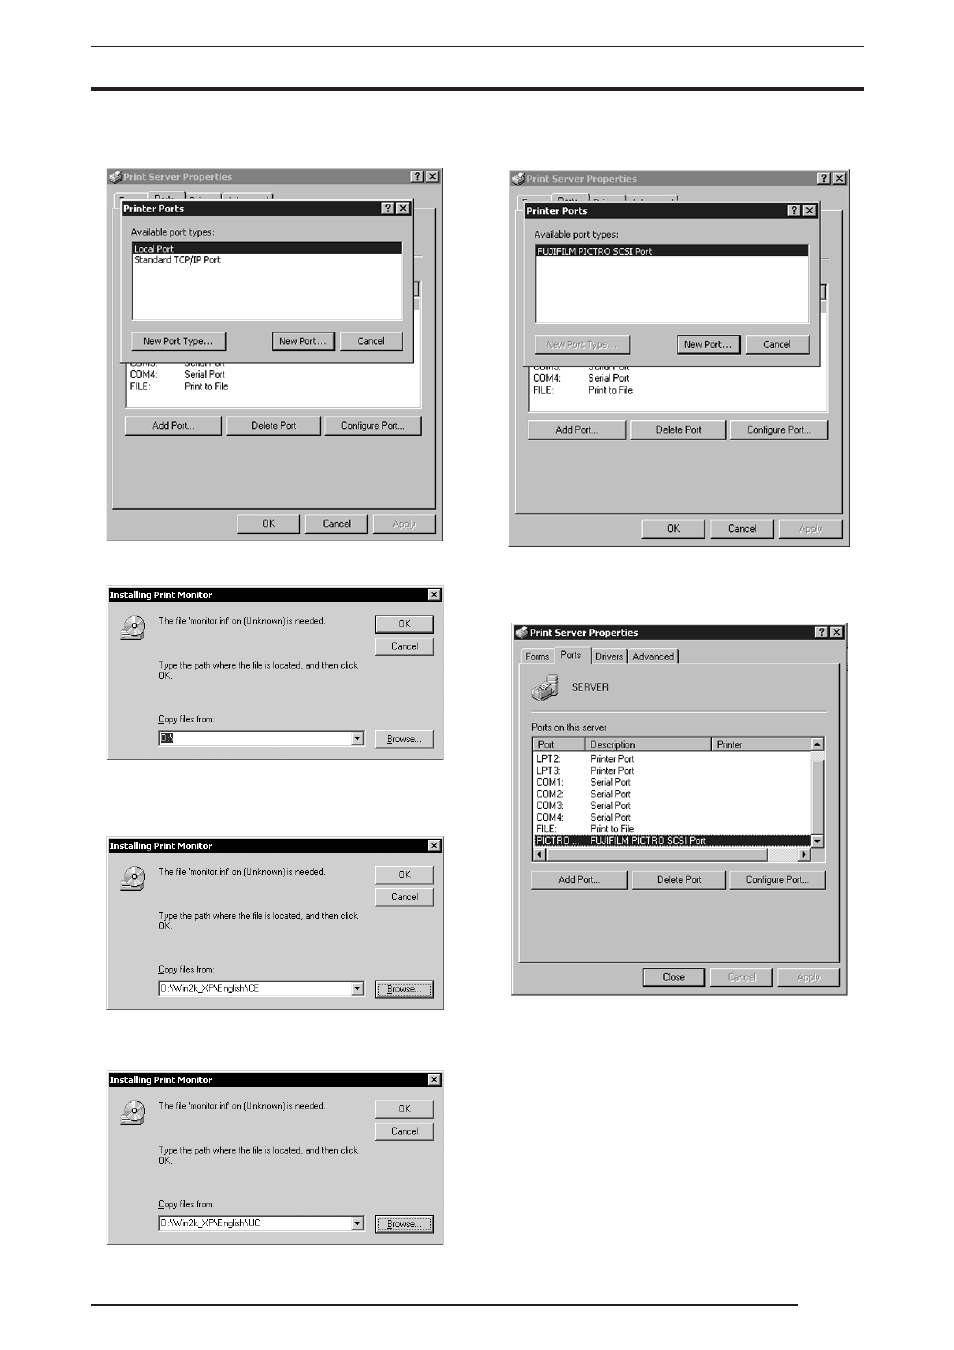
4.
Click the
[Add Port] button.
The
[Printer Ports] dialog box is displayed.
5.
Click the
[New Port Type].
The
[Installing Print Monitor] dialog box is displayed.
6.
Enter
CE Type
D:\Win2k_XP\English\CE (*If your CD-ROM drive is D: drive)
in the
[Copy files from:] field.
UC Type
D:\Win2k_XP\English\UC (*If your CD-ROM drive is D: drive)
in the
[Copy files from:] field.
Click the
[OK] button.
The following appears.
7.
Confirm that
[FUJIFILM PICTRO SCSI Port] appears in the
[Available port types;] field, and then click the [New Port]
button.
The following is displayed when the file is copied.
8.
Confirm that
[PICTRO SCSI:] appears in [Ports on this
server], and then click the [Close] button.
This completes the installation of
[PICTRO SCSI Port].