IBM EGX-400 User Manual
Page 43
39
Chapter 3 - Preparations
3-2. Cutter Installation Method 1 (With Nose Unit)
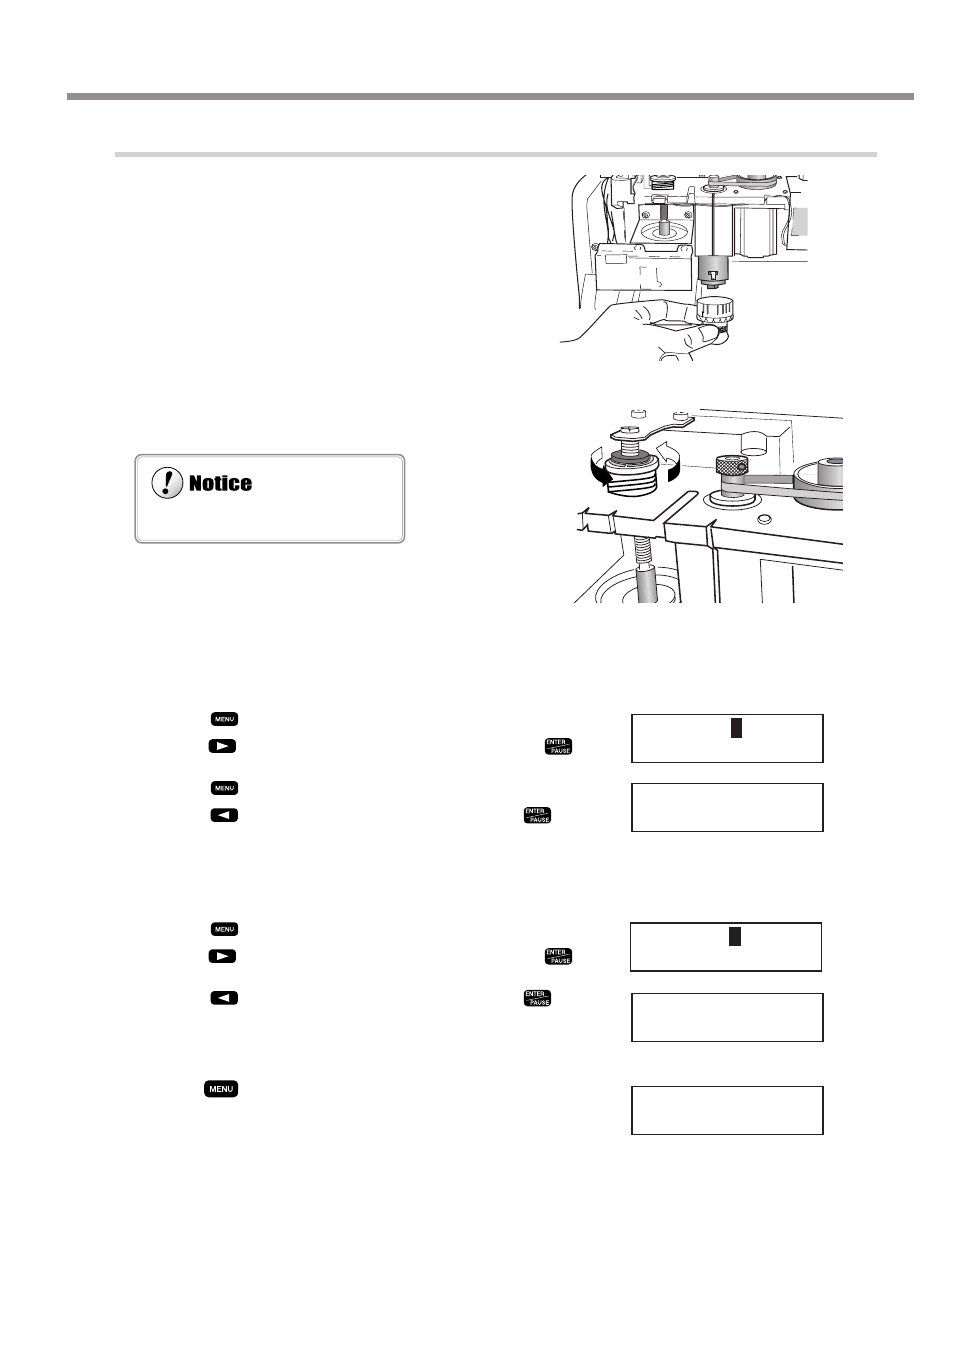
2. Nose-unit Installation and Menu Settings
5
Install the nose unit. Tighten fully, then loosen
two turns.
6
Fully loosen the lock nut.
7
Use the menus to set [AUTO Z CONTROL] to ON.
(1) Press
several times to display the screen shown at right.
(2) Press
to move the blinking cursor to [OTHERS], then press
.
(3) Press
several times to display the screen shown at right.
(4) Press
to move the blinking cursor to [ON], then press
.
8
Use the menu to set [REVOLUTION] to ON.
(1) Press
several times to display the screen shown at right.
(2) Press
to move the blinking cursor to [OTHERS], then press
.
(3) Press
to move the blinking cursor to [ON], then press
.
9
Press
several times to return to the top screen.
Be sure to loosen the lock nut.
X 0 Y 0
Z 0 8000RPM
I/O
O
THERS
TEACHING SELF
REVOLUTION
AUTO Z CONTROL
I/O
O
THERS
TEACHING SELF