Changing sampling frequencies and bit depths with, Dante controller, Switched (daisy chain) connection example – Tascam MM-4D/IN-E 4-Channel Mic/Line Input Dante Converter with Built-In DSP Mixer User Manual
Page 13
TASCAM MM-4D/IN-E / MM-4D/IN-X
13
3
Transmitting device name
This is the name of a transmitting device on the Dante
network.
4
Transmitting device channels
These are the names of the channels of the transmitting
device on the Dante network.
5
Audio routing
Route the audio channels of the transmitting and receiv-
ing devices that you want to connect here.
Left-click the intersection of the channels you want to
connect on the matrix to connect them.
NOTE
While pressing the computer keyboard Ctrl key, left-click
the
“-”
at the intersection of device names to connect all
connectable channels at once.
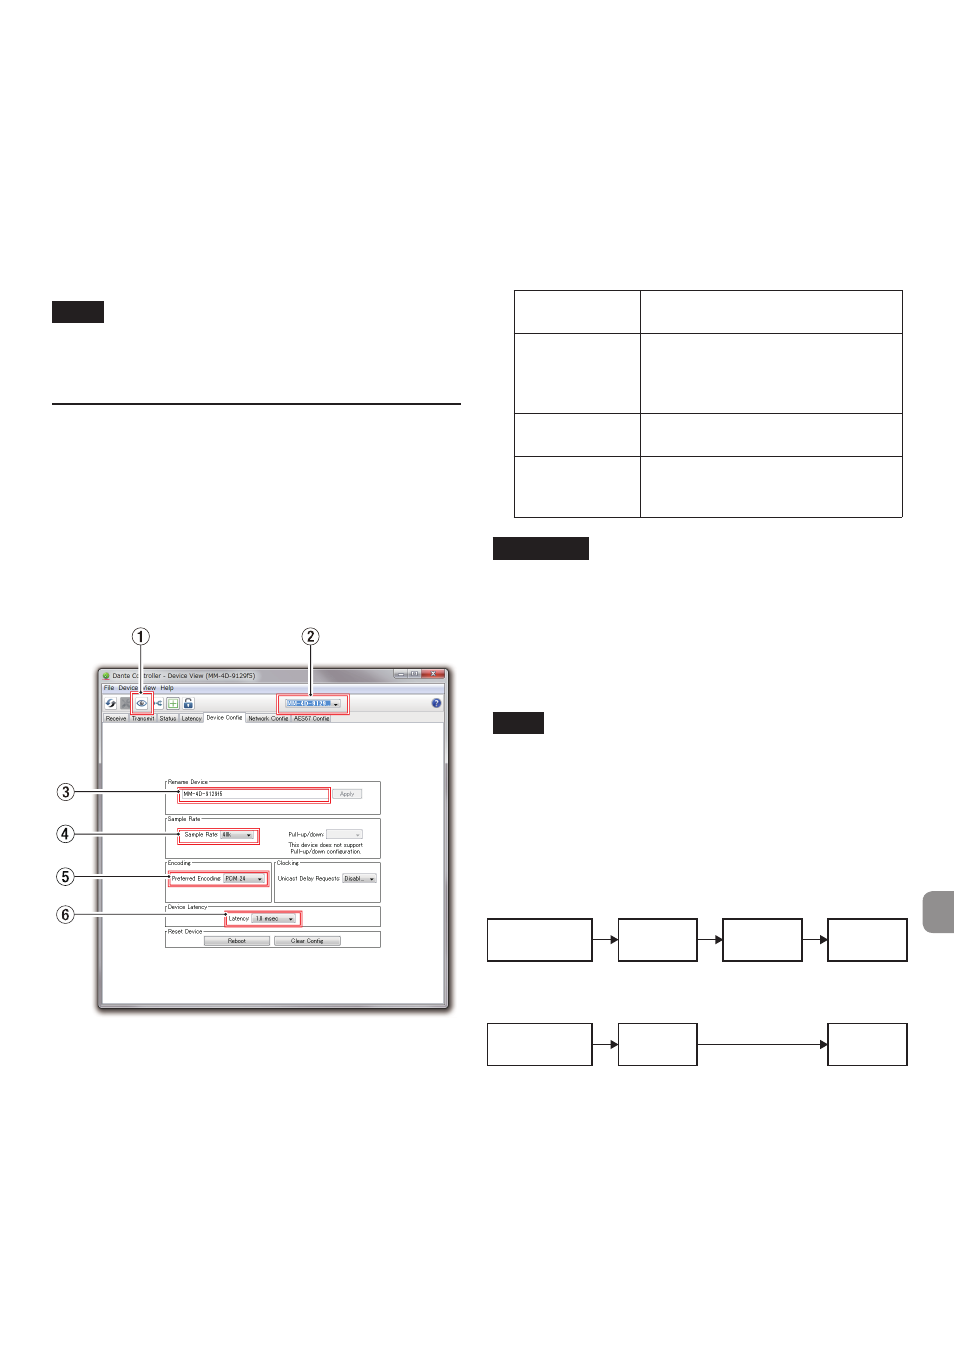
Changing sampling frequencies and
bit depths with Dante Controller
Double-click a device name on the Network View screen to
open the Device View screen.
On this screen, you can set and monitor conditions related
to devices on the Dante network.
Click the Device Config tab to open the page where you can
change the sampling frequency, bit rate and other settings
of the device selected in 1 shown in the illustration below.
1
Identify Device
If the unit is selected by device name (
1
), clicking this
icon will cause all 3
SAMPLE RATE
indicators to start
blinking.
Clicking it again will return them to their ordinary status.
This allows the quick identification of the device being
operated when multiple units are being used at the
same time, for example.
2
Device name
This is the name of the device that can have its settings
changed in the current Device View.
3
Change device name
Edit the device name.
4
Sampling frequency
Set the sampling frequency.
5
Bit depth
Set the bit depth.
6
Latency setting
Set the latency.
Use the following guidelines to change the latency set-
ting.
Selectable
latency value
Connected network setup guide-
line
1 msec
The transmission route from the
transmitting device to the receiving
device passes through 10 gigabit
switching hub.
2 msec
The transmission speed of the
transmitting device is 100 Mbps.
5 msec
Use this maximum selectable la-
tency value when creating a large-
scale network.
ATTENTION
i
Changing the name of a device will clear audio routing
settings. For this reason, we recommend changing de-
vice names to names that are easy to identify before set-
ting audio routings.
i
Depending on network connection conditions, setting
the latency to a value higher than the guideline might
be necessary.
NOTE
When using a switched (daisy chain) connection, which
does not use a switching hub, set the latency accord-
ing to the number of Dante devices that signals pass-
through as shown below.
Switched (daisy chain) connection example
Passes through 2 devices
Passes through 1 devices
Transmitting
device
Transmitting
device
Receiving
device
Receiving
device
1st device
1st device
2nd device