Sending images to a registered, Web service, Sending images to a registered web – Canon IXUS 180 User Manual
Page 82: Service, Registering web services, Sending images to a registered web service

82
Before Use
Basic Guide
Advanced Guide
Camera Basics
Auto Mode
Other Shooting
Modes
P Mode
Playback Mode
Setting Menu
Wi-Fi Functions
Accessories
Appendix
Index
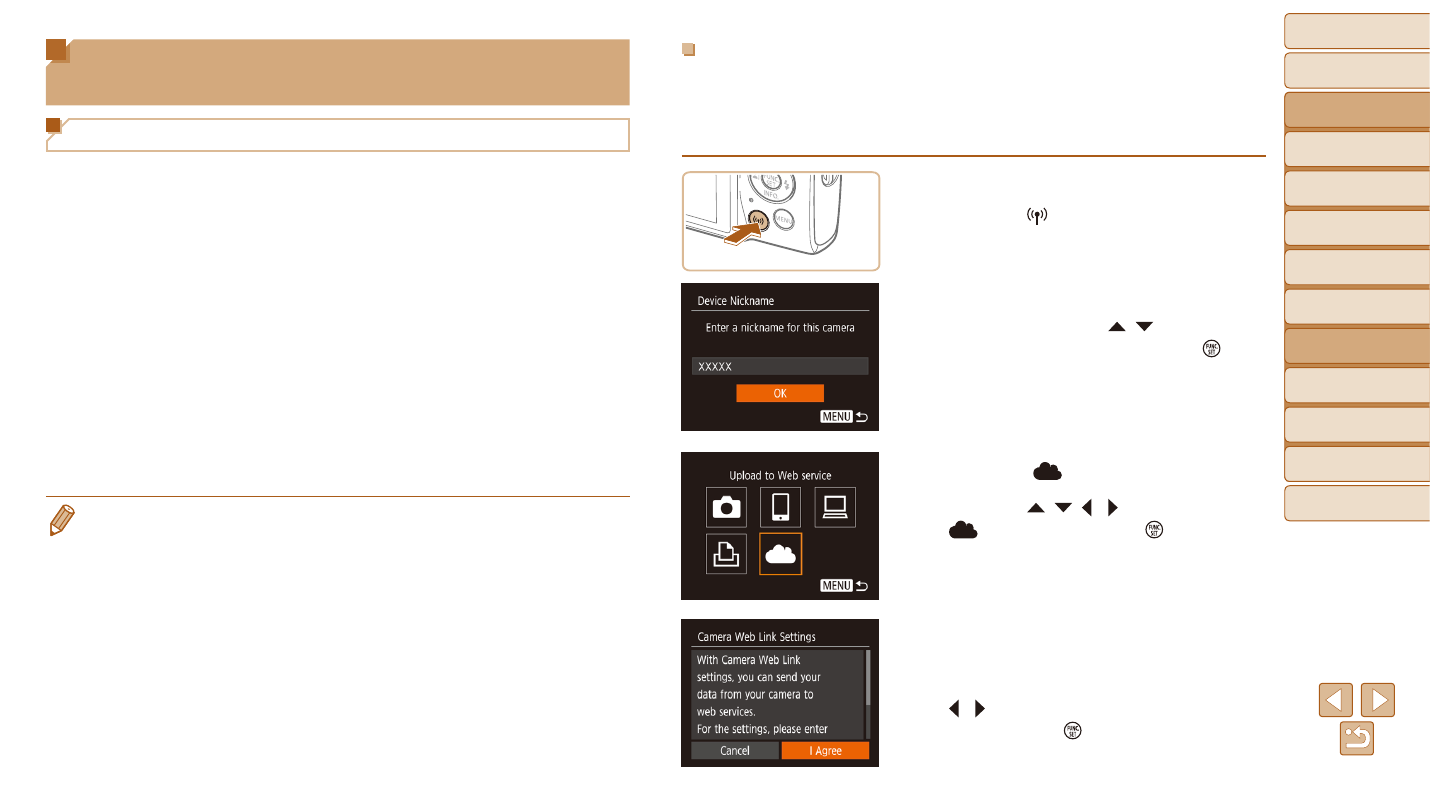
Registering CANON iMAGE GATEWAY
Link the camera and CANON iMAGE GATEWAY by adding CANON iMAGE
GATEWAY as a destination Web service on the camera. Note that you will
need to enter an email address used on your computer or smartphone to
receive a notification message for completing linkage settings.
1
Access the Wi-Fi menu.
z
z
Press the [ ] button.
z
z
If the [Device Nickname] screen is
displayed, press the [ ][ ] buttons to
choose [OK], and then press the [ ]
button.
2
Choose [ ].
z
z
Press the [ ][ ][ ][ ] buttons to choose
[
], and then press the [ ] button.
3
Accept the agreement to enter
an email address.
z
z
Read the agreement displayed, press the
[ ][ ] buttons to choose [I Agree], and
then press the [ ] button.
Sending Images to a Registered Web
Service
Registering Web Services
Use a smartphone or computer to add to the camera Web services that you
want to use.
•
A smartphone or computer with a browser and Internet connection is
required to complete camera settings for CANON iMAGE GATEWAY and
other Web services.
•
Check the CANON iMAGE GATEWAY website for details on browser
(Microsoft Internet Explorer, etc.) requirements, including settings and
version information.
•
For information on countries and regions where CANON iMAGE GATEWAY
is available, visit the Canon website (http://www.canon.com/cig/).
•
You must have an account with Web services other than CANON iMAGE
GATEWAY if you desire to use them. For further details, check the
websites for each Web service you want to register.
•
Separate ISP connection and access point fees may be applicable.
•
CANON iMAGE GATEWAY also provides user guides for downloading.
