Multi-Contact MA213-04 User Manual
Page 5
Advanced Contact Technology
www.multi-contact.com
5 / 8
8
9
CT-NET-AWZ
D
10
11
12
13
14
(ill. 8)
Introduzca los contactos de la cara
posterior en las matrices de contacto
hasta que encajen�
(ill. 8)
Push the contacts through the num-
ber indicated side until they lock into
place�
Atención
Tape todos los orificios de con-
tacto sin ocupar con tapones
ciegos�
Attention
Any unoccupied contact slots
should be fitted with blind plugs.
Extracción de contactos
Contact extraction
(ill. 9)
Introduzca la herramienta extractora
CT- NET-AWZ por la cara frontal en la
matriz de contacto hasta que se escu-
che un clic� A continuación, extraiga el
contacto con el botador D�
(ill. 9)
Insert the extraction tool CT-NET-AWZ
from the front side into the contact
slot until you hear a click� Then with
the drift D push out the contact�
Montaje de las matrices de
contacto en el soporte de
contactos
Assembly of the contact in-
serts into the contact carrier
(ill. 10)
Empuje el anillo de sujeción Z sobre
la matriz de contacto K� La pieza
protuberante F debe apoyar sobre la
parte lisa�
(ill. 10)
Connect the retaining ring Z to the
contact insert K� Place the leading part
F over the flat area of the insert K.
(ill. 11)
Retire la cinta adhesiva y corte los
hilos de pantalla a una longitud que
permita volverlos 3 mm sobre el anillo
de sujeción
(ill. 11)
Remove adhesive tape and cut the
screening wires so that they can be
layed approx. 3 mm over the retaining
ring�
(ill. 12)
Coloque los hilos de pantalla sobre el
anillo de sujeción�
(ill. 12)
Lay the screening wires over the
retaining ring�
Nota:
El anillo de sujeción debe ajustarse
de forma que sujete el extremo del
aislante externo del cable.
Note:
In the end position, the retain-
ing ring must clamp the outer cable
insulation.
(ill. 13)
Deslice la tuerca M sobre el anillo de
sujeción Z�
(ill. 13)
Push nut M over the retaining ring Z�
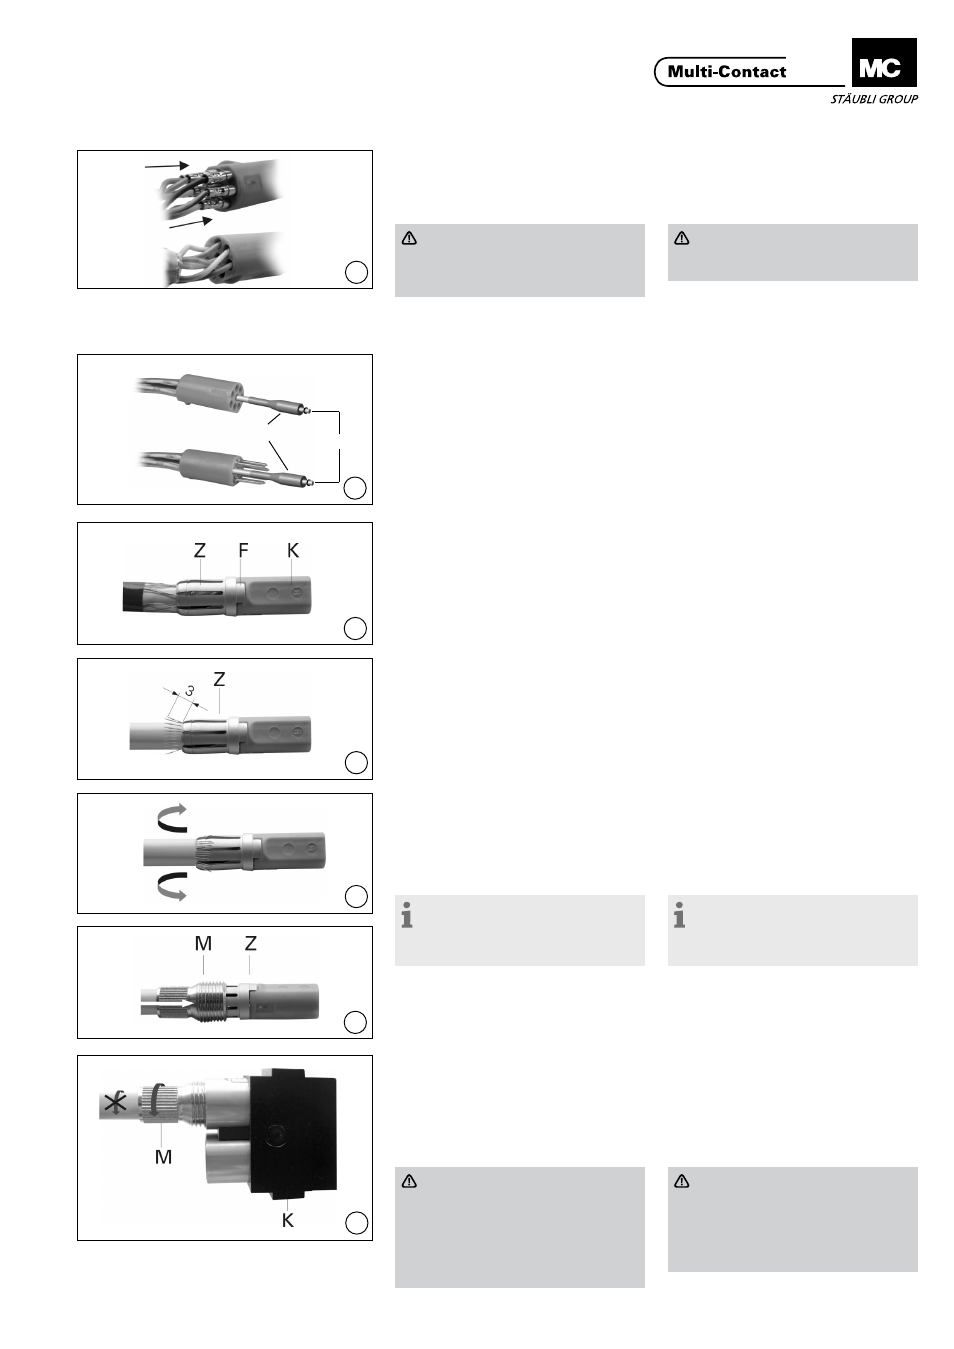
(ill. 14)
Introduzca el conjunto en el soporte
de contactos K� Observe la posición
correcta de la parte plana�
Apriete la tuerca M al tiempo que su-
jeta el cable para evitar que este gire�
(ill. 14)
Insert the whole unit in the contact
carrier K� Ensure that the position of
the flat part is correct. Tighten nut M
while holding the cable to avoid any
cable rotation�
Atención:
Apretar la tuerca únicamente con
la mano (sin herramientas)� La
cantidad de hilos de rosca que se
pueden ver después de apretar
la tuerca, dependen del diámetro
externo del cable�
Attention
Tighten the nut only by hand (wit-
hout tools)� The amount of thread
that is visible after tightening
the nut depends on the outside
diameter of the cable�