Multi-Contact MA092 User Manual
Page 4
Advanced Contact Technology
4 / 8 www.multi-contact.com
5
Tab. 2
6
4
(ill. 4)
Colocar el manguito de crimpado por
encima del Kevlar y llevarlo hasta el
anclaje�
(ill. 4)
Push the crimp sleeve over the Kevlar
and onto the anchor�
(ill. 5)
Introducir los contactos con el man-
guito de crimpado en la matriz de
3,3 mm de la crimpadora.
(ill. 5)
Lay the contacts with the crimp sleeve
into the 3.3 mm sunken opening on
the crimping pliers�
Pretensar la crimpadora, alinear el
contacto y cerrar completamente la
mordaza hasta que se oiga cómo se
desbloquea�
Pre-tension the crimping pliers, adjust
the contact and close the pliers com-
pletely until it unlocks audible�
Secado del adhesivo
Adhesive curing
Para aplicar el adhesivo mezclado, a
temperatura ambiente, se dispone
de un tiempo aprox� de 90 minutos�
Se puede variar el tiempo de secado
del adhesivo aplicándole temperatura
mediante una caja calentadora o un
armario térmico� Para un secado total,
el adhesivo requiere los tiempos indi-
cados en la siguiente tabla (tabla 2)�
No se deben manipular los contactos
hasta que el adhesivo haya terminado
de secarse completamente�
The adhesive has a pot life of ap-
proximately 90 minutes at room tem-
perature� The hardening time of the
adhesive can be reduced by increas-
ing the temperature, using a heat box
or warming cabinet, for example� The
adhesive takes the times given in the
table below (Table 2) to harden com-
pletely� The contact should only be
processed further once the adhesive
has hardened completely�
Introducir con cuidado los contactos
crimpados en los orificios de la caja
calentadora para evitar una rotura
accidental de la fibra.
In order to avoid breakage of the fiber,
please insert the crimped contacts
very carefully into the openings of the
heat box
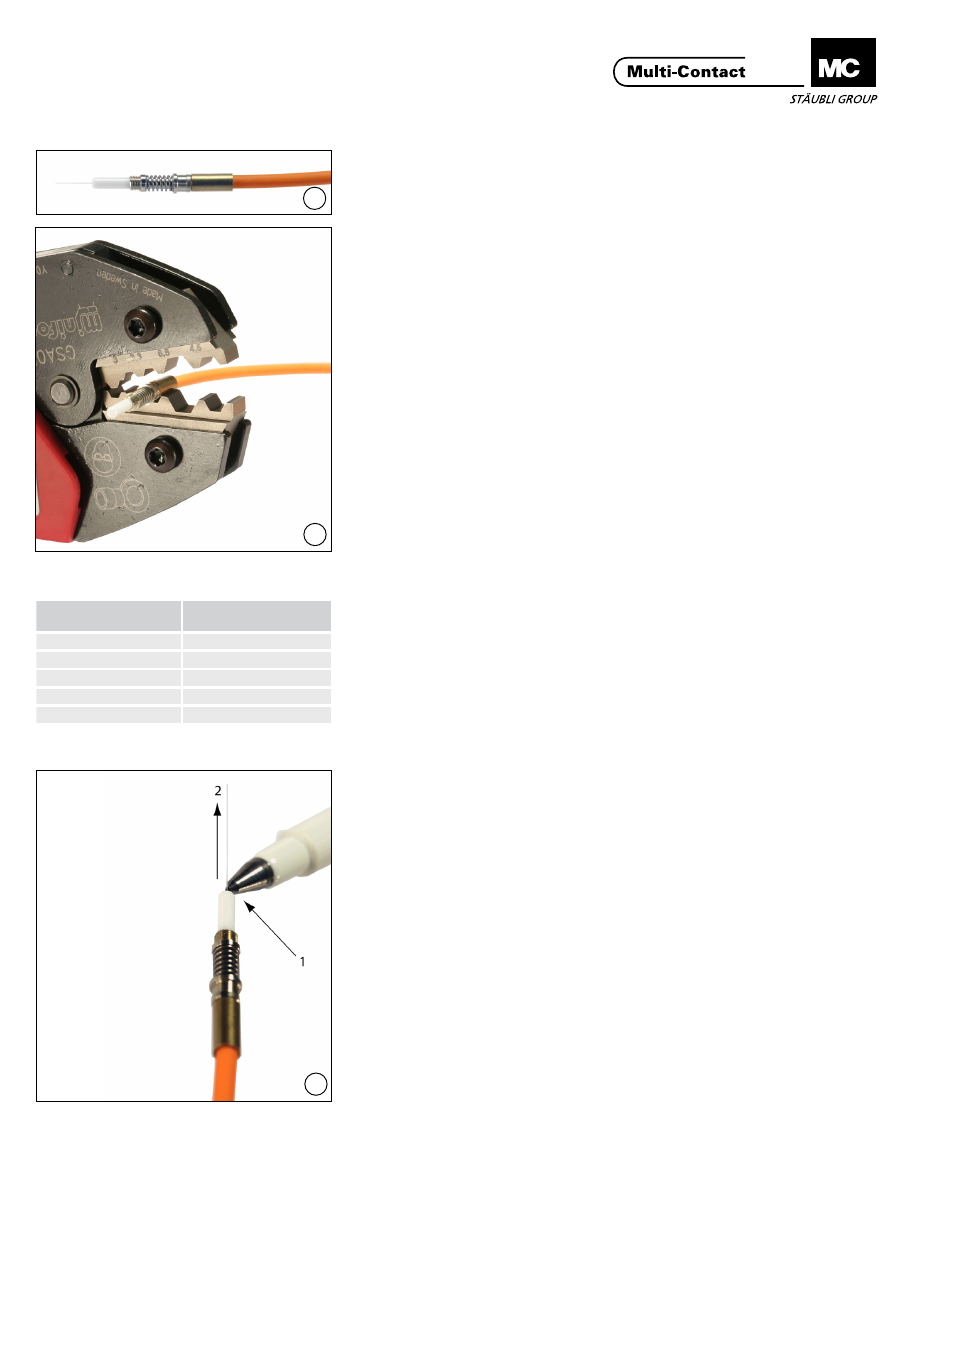
Rasgado y rotura
Scratching and breaking
(ill. 6)
Una vez seco el adhesivo, extraer el
contacto de la caja calentadora y ras-
gar ligeramente la fibra que sobresale
a una distancia de aprox� 1mm de la
cara frontal del casquillo con la cuchi-
lla para fibra (1) y retirarla aplicando
una leve tracción axial (2)�
(ill. 6)
Once the adhesive has set, remove
the contact from the heat box� Gently
scratch the projecting fiber at about
1 mm from the ferrule-end surface
using the fiber cleaving tool (1).
Remove the fiber under slight axial
tension (2)�
Temperatura
Temperature
Tiempo
Time
20 °C
12 h
80 °C
45 min
100 °C
10 min
120 °C
5 min
150 °C
1 min