MCZ Omega '05 User Manual
Page 24
PELLET STOVE
Chapter 3
INSTALLATION AND USE MANUAL
page
23
Installation and assembly
Technical service – Rights reserved MCZ S.p.A. – Reproduction prohibited
EN
G
L
IS
H
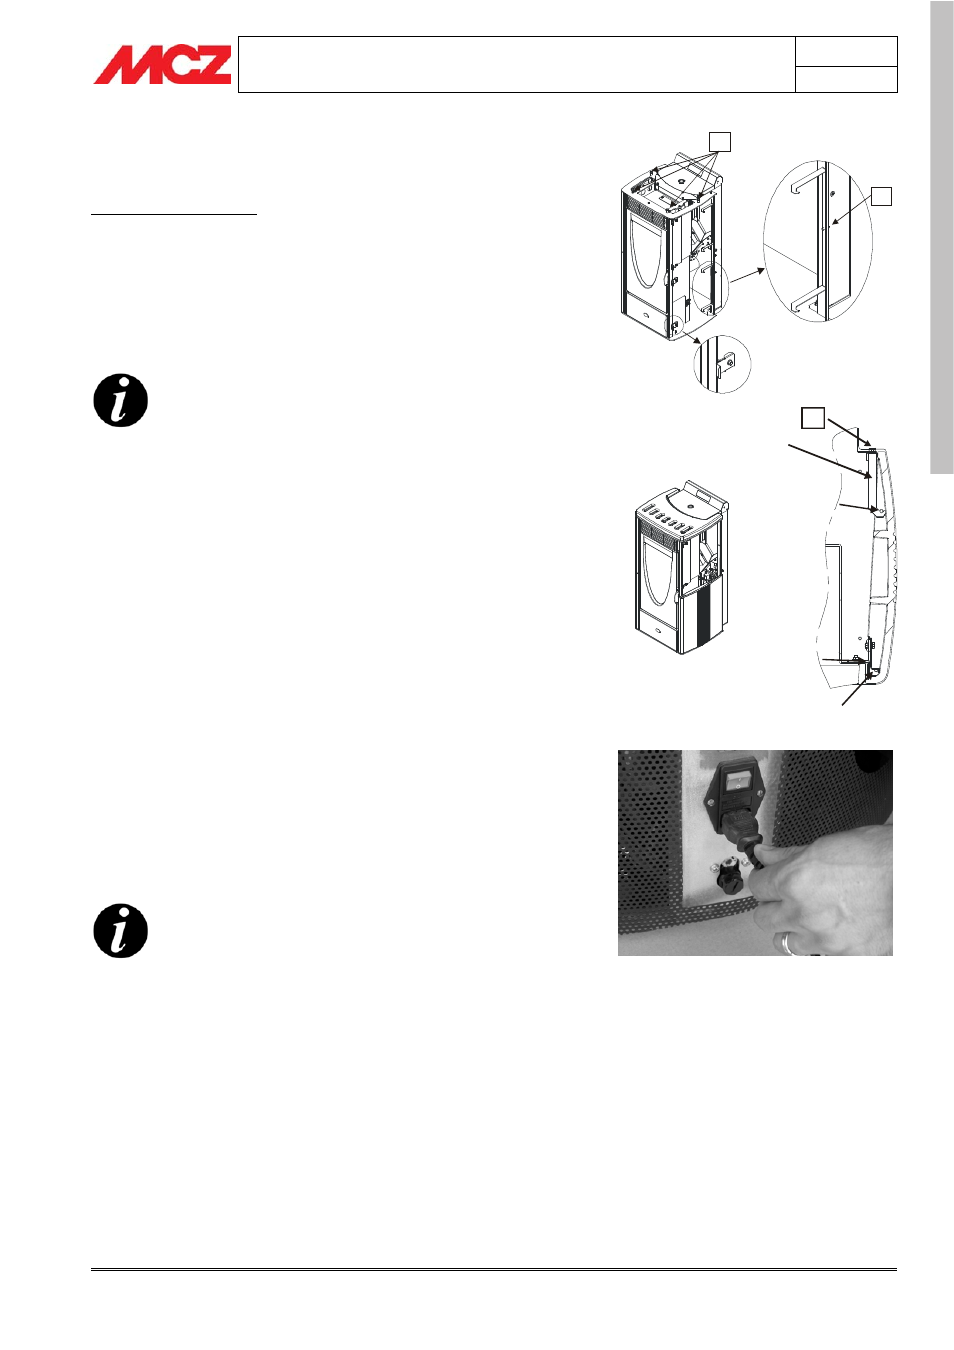
3.3. INSTALLATION OF THE CERAMIC CLADDING
FOR OMEGA-PLANET
A LOOK AT THE STOVE
In the front part there are the hooks (A) which can be adjusted in
depth and width (there are two for each tile). They should already be
attached in the coorect position.
On the back are the hooks (B) which are tentatively attached to the
frame of the stove. Loosen the screw (Z) which holds them (without
removing it completely) so that they can be moved horizontally.
TILE INSTALLATION MUST ALWAYS START FROM
THE BOTTOM.
Take a tile from the package (with its pins already inserted), mov eto
the side of the stove, and insert the tile from the front so that the
hooks (A) touch the front pin.
Rest the tile against the frame of the stove, take the rear hook (B) and,
using the screw as a grip, make the hooked ends grasp the rear pin of
the tile.
Check that the position is correct and tighten the screw all the way
down.
Repeat the procedure for the other tiles.
Install the top last, resting it on the four rubber stoppers (K). Use finger
pressure to check that the top is in a stable position. If necessary, use
the rubber stopper and the washer below it for levelling.
3.4. ELECTRICAL CONNECTION
Connect the supply cable first at the rear of the stove and then to an
electrical outlet on the wall.
The main switch located on the rear of the stove should be switched on
only when you want to light the stove.
If you do not intend to use the stove, it is advisable
to keep it switched off.
K
Z
Hook B
Hook A
Hook A
Hook B
Font ceramic
pin
Z
Rear
ceramic
pin