Running the self-test, Connecting printer cables, Parallel cables – Epson FX-870/1170 User Manual
Page 50: Serial cables, Printer
Installation and Setup
Running the Self-Test
The self-test checks the printer mechanically and electronically to
make sure
it works
properly. If the printer runs the self-test successfully, it means that everything is
operational in the printer (with the possible exception of the interface circuit).
To run the self-test, hold down the PAPER PEED button while turning on the printer. You
can use any paper path and any acceptable paper type to run the self-test. To stop the
test, simply turn off the printer.
Connecting Printer Cables
Parallel Cables
The cable you connect to the built-in parallel Centronics interface should be a shielded,
twisted-pair cable no longer than 10 feet (3 meters),
maximum.
If the cable has a frame
ground connector, attach it to the frame ground terminal beside the parallel connector in
the back of the printer. (See Table 1-13 for pin assignments and signal functions for the
parallel interface.)
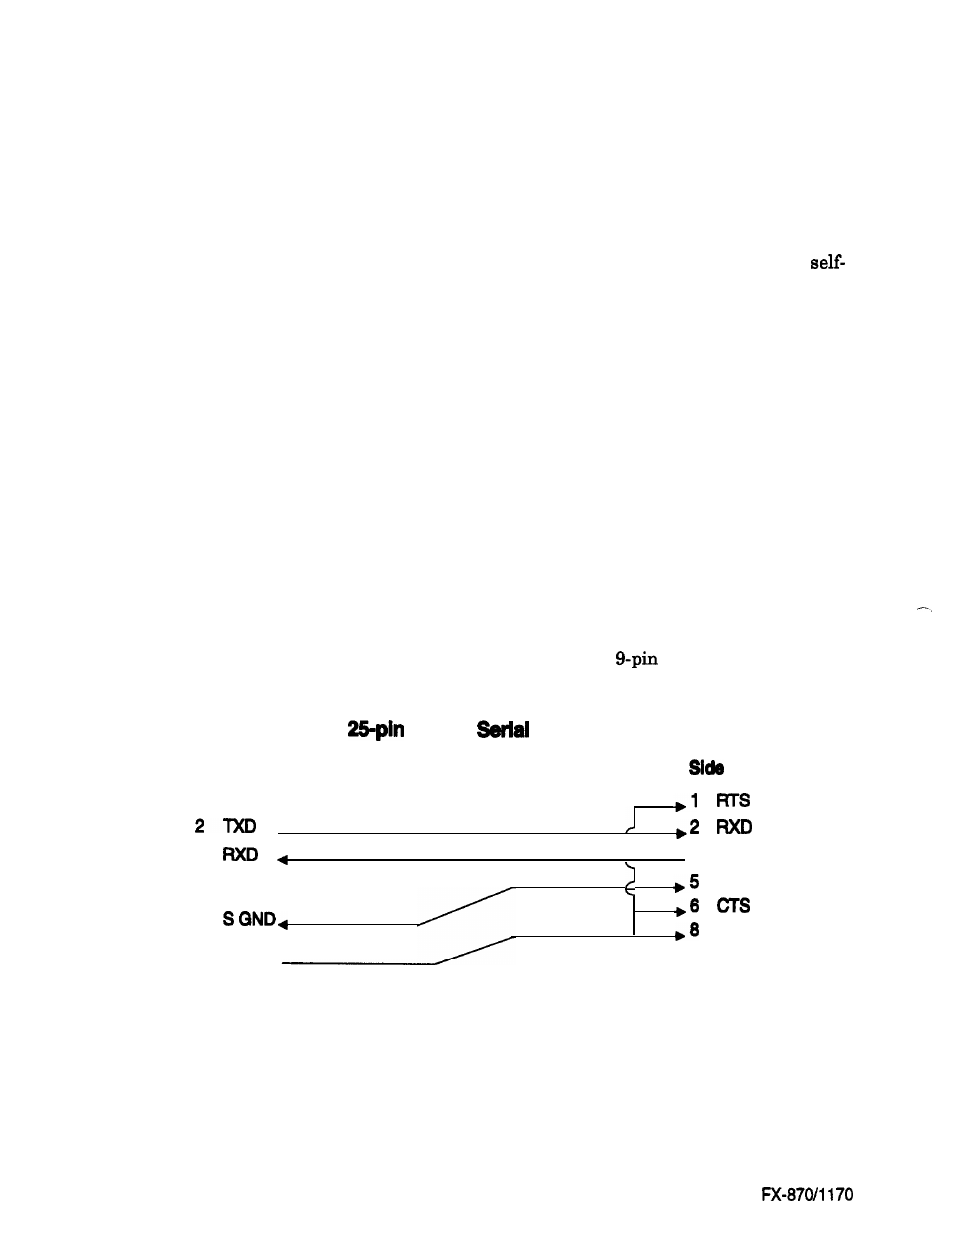
Serial Cables
If you install an optional Type B interface in the printer slot, you must use an RS-232C null
modem cable.
The cable configuration for connecting the printer serially to a
(AT-type) computer
connector is shown in the figure below.
Printer
side
to Spin
Cable
Computer
3
3
TXD
SGND
7
DCD
20 DTR
Figure 2-1. Serial Cable Configuration to a O-Pin Computer Connector
2-2
Epson