Quick start guide, Quick start guide — fox 2g tx/rx av, Step 1 – Extron electronic FOX 2G Tx User Manual
Page 5: Step 2, Step 3, Step 4, Step 5, Step 6, Step 7, Fox 2g tx/rx av • quick start guide
FOX 2G Tx/Rx AV • Quick Start Guide
QS-1
Quick Start Guide — FOX 2G Tx/Rx AV
Step 1
Turn off all equipment or disconnect it from power sources. Mount
the transmitter and receiver as required.
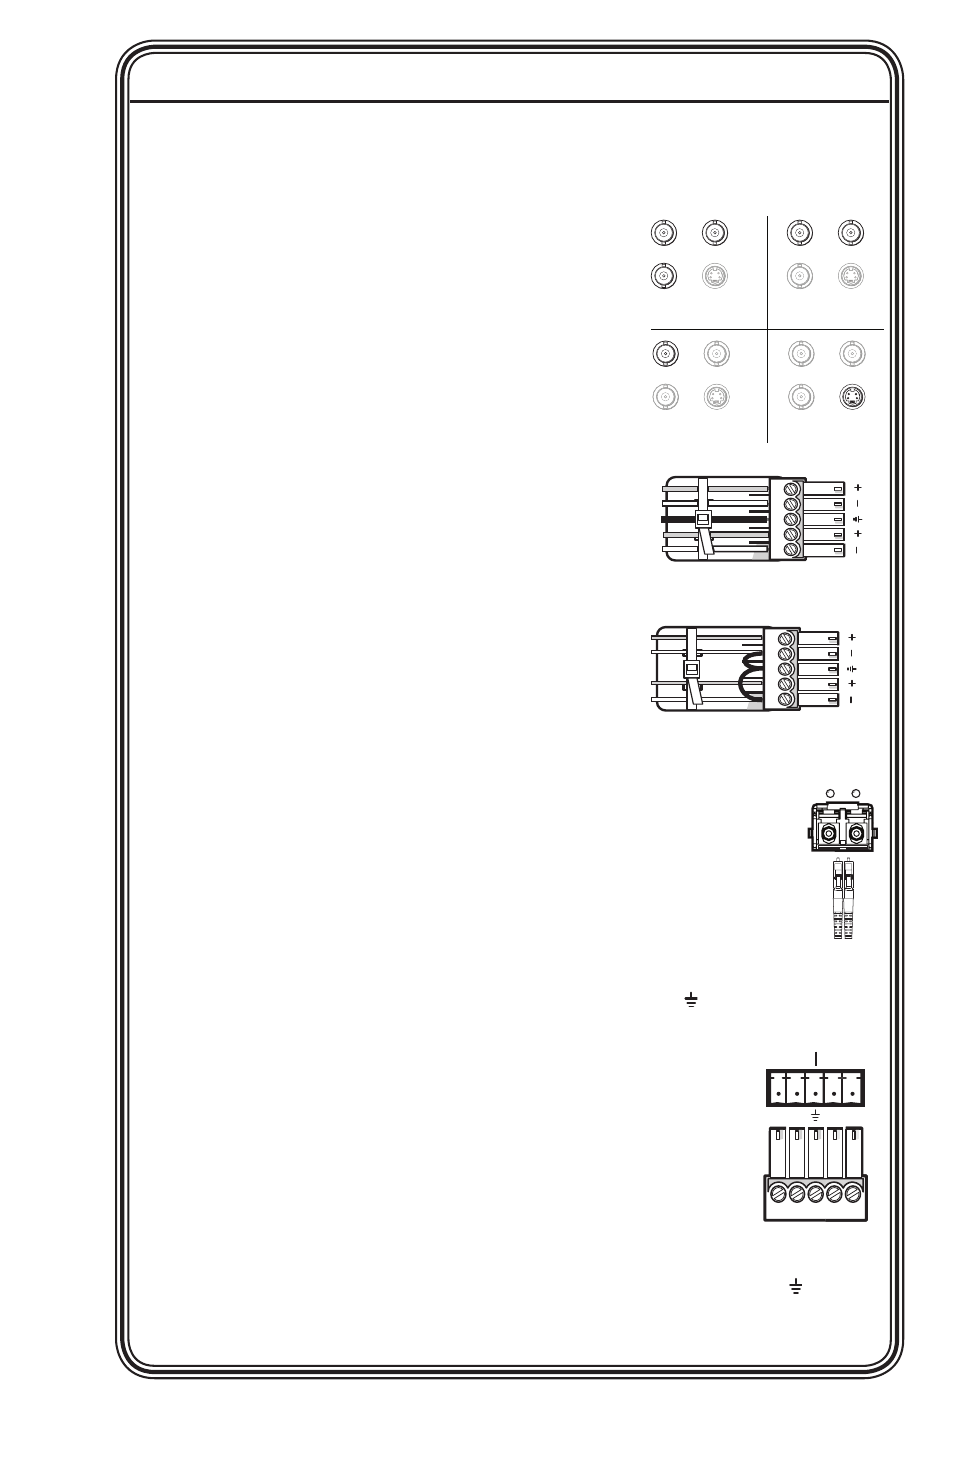
Step 2
Connect a low resolution video source to the
transmitter using the BNC connections for
composite or component sources. S-video
can be connected using either the BNC
connectors or the 4-pin mini DIN. (See the
figure at right and page 2-11).
Step 3
Connect balanced or unbalanced, stereo
or mono audio input to the transmitter
using the 5 pole, 3.5 mm captive screw
connector. (See the figure at right and
page 2-12).
Step 4
If required, connect an alarm system to
the transmitter's 2 pole captive screw
connector. (See page 2-13).
Step 5
Connect the fiber optic cables to the port on the rear of the
transmitter (see the figure at right and page 2-14). Link 1
is essential for video, audio, and RS-232 signals. Link 2 is
required when using RS-232 commands for complete system
configuration.
Step 6
To configure the transmitter and receiver using RS-232 commands,
connect the control device to the three right poles ( ,Tx, and Rx),
labeled RS-232 Remote, on the RS-232 captive screw connector of
the transmitter (see the figure at right and page
3-3). Alternatively, the host device can be connected
through the front panel Config port (see page 3-2) or
the corresponding ports on the receiver (see step 13).
These ports may also be used to configure the system
with the FOX Extender Windows Control Program.
Step 7
To pass through RS-232 commands to remote devices, independently
of the FOX 2G Tx/Rx AV, use the three left poles (Tx, Rx, and ),
labeled RS-232 Over Fiber. The ground is common for both sets of
RS-232 signals. (See the figure above right and page 3-3).
Rx
Tx
OPTICAL
REMOTE
Tx Rx
Tx Rx
OVER FIBER
RS-232
Balanced Audio
Tip
Ring
Tip
Ring
L
R
Sleeves
Unbalanced Audio
Tip
Sleeve
Sleeve
Tip
L
R
Y/VID
R-Y
S-VID
B-Y/C
Y/VID
S-video
R-Y
B-Y/C
Y/VID
R-Y
S-VID
B-Y/C
S-VID
S-video
R-Y
Y/VID
R-Y
S-VID
B-Y/C
S-VID
Component
Y/VID
R-Y
S-VID
B-Y/C
S-VID
Composite
R-Y
B-Y/C