Extron electronic FOX 2G Tx User Manual
Page 19
FOX 2G Tx/Rx AV • Installation and Setup
2-7
8
.
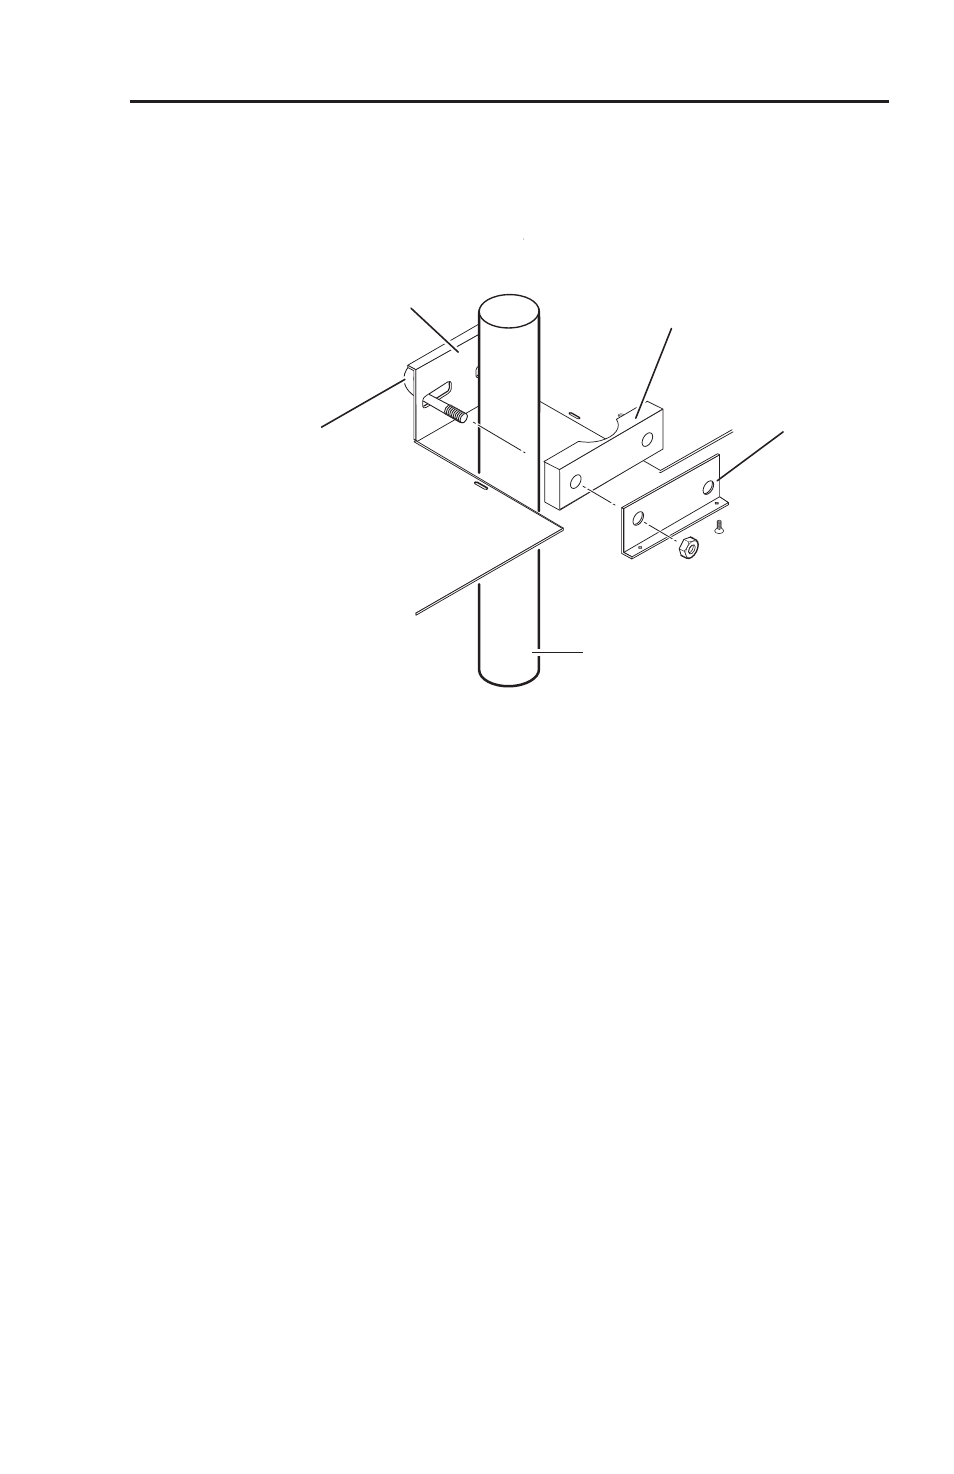
Pass the two legs of the U-bolt through the slotted holes
in the back of the mounting plate, around the mounting
pole, through the holes in the rubber contoured base, and
through the holes in the L bracket (see figure 2-5 below).
U-bolt
L-shaped
Bracket
Contoured
Base
Ceiling
Pole
Mount Plate
on PMK Tray
Figure 2-5 — U-bolt attachment
9
.
Align the two small holes in the bottom of the L-shaped
bracket with the holes in the PMK 350 base plate. Insert
and tighten the two provided 6-32 x 5/16" screws. Leave
the screws slightly loose so that the bracket can still be
adjusted.
10
. Place the hex nuts on both ends of the U-bolt and hand-
tighten them.
11
. Make the necessary cable connections to the
FOX 2G Rx AV, the power supply, and any other units.
12
. Slide the PMK 350 along the pole to its final position and
tighten the hex nuts, using a socket wrench.
12
. Tighten the screws holding the L-bracket to the PMK 350
base plate.
13
. Reattach the cover sheet (see figure 2-4).
14
. Reattach and secure the front and back panels, using the
screws retained in step 1.