Projector mounting, Installation and setup, cont’d, Fox 2g tx/rx av • installation and setup – Extron electronic FOX 2G Tx User Manual
Page 18: Figure 2-4 — projector mounting, Strips (see figure 2-4 below)
FOX 2G Tx/Rx AV • Installation and Setup
Installation and Setup, cont’d
2-6
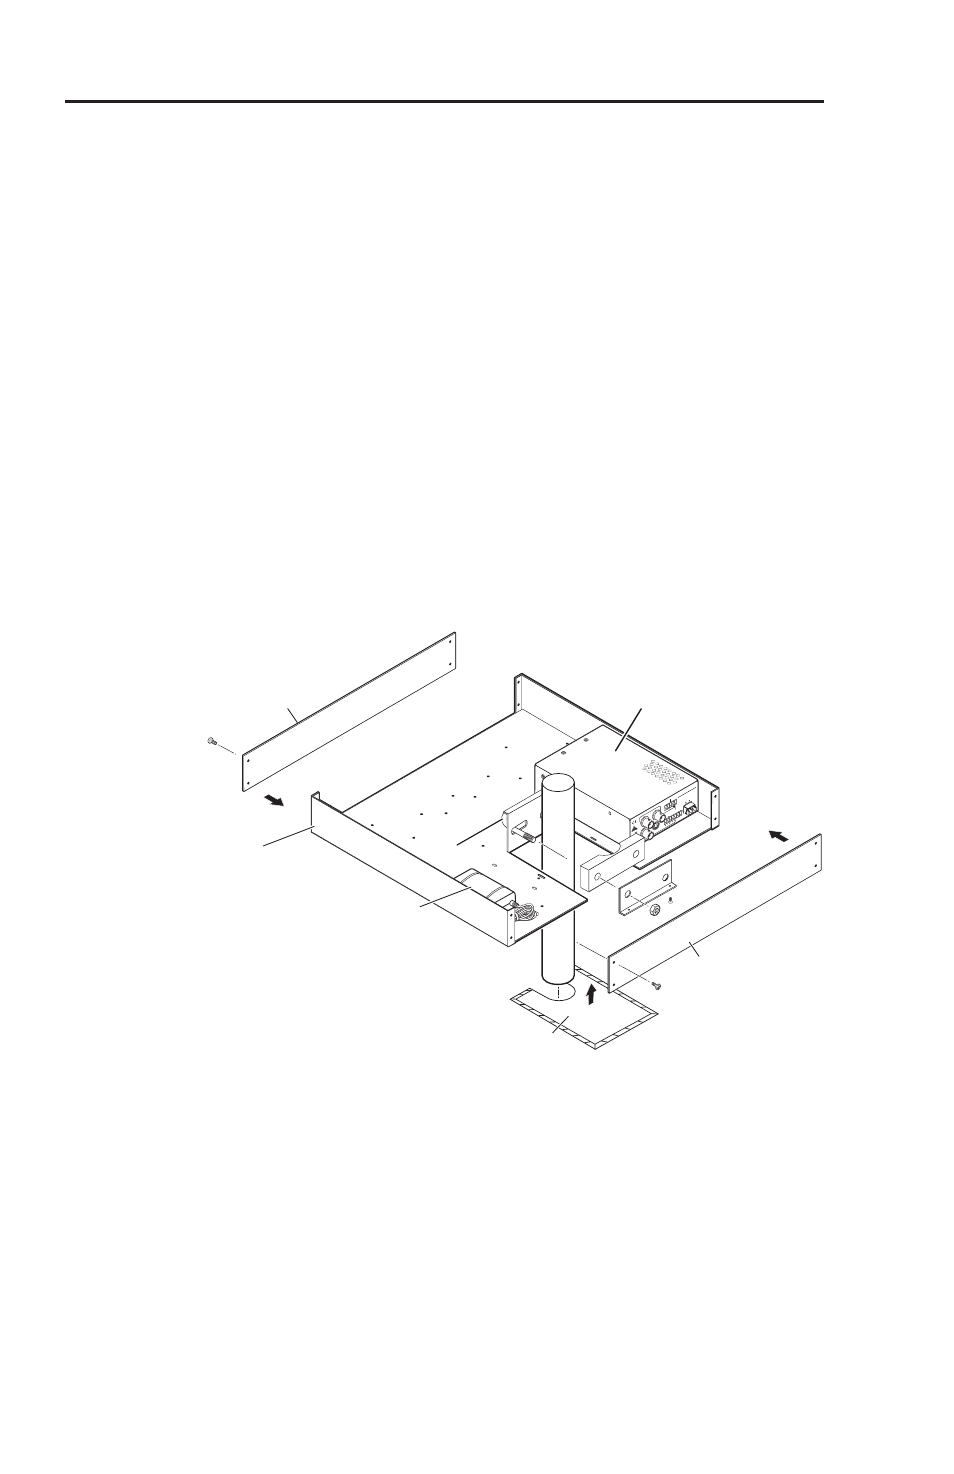
Projector mounting
Mount the FOX 2G Rx AV above a projector using an optional
Extron Projector Mounting Kit. The following intructions apply
to the PMK 350 (PN 70-563-0x). To use other projector mounting
kits, consult the appropriate manual. Mount the receiver on the
PMK 350 as follows:
1
.
Remove and retain the four screws holding the front and
back panels of the PMK 350.
2
.
Remove the cover sheet.
3
.
Remove the rubber feet if these have been installed on the
bottom of the FOX 2G Rx AV.
4
.
Secure the receiver to the mounting tray, using two of
the 4-40 x 3/16" screws provided with the PMK 350 in
diagonally opposite corners of the receiver.
5
.
Mount the power supply, using the provided plastic ties or
Velcro
®
strips (see figure 2-4 below).
FOX 2G Rx
AV
Y/VI
D
I
N
P
U
T
S
RS-232
OVER FIBER
RS-232
REMOTE
Tx Rx
Tx Rx
AUDIO
L
R
ALAR
M
1
2
R-Y
B-Y/C
S-VID
OPTICAL
POWER
12V
0.6A MAX
Rx
Tx
Extron
PMK 350
Multi-product Projector
Mounting Kit
Cover Sheet
Front Plate
Rear Plate
U-bolt
Extron
FOX 2G Rx AV
Power supply
Figure 2-4 — Projector mounting
6
.
Add any other unit(s), as required.
7
.
Place the PMK 350 around the projector ceiling mounting
pole.