Inserting the paper spindle in the printer, Inserting the paper spindle in the printer -5 – Epson StylusPro10000 User Manual
Page 23
1-5
Setting Up the Printer
|
1-5
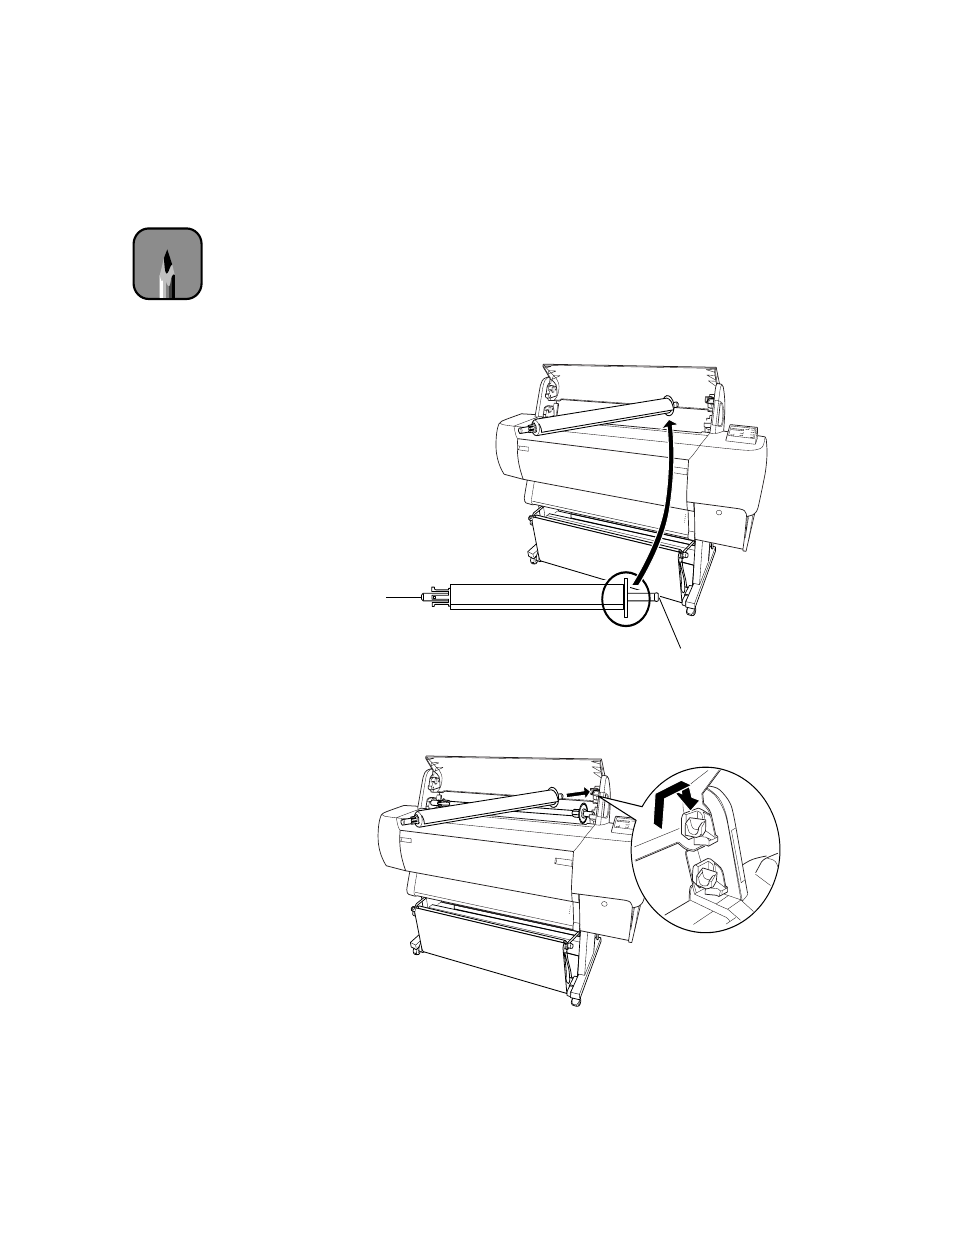
Inserting the Paper Spindle in the Printer
Follow these steps to insert the spindle in the printer:
1. Open the roll paper cover. Position the spindle so that the white end
(with the wide fixed paper stop) is on the right.
2. Insert the white end into the right mounting bracket inside the printer.
You can use either the upper or lower bracket.
Note
You can have two rolls of
paper in the printer at the
same time, and print on
either one. If you have
two rolls, make sure to
wind one of the roll paper
belts that came with your
printer around the end of
the roll you’re not using.
See page 2-7 for more
information.
white
black
See also other documents in the category Epson Photo Printers:
- R300 (6 pages)
- C120 (2 pages)
- R380 (72 pages)
- STYLUS PHOTO R800 (6 pages)
- PictureMate 239 (3 pages)
- Ultra Hi-Definition Photo Printer R260 (82 pages)
- STYLUS DX6000 (36 pages)
- PictureMate 238 (1 page)
- PictureMate 500 (90 pages)
- Stylus Color 800 (20 pages)
- All in One Stylus CX7800 (12 pages)
- SUBLIJET IQ R800 (53 pages)
- Sylus Pro 10600 (16 pages)
- CPD-18557R1 (1 page)
- PictureMate 222 (1 page)
- T087720 (4 pages)
- PictureMate CZ 283 (2 pages)
- Stylus Photo R300 Series (124 pages)
- 1400 (6 pages)
- Stylus Photo EX 220-240 V (12 pages)
- Stylus Photo 750 (11 pages)
- STYLUS PHOTO 900 (2 pages)
- Photo PX700W (3 pages)
- 221 (2 pages)
- Stylus Pro 9800 (8 pages)
- Stylus Photo R220 (10 pages)
- CPD-19345R0 (119 pages)
- PIS T079620 (4 pages)
- PictureMate (126 pages)
- PictureMate (6 pages)
- 790 (26 pages)
- LQ-680Pro (16 pages)
- STYLUS PHOTO 915 (4 pages)
- RX650 (2 pages)
- STYLUS R2880 (64 pages)
- PowerLite 1260 (2 pages)
- Stylus NX200 (2 pages)
- HP 7960 (1 page)
- R Series (6 pages)
- R340 (40 pages)
- Stylus CX3100 (57 pages)
- 870 (8 pages)
- STYLUS R1900 (56 pages)
- STYLUS R3000 (5 pages)
- Photo 925 (152 pages)