4 mounting the new rear panel – SMA SC 500CP-10-JP Mounting Instructions User Manual
Page 17
SMA Solar Technology AG
6 Assembly
Mounting Instructions
SCCP-JP-MA-Silence-en-10
17
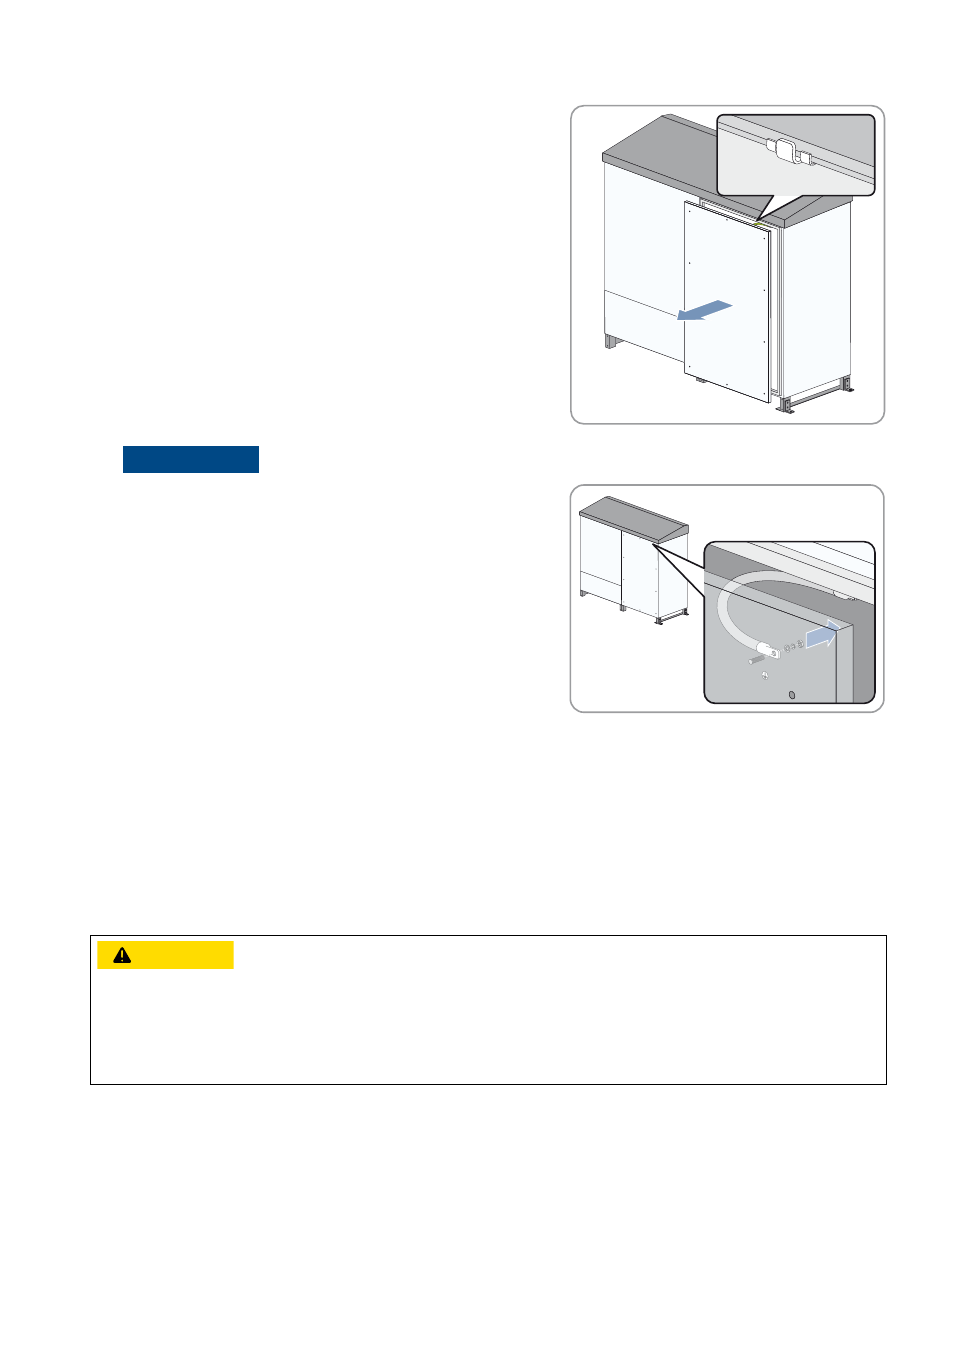
5. Carefully pull the rear panel of the inverter cabinet approx. 80 mm
to 100 mm towards you. Make sure that the hook fitting cannot fall
out.
7. Remove the rear panel and store it.
6.4 Mounting the New Rear Panel
Requirements:
☐ The required mounting material must be available (see Section 5.1 "Additionally Required Mounting Material",
☐ The inverter must be sufficiently protected from inclement weather.
☐ Two persons must be available for assembling the rear panel.
6.
/05*$&
Property damage due to grounding cable being ripped out
The rear panel of the inverter and the switch cabinet are connected
via a grounding cable. If the rear panel is removed without due
care, the grounding cable could be ripped off and the inverter
damaged.
• Use a suitable wrench to release the grounding cable from the
rear panel before removing the rear panel. Wrench size:
AF 13
&$87,21
Danger of crushing caused by heavy, bulky rear panel
The rear panel of the inverter weighs up to 20 kg. If the rear panel slips or jams, limbs could be crushed.
• Always have two persons available for assembling and disassembling the enclosure parts.
• When carrying out any work on the inverter, always wear suitable personal protective equipment.