Inserting the intuition xg chassis into the rack – Grass Valley Intuition XG Installation v.5.0 User Manual
Page 47
3-8
Intuition XG Installation & Quick Start Guide
Installation instructions for the Intuition XG-3U/Dual
Inserting the Intuition XG chassis into the rack
Once the rail assembly sections have been properly installed on the Intuition XG chassis
and in the equipment rack, you can use the following procedure to properly insert and fix
the chassis into the equipment rack.
CAUTION
Due to the heavy weight of the Intuition XG device, ensure that the rack is securely anchored
onto a unmovable surface or structure before installing the chassis into the rack.
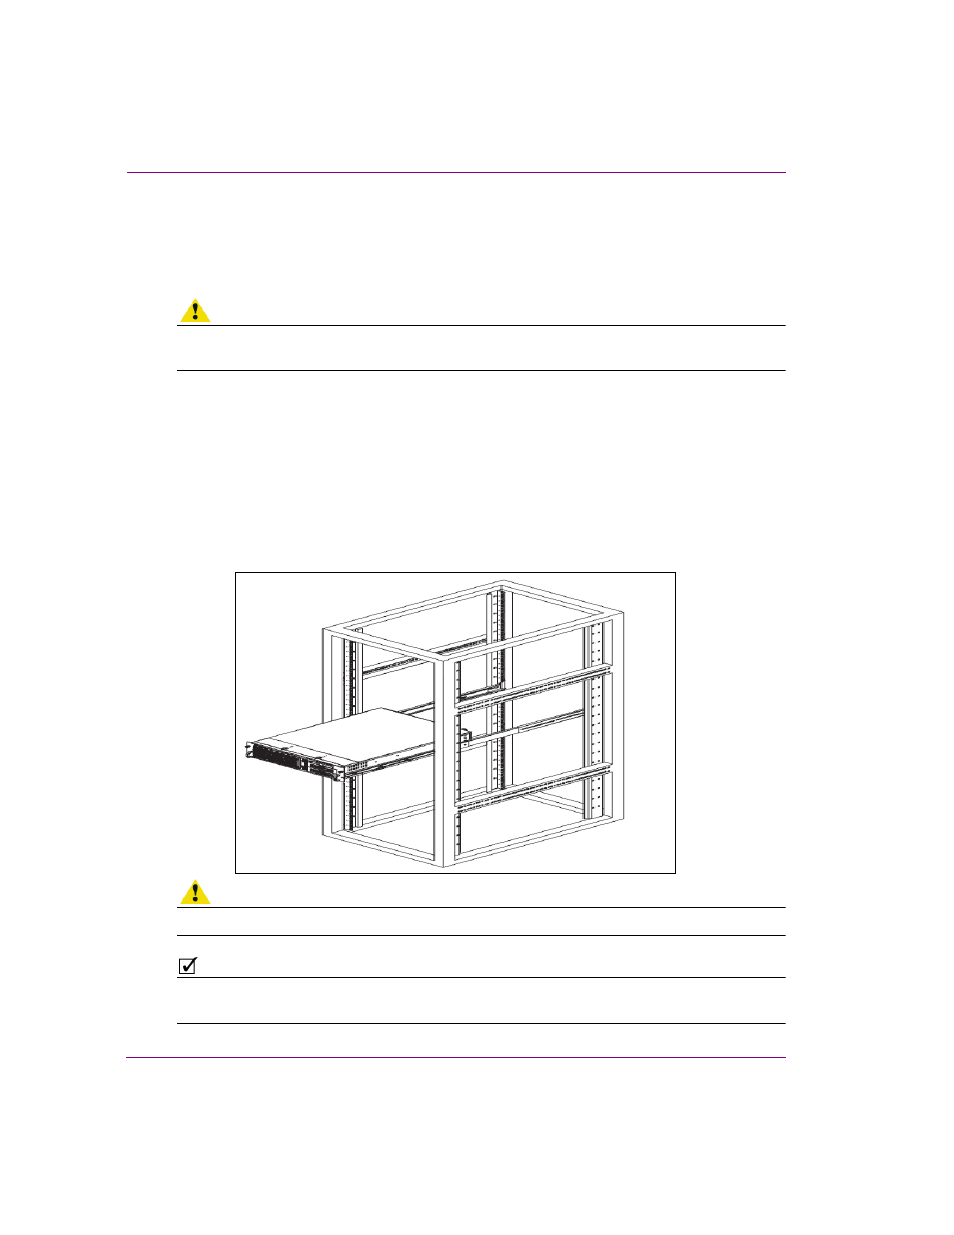
To insert the Intuition XG chassis into a rack:
1.
Extend the rack extension rails as illustrated below.
2.
Align the chassis rails with each of the rack extension rails.
3.
Slide the chassis rails into the rack extension rails, keeping the pressure even on both
sides. When the chassis has been pushed completely into the rack, it should click into
the locked position.
4.
Optional: Screws may be used to secure the to hold the front of the chassis to the rack.
5.
Re-attach the Intuition XG faceplate by aligning and pushing the faceplate towards the
chassis.
CAUTION
Slide/rail mounted equipment is not to be used as a shelf or a workspace.
N
OTE
To completely remove the chassis from the rack, you must release the safety tabs on both
sides of the chassis.